Yup, good call on the new wheels.
Nice photos. Does this car have rear side marker lights and quarter panel script/emblems?
Yeah, I just took them off temporarily because the paint is getting worked over this week. Final wet sand / polish type of thing.
Glad you stuck with those wheels, I really like them and gives that personal touch on your car. If I planned to run a smaller wheel those would be on my list. You can always keep those stock ones on the shelf just Incase you ever wanted to go back.
Dig those photos, beautiful area country for sure, far different then we are used to here in the desert.
Lookin’ good Andrew, I know it’s been a long road for you & the car. I hope you can fully enjoy it now (they are never truly “done”).
Long road indeed! The road continues…
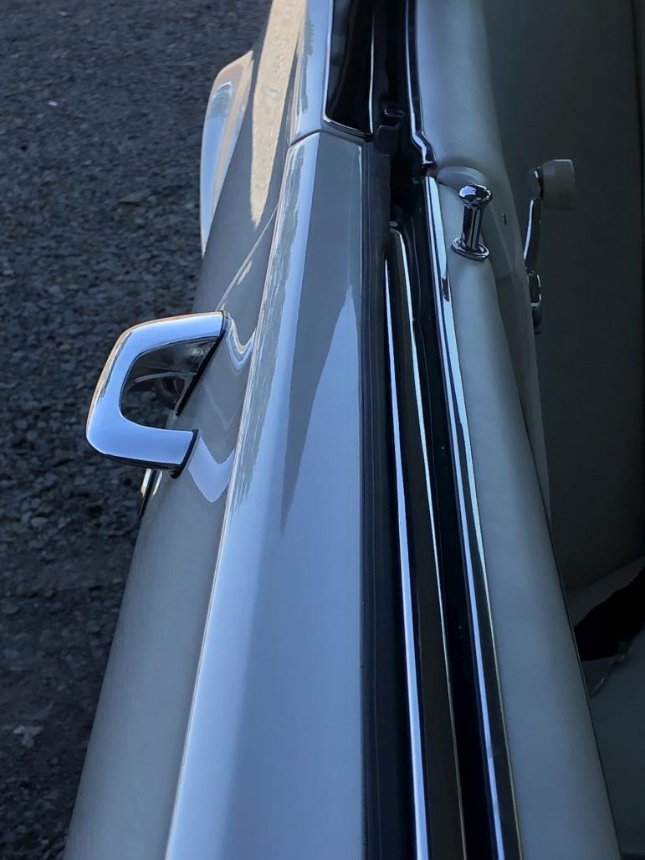
So as I mentioned before, I took the car to a pro detailer who went over much of the paint with some 3000 grit and buffed it out. It came out very nice. Kinda hard to appreciate in pics but here ya go anyway.

One of the worst problem areas that I highlighted before was the top of the doors. These areas are much much better now. It was hard to get a pic but this kinda shows how smooth these areas are now.
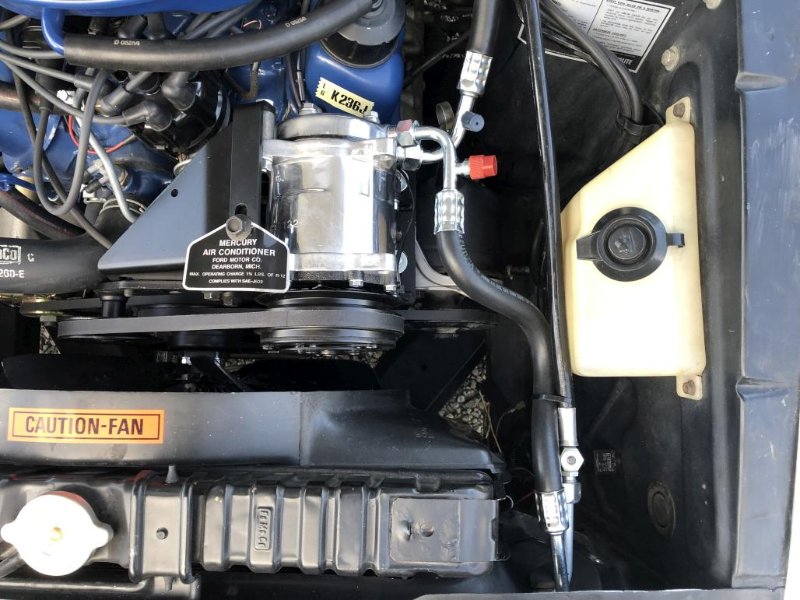
My next project I wanted to tackle was the A/C. I had the under dash stuff in place (original evaporator) and I had a new condeser and drier in place, so I just needed to figure out the compressor and hoses. I got to looking at my original Tecumseh compressor and it looked ok, seemed to spin fine, but given its age I really had no idea what kind of condition it was in internally. My original hoses were all looking pretty crackly and dry rotted. So… given that the cost to replace the factory hoses and service the old compressor would be similar or higher, I decided to go for the modern upgrade to r134 and the more efficient Sanden compressor. I got this kit from Original Air Group (which is a division of Classic Auto Air). As much as I like originality, I wanted the A/C to be functional, serviceable, and efficient, and this seems to be the best way to achieve that. It’s all reversible too.
Installing the kit wasn’t bad, but it wasn’t all rosy either. For one thing, a lot of the nuts and bolts almost conflict with each other, and it’s hard to get tools in there to tighten them.


For another, the discharge hose they supplied is too long. I ended up having to zip tie it to the sight glass hose (sold separately) in order to get it to route reasonably.
For another, the suction hose gets in the way of the power steering pump dipstick / filler tube. I had to angle this hose up enough to just barely allow the dipstick to be removed.
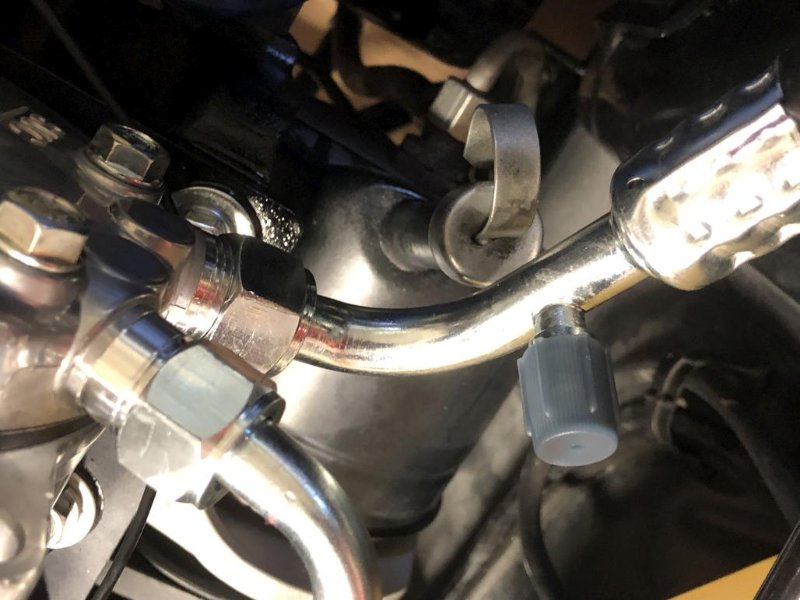
Here’s how it turned out on the other end, this’ll work fine.
At the end of the day, it doesn’t look too bad. And I had to put on the compressor tag just for giggles, even though it doesn’t apply anymore.

I didn’t use their drier since I had a new one already, which has been sealed from the element all this time. It turns out they sent me the wrong drier anyway. But as a final touch, I slapped on this decal to make it look original-ish.

After everything was hooked up, I went to get the system evacuated and charged. I gotta say… it sure is nice having cold A/C in an old classic car! Driving it home after picking it up, it was still very warm out, and it felt so luxurious to have the windows up, and cold air blowing out of the vents. I’m also impressed with my factory blower fan, it’s strong and quiet.
So, overall I’m happy with the functionality of the kit. The fitment issues are a little annoying but everything works as it should. More to come!
BTW - I did put the proper cork tape over the evaporator lines.

Anyway, I’ve still been chasing some issues. I’ve been having an intermittent charging issue, which I go into in this thread, and a running hot issue.
Just to pile it on, one evening I decided to go get a burger. So when I got to the restaurant, I locked the doors and went in. When I came back out, I couldn’t unlock the driver’s door. Turning the key made the lock knob come up about halfway, and the door wouldn’t budge. Luckily the passenger side still worked, so I climbed in from that side.
So a couple days later I investigated. I wasn’t thrilled about having to take the door panel off, but there was no other way. I was able to get the door open by jiggling the lock knob a bunch. And another time I was able to use a long screwdriver to release it.
Darrell captured me during this super fun time. I was about to flip him off but he was too fast.

Well there’s yer problem. The lower tab on this piece was completely broken off. This piece can get sloppy and hogged out from years of use, but I didn’t expect to see it totally broken.

Since this latch is gold cad, it’s either a service replacement or a repro that was put in at some point. So I found a good original one that wasn’t too worn, cleaned it up and lubed it, put it in, and made sure the button lever was adjusted. Problem solved, door panel back on.
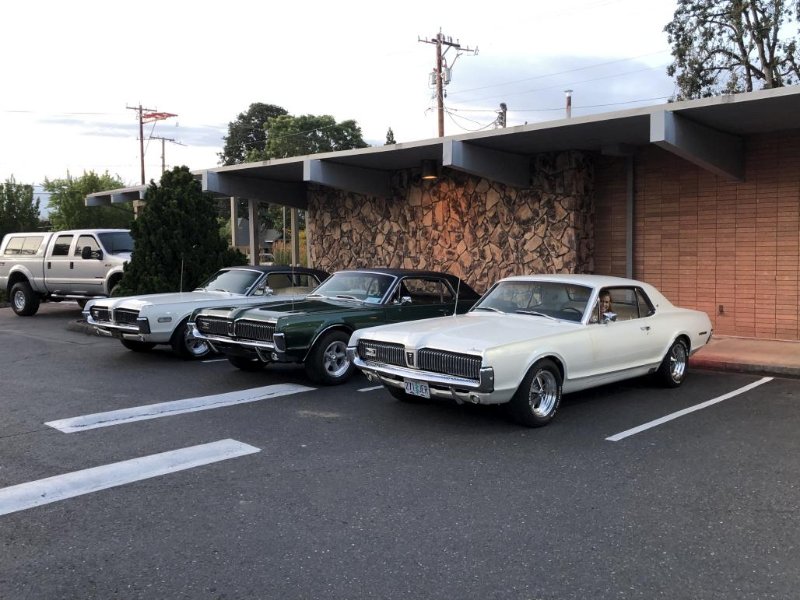
On a more fun note, I participated in my first car show of sorts since doing the resto. First Friday in Silverton, OR,

I even ran into a couple of familiar faces…
I want to get out and take some quality photos for the WCCC calendar, but things have been pretty crazy. That’s pretty much it for now! Just need to keep working the bugs out.
Well I guess I should kinda wrap this up! Many of you probably know that I just went through a big life change, move, etc. and I’m still getting my bearings. Before the move, there were a few things to wrap up.
The charging issue turned out to be the voltage regulator. So that was fairly straightforward.
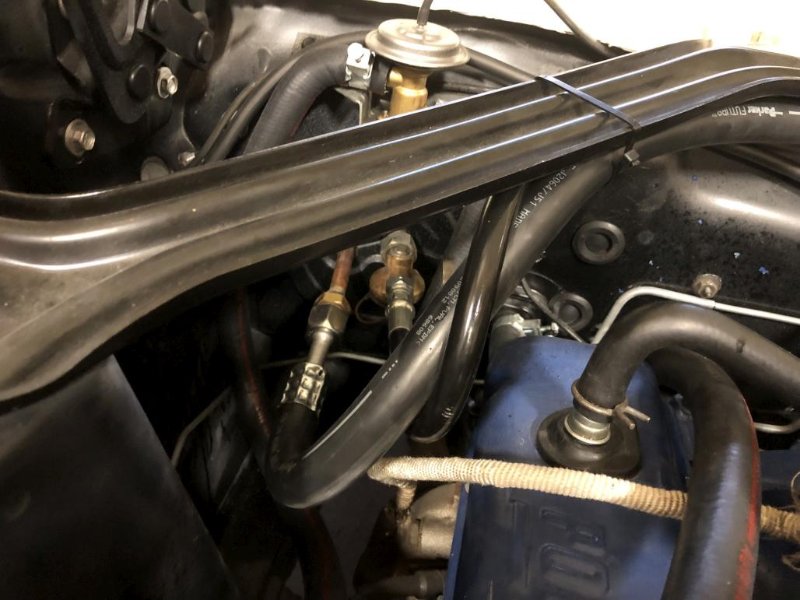
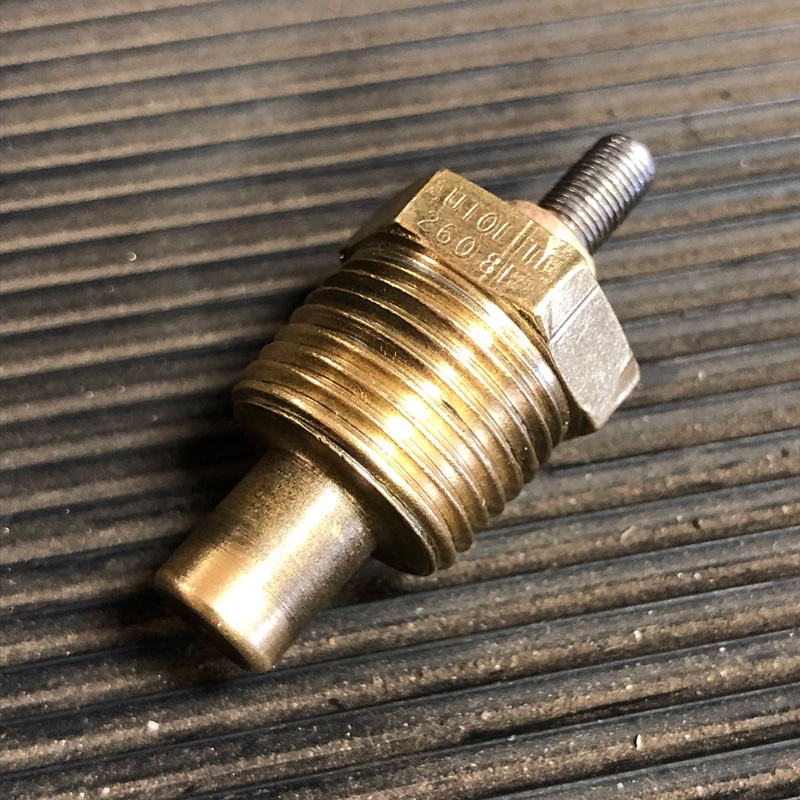
The cooling issue was a combination of things. For one, I was informed by members here that the aftermarket temperature sending units don’t read accurately, so it was reading hotter than it should have (verified with a laser thermometer). So I scrounged around in the WCCC junkyard and found an original Autolite sender. Now the gauge reads much more accurately.
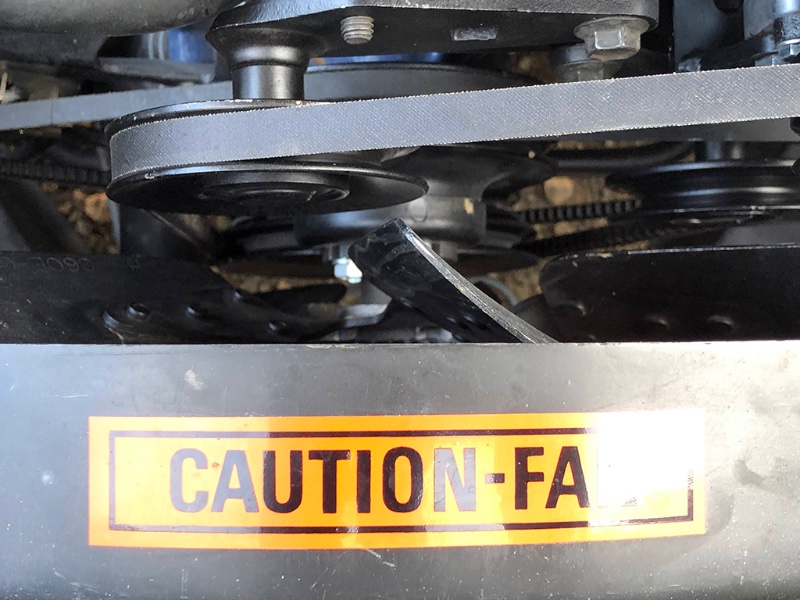
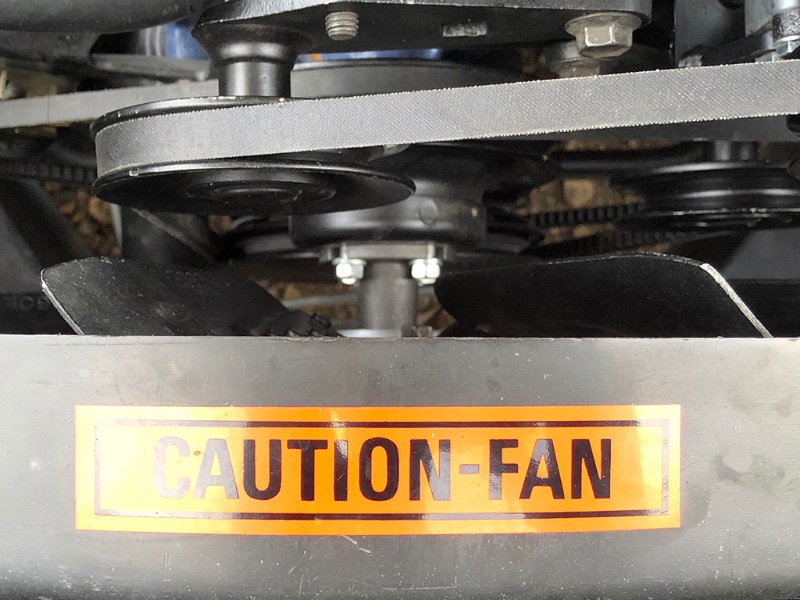
Secondly, I had the wrong fan clutch. For some reason, WCCC was carrying the wrong one at the time. This has since been remedied (link to fan clutch). As shown in the pic below, the one I had was too short and didn’t place the fan far enough into the shroud.
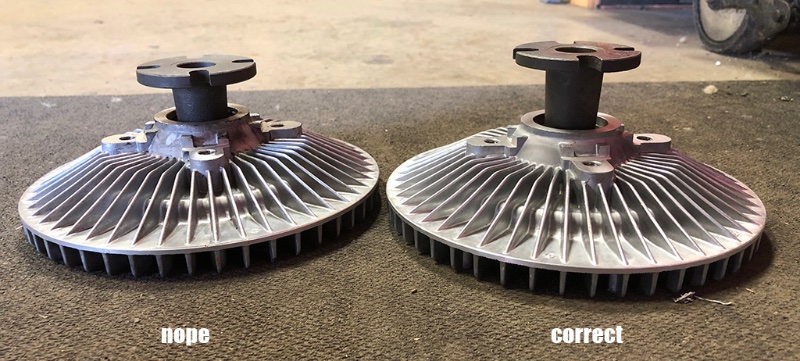
Here are before and after pictures. It’s a little hard to tell the difference because the fan is in a different position, but you can kinda get an idea.
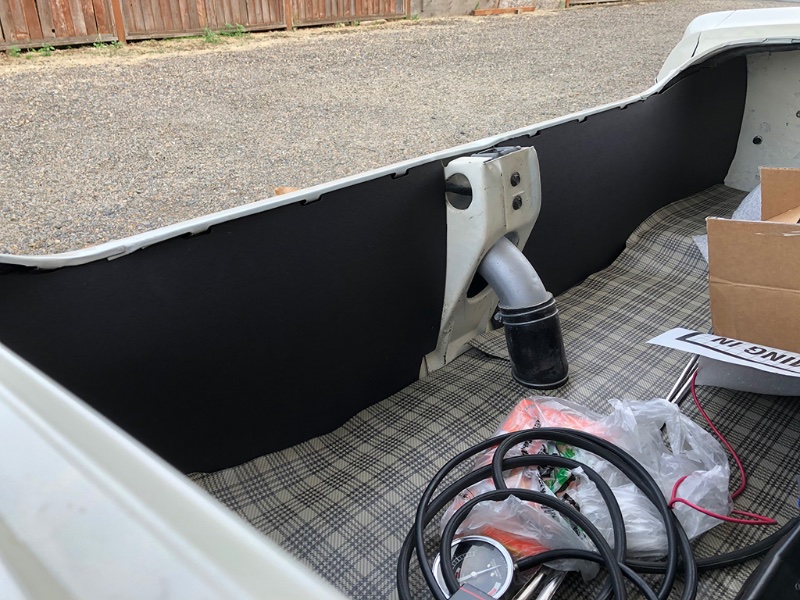
Finally, one of the last loose ends was to install the taillight protectors in the trunk. The repros are a good snug fit. I didn’t end up using screws to affix them, they fit firmly enough in place on their own.
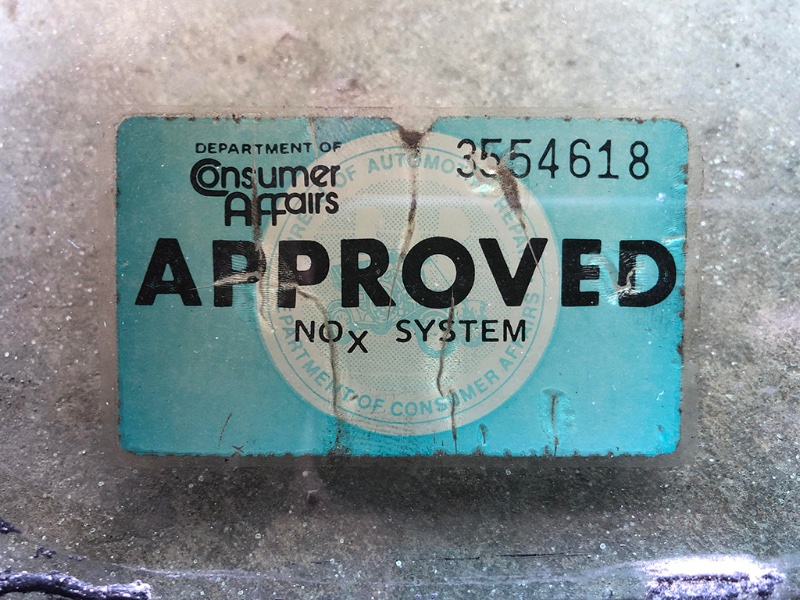
And that was about it before hitting the road! Before leaving, I had to go through all my remaining parts on the shelf and get rid of things I didn’t need. So before trashing my original windshield, I snapped a picture of this decal for posterity:
And that pretty much sums it up! Here’s one last picture in my garage in Salem before I left that house.

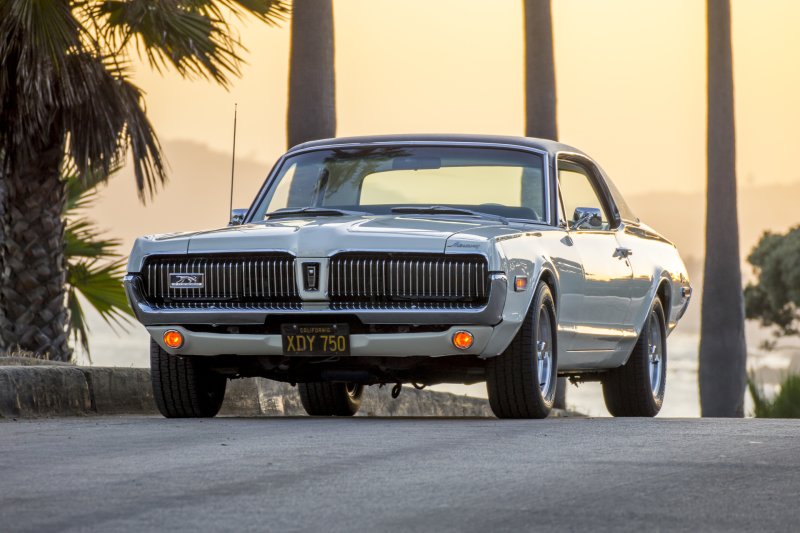
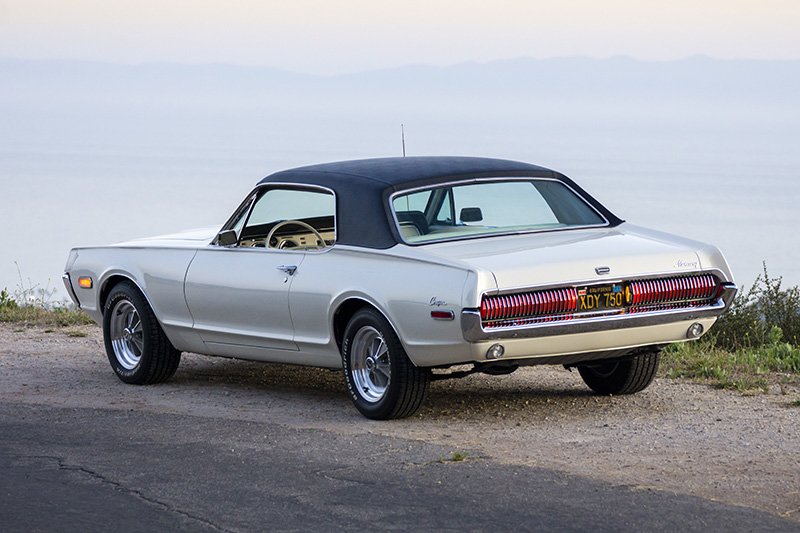
And then I drove it about 1,000 miles down Interstate 5 to Santa Barbara! Crazy times. What a wild ride it’s been.
I have a lot more to say about it, but instead of being redundant, you can read more about my life changes here and more about the general story of the car in my ROTM write up, in which I found some more vintage pictures of my grandparents with the car, and talk about my early history with it.
There are still some little things to do. I need to seal up the edges of the vinyl top and / or install the stainless retainer strips. Still kinda psyched out by that for some reason. There will always be little projects and I’ll probably continue to post them here if they’re worthwhile.
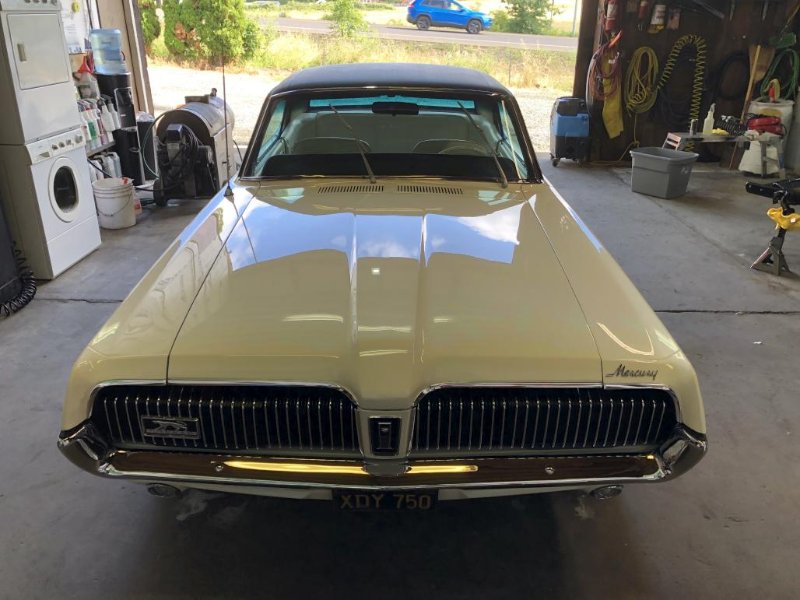
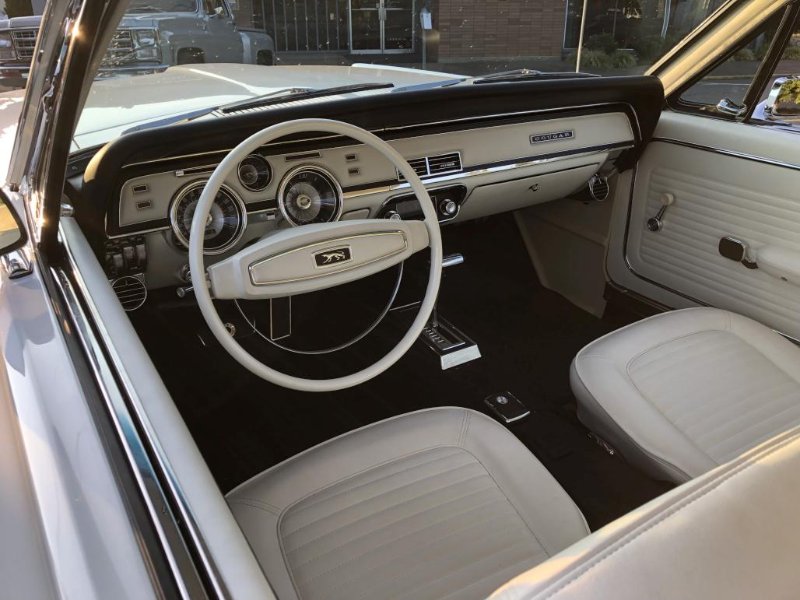
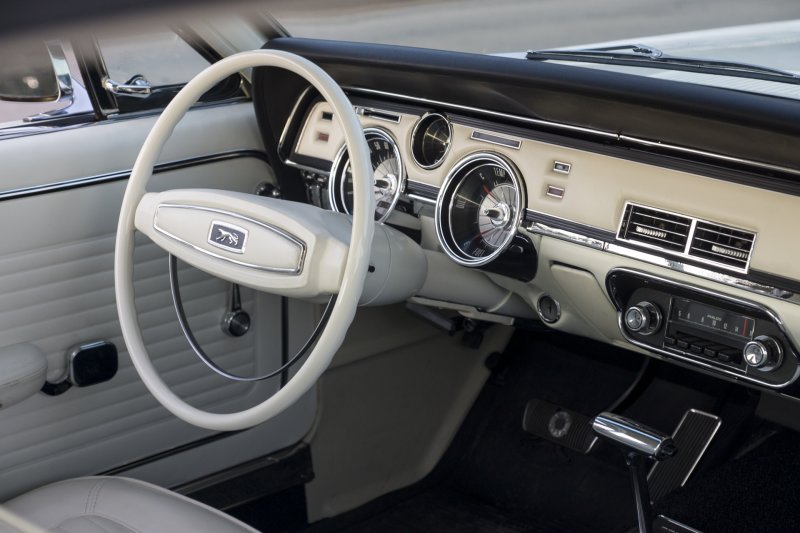
Thanks for following along! It’s hard to believe this saga is basically over. It’s taken up such a big chunk of my life, and it was the biggest challenge I’ve ever undertaken. As I’ve said here and in other threads, there’s no way I could have done this without the help and expertise of others, and without being at WCCC to use the shop space, tools and parts available there. Words can’t really sum this whole thing up, so here are a few pictures of the finished product.

The end for now! And you can bet I’ll be putting it somewhere in the 2020 calendar… ![]()
Your Cougar looks amazing - great work. Your work inspired my son to repair his 1968 white XR7 as well. We did a roof replacement following your video, and it came out nice. His Cougar is also a black plate California car, in fact his license plate is very close to yours - so probably sold within a few weeks of each other! Best Regards, Scott & Darren
Andrew, how does the cooling system work with that longer fan clutch? Does it maintain temp idling/sitting in traffic? I think I have the same issue that I bought the too-short clutch from WCCC.
Thanks Scott! That’s cool to hear. Over the years I’ve heard of a few cases in which people were inspired to save their Cougars because of that roof video, so that feels pretty good! Your son’s Cougar looks great.
It’s been good as far as I can tell! The hardest test was on the road trip when we got stuck in some Bay Area traffic and it was over 100 outside, and of course I had the A/C cranked. The needle on the gauge climbed about to the M or P in TEMP, though I didn’t take a laser reading of what the actual temperature was. Guessing it got over 200 though. Other than that, it’s been totally fine in normal circumstances.
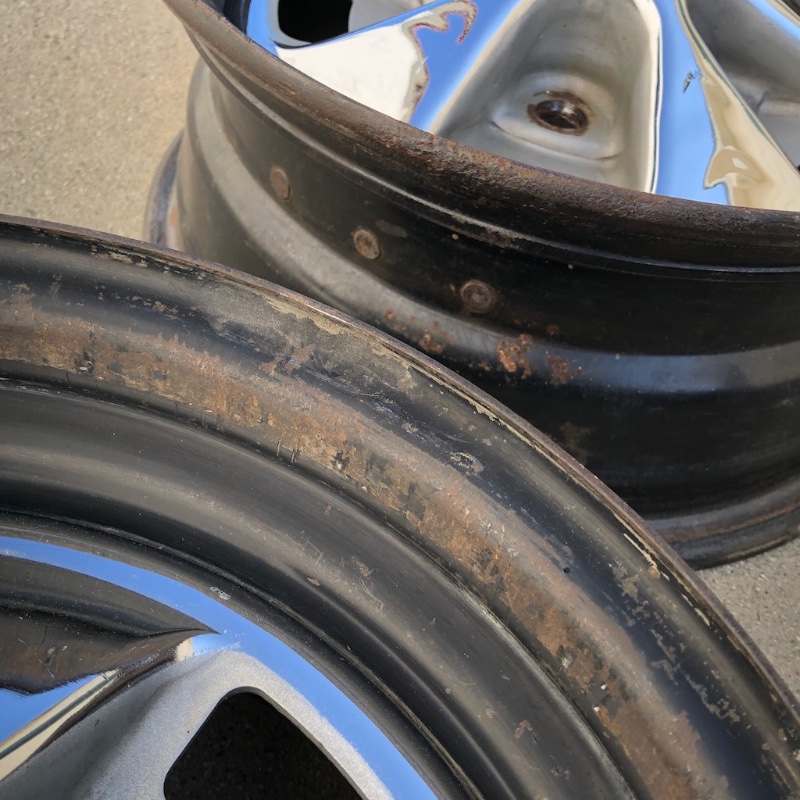
Holy thread revival! There’s finally an update worth talking about. I haven’t been doing much with the car (aside from the odd video) but when Don came across a very nice set of original 1968 styled steel wheels that had been in dry storage for decades, I had to snag them. Thanks Don!
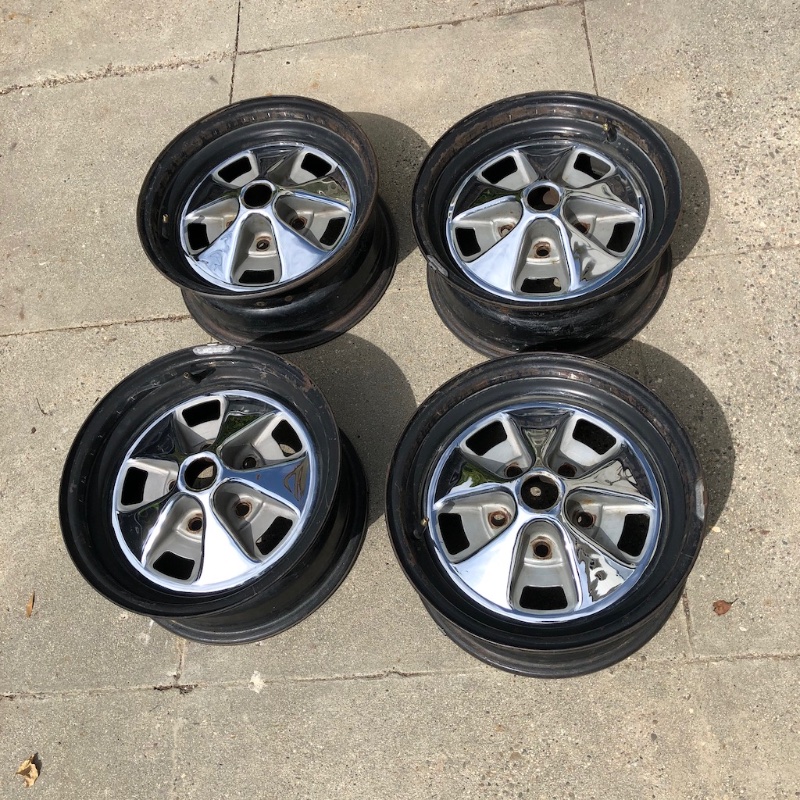
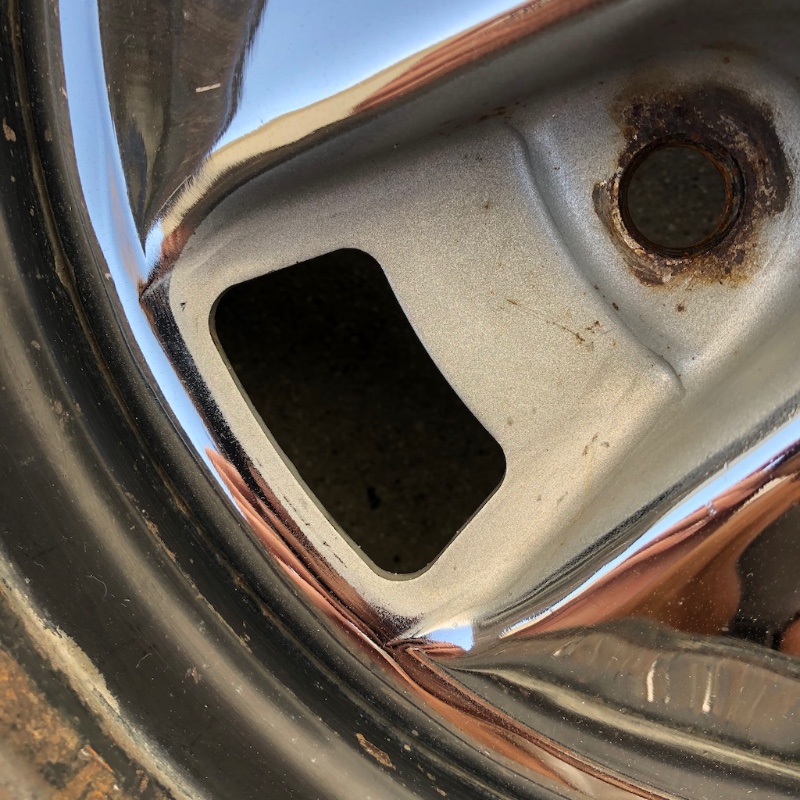
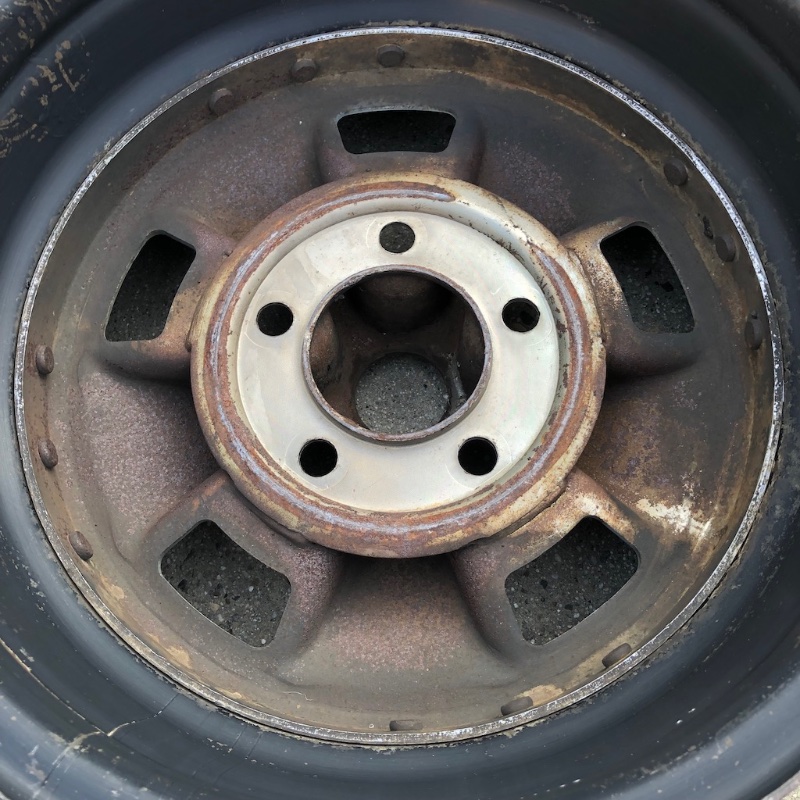
In general they are in excellent shape for their age. There was some general crusty-ness, especially on the back sides, but most importantly, the chrome is in great shape with no pits or major issues. The silver paint is almost completely intact, and I can get a good sense for where the factory masks ended. Just a little crusty around the lug nut holes. I did some general cleanup and removed the valve stems and balancing weights. Here are some pics of condition and silver paint edges.

I debated a bit about how to go about cleaning these up, and even whether I should just leave them alone since they’re only original once. But unsurprisingly, I had to try to cosmetically restore them. Can’t be putting rusty wheels on my car. So, I went to town on all the rusty backsides with an array of wire brushes.
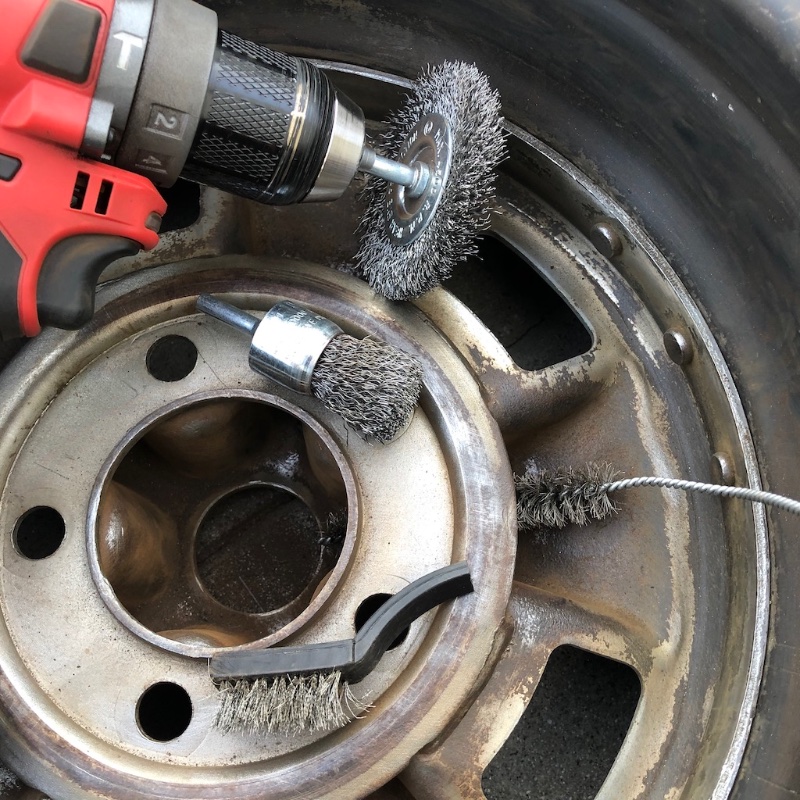
This was a pretty successful operation, at least to remove most of the loose rust on the surface.
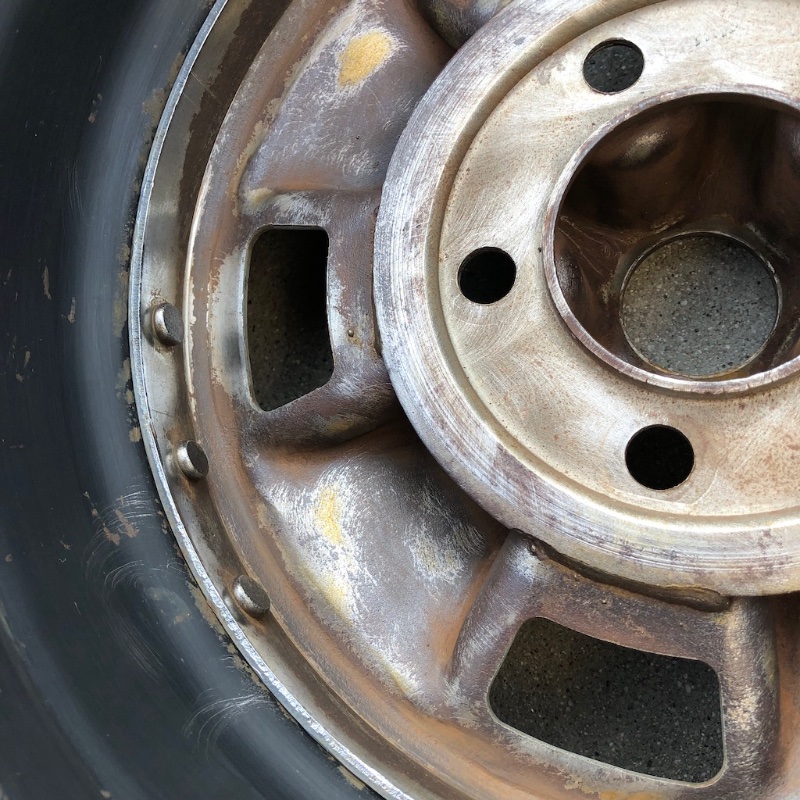
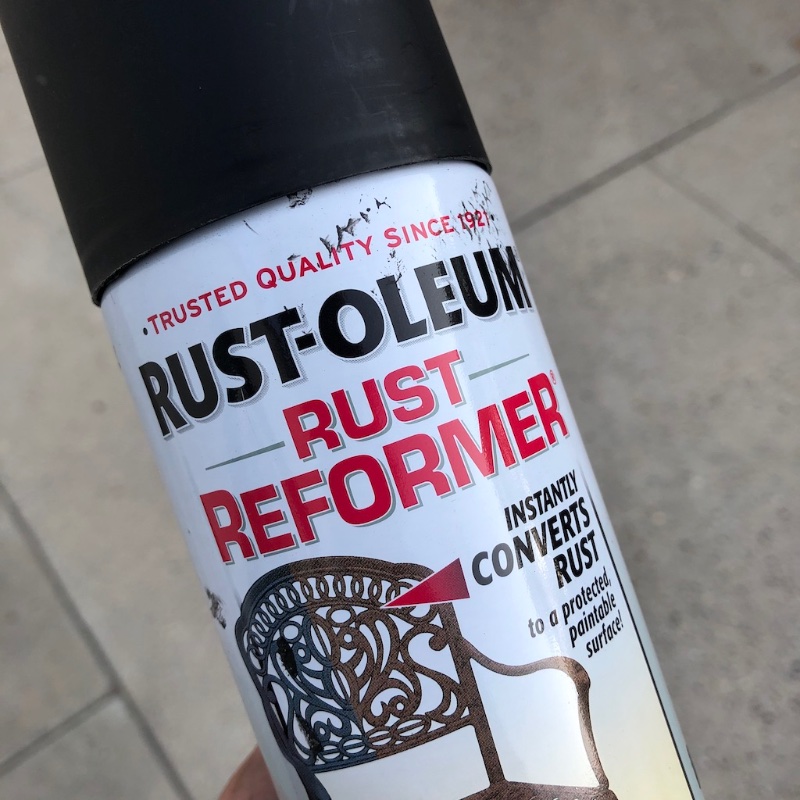
Next I thought I’d try something new. There was no way I could remove all the rust. Even if I had access to a good blast cabinet (which I don’t), I don’t know if I’d risk messing up the chrome anyway. So I grabbed some of this Rustoleum “rust reformer” which supposedly you can paint directly over rust.
So, after giving everything else on the backs and sides a good scuff with scotch brite pads, and trying to make sure I got rid of all the loose rust, I washed away all the debris and let the wheels dry in the hot sun. A few hours later when they were fully dry, I wiped them down with wax & grease remover and went to town.
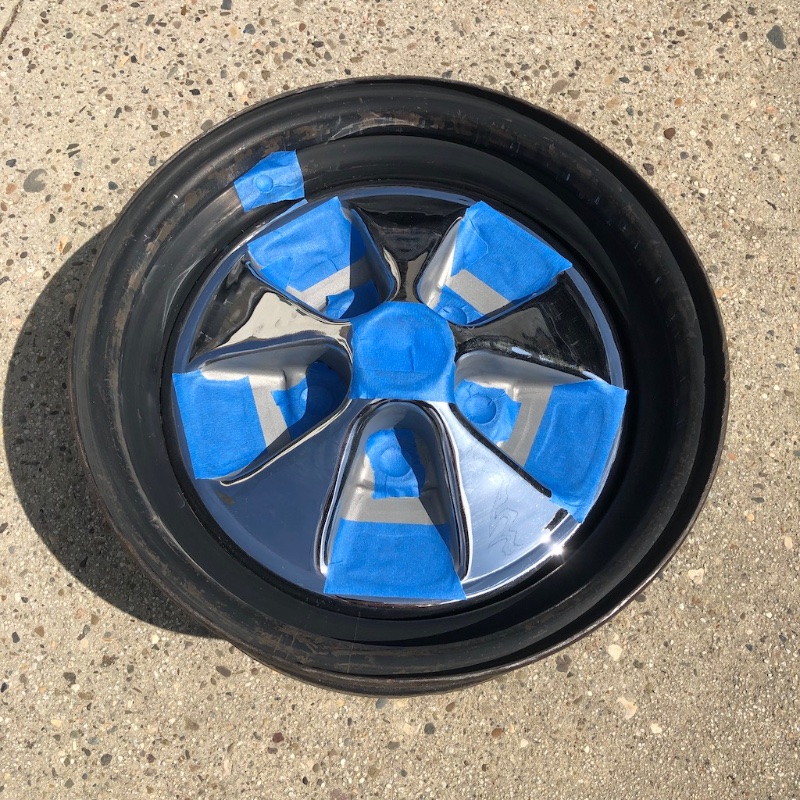
First I had to mask off all the holes, of course.
I was pleasantly surprised by how easily this stuff goes on and covers, and you supposedly only need one coat.
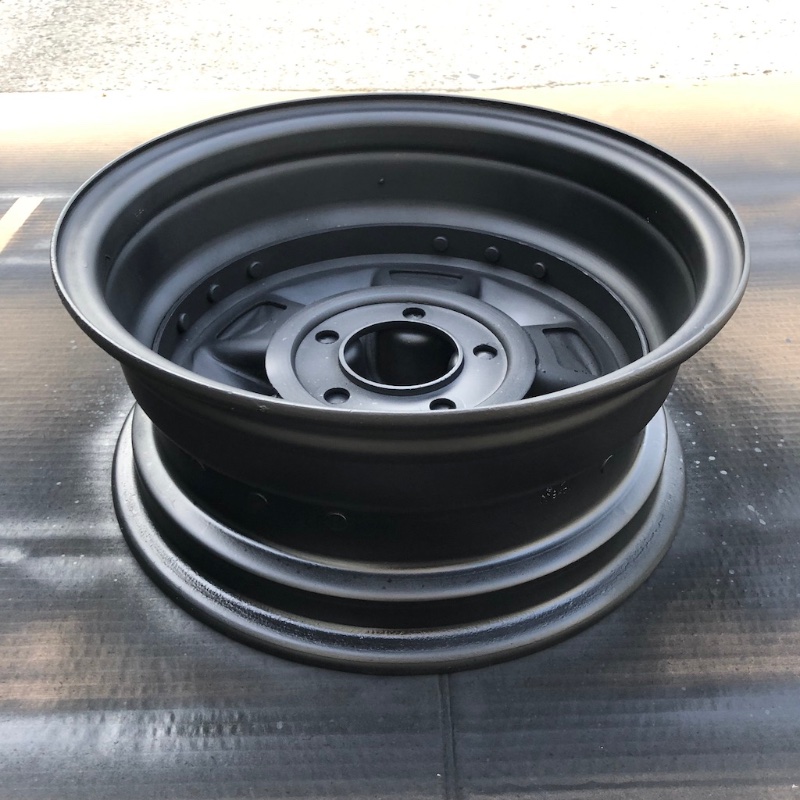
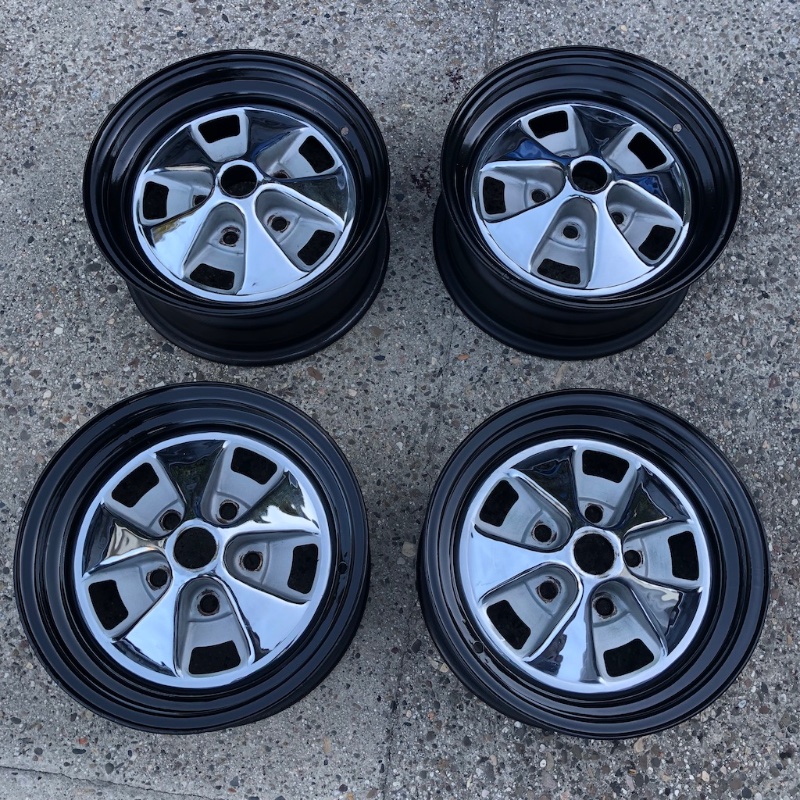
It’s basically a flat black finish, and it looks pretty nice. You can just call it good there, or paint over it after 24 hours. I decided to throw a coat of satin black epoxy paint over the top of it, just for good measure. So that’s what I did, the next day or so. This shot shows you the difference in finish between the epoxy (2 wheels in the foreground, albeit still wet) and the rustoleum stuff (background).
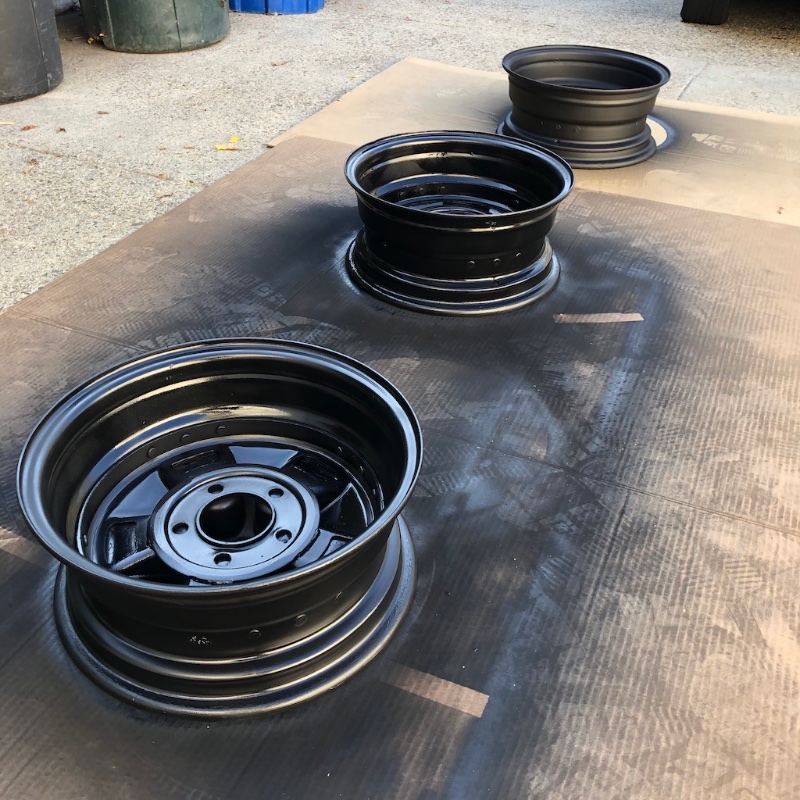
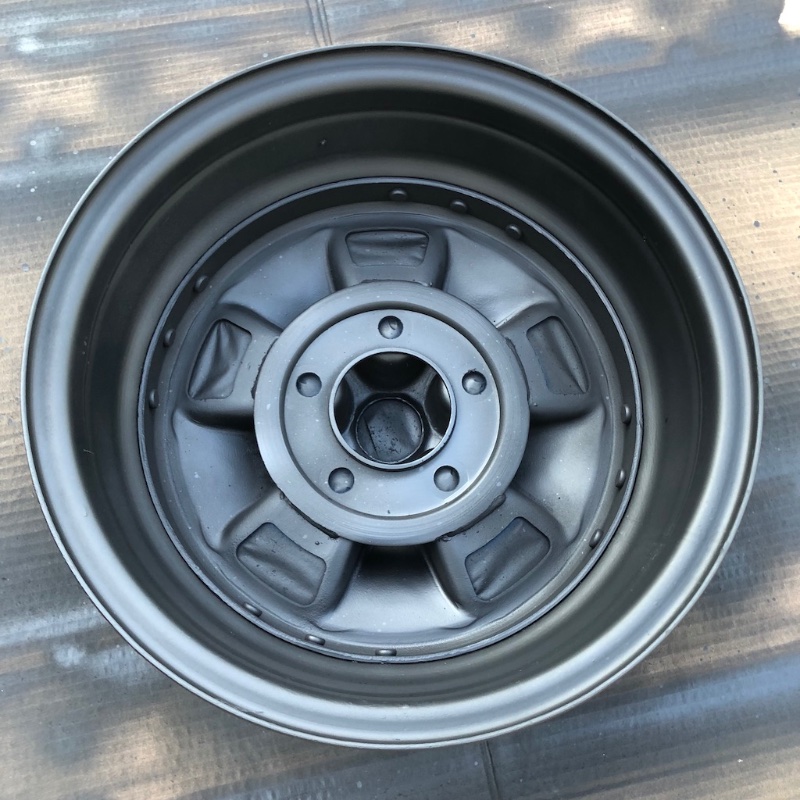
Backs and insides are officially looking good! Next will be on to the fronts, which I’ll save for another day. I just finished up the black outer sections on the fronts tonight, and still have to find the right method for the silver. Open to tips from anyone who has repainted these wheels before! It’s basically tape vs. a rag soaked in thinner to wipe off the edges.
Damn those look good, both before and especially after. That was worth resurrecting this old thread for.
That looks like a very thorough job that will no doubt last a lifetime.
Here’s a link to my post for my wheel restoration attempt https://cccforum.discoursehosting.net/t/healing-heroes-win-the-mustangs/129/1
I don’t know that it’s up to your standards but I was happy with how the argent recessed areas turned out.
Thanks! More to come, this is going to complete my original vision for the car’s look if all goes to plan.
Hey, great job on yours! The masking looks like a pain but I’ll probably end up doing something similar. Rather than removing all the old paint, I think I’m going to just leave it there and use it as a “primer” layer since it still seems to have good adhesion to the chrome. I’m also planning on using the VHT Ford Argent wheel paint, but no clear. I’ve actually used this paint & clear combo before on my Volvo’s wheels, and the clear has turned yellow and started coming off after a couple years. Silver still looks good. It was cold when I painted them so maybe that was the problem.
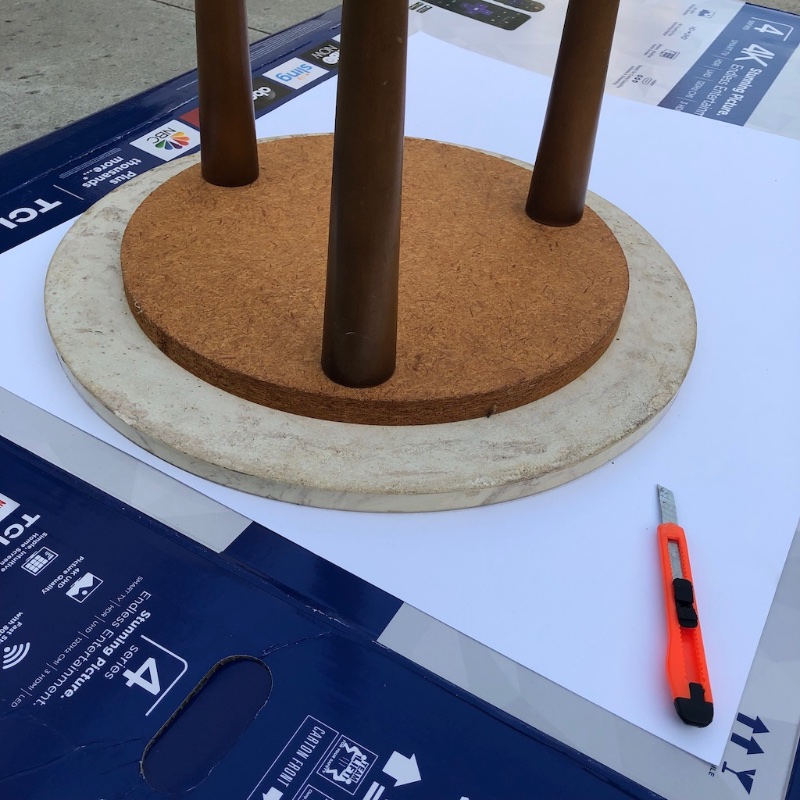
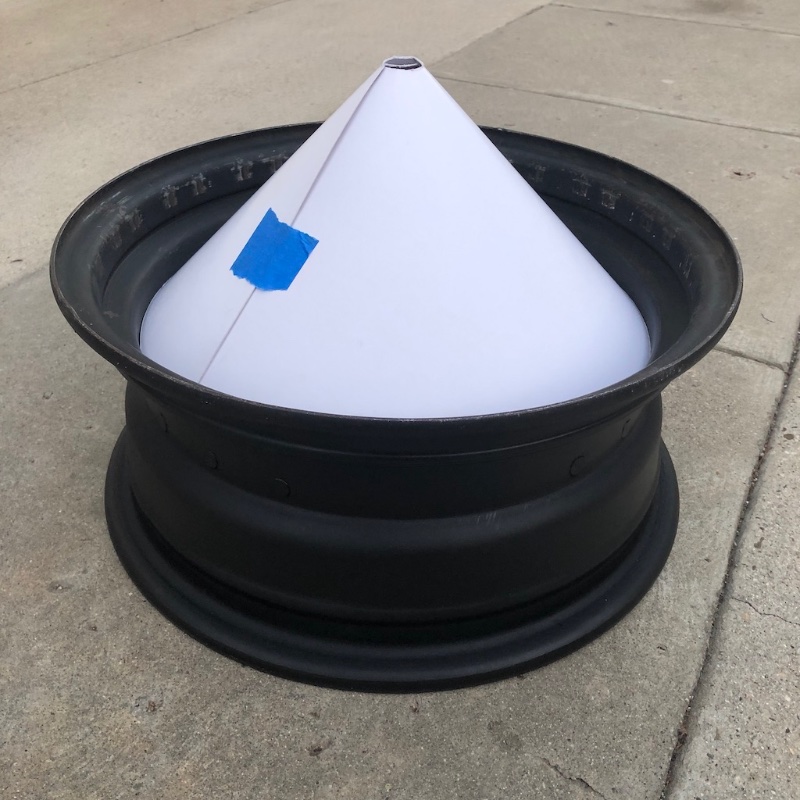
So to bring this up to speed, here’s how I finished up the black outer section on the front of the wheels. Got them all cleaned and scuffed up, then I had to figure out how to mask off the wheel centers. I figured some sort of cone would be a good way to do this. After some experimentation with scrap paper and cereal boxes and whatnot, I figured out about how big of a circle I would need to get a steep enough ‘cone angle’ to fit down inside the bottom of the crevice.
I went to my local art supply store and got some poster board, then started looking around my house to find anything that was a perfect circle I could use as a template. I was almost thinking I would have to rig up some kind of large compass, then I looked at this little table in my living room. It’s about 18" in diameter and worked perfectly.
Then I used some geometry to find the center of the circle. No, I did not remember how to do this from high school, but thanks to a quick search on YouTube it all came back.
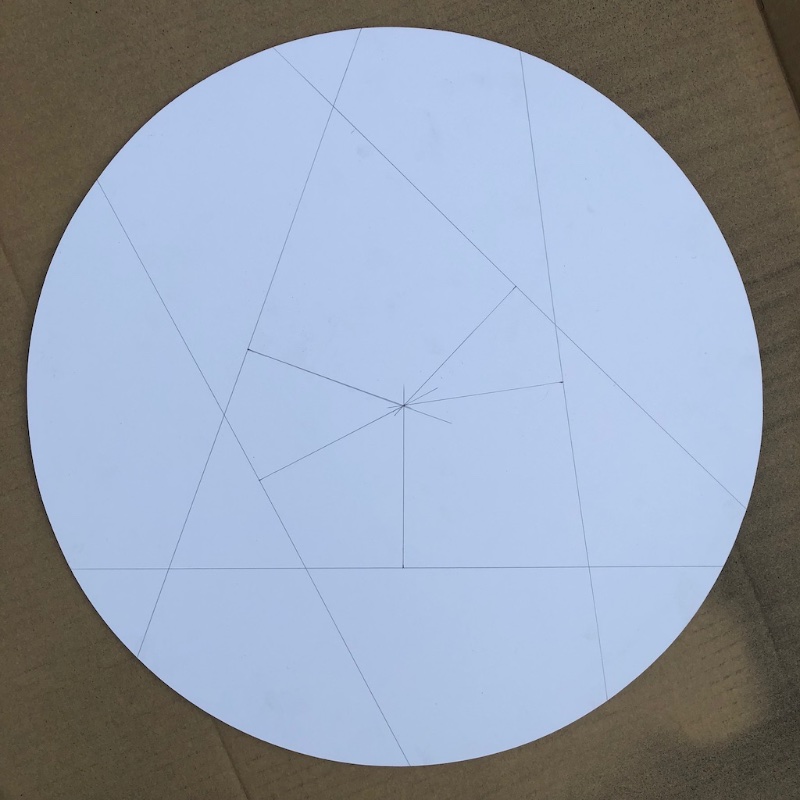
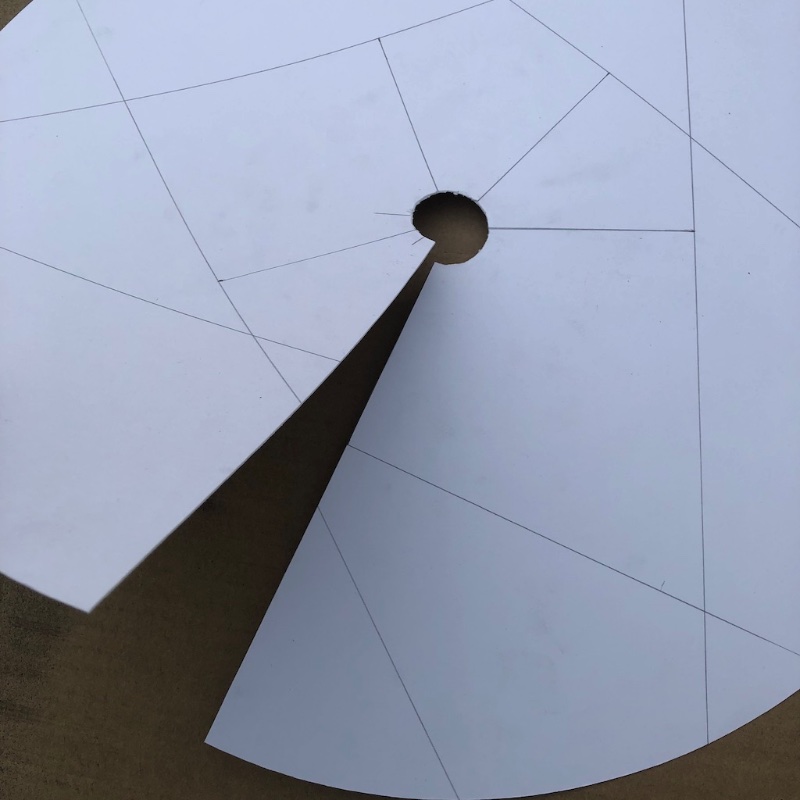
Then I made a relief circle cut in the middle and a line cut, and I now had the makings of a cone.
Next I figured I’d go ahead and use the Rustoleum as a primer coat of sorts, like I did on the backs. There was still some surface rust and whatnot so it seemed like a good idea. This worked out well!

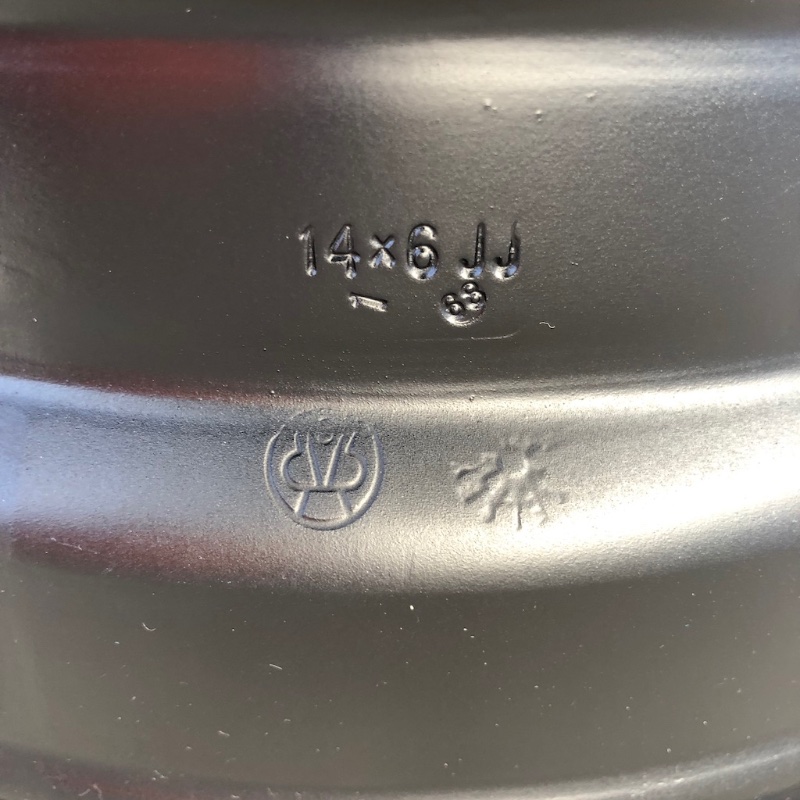
As an aside, I thought it was cool to see these markings.
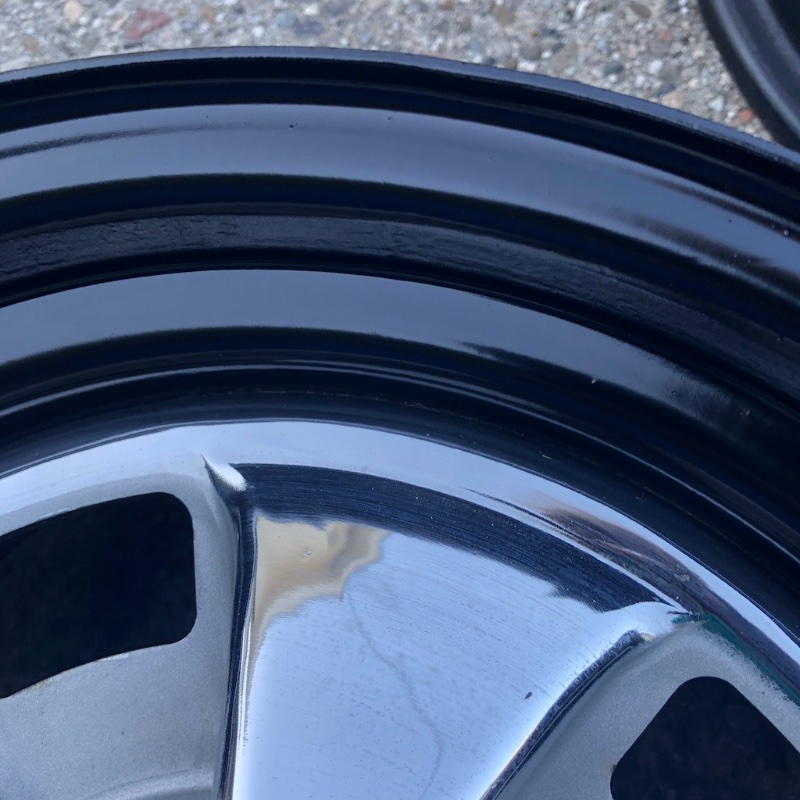
Anyway, after letting the first coating dry for 24 hours, I went over all the outers with VHT satin black wheel paint. I did two light-ish coats and one medium-wet coat. I sprayed a bit extra along the inner areas to let some of it flow down into the crevice. I would pull the cone out right after spraying to let the wet paint flow down a little. Happy with the results!
Tried to take a pic to show how well the paint covered but it’s hard to see - I guess that’s a good thing! It got down into the crack pretty nicely.
Anyway, these wheels are now way too pretty to put trim rings on and scratch the crap out of my new black paint. What do you think, should I just run them with the black outers?
Silver is next! I’m looking forward to seeing these finished, but not really looking forward to the masking adventure that probably awaits me. They almost look good enough as they are now, but I’m gonna freshen up the silver anyway.
Damn, those turned out really nice! I need to get around to doing mine as well. Maybe this winter I’ll get them prepped to be painted in the spring. Maybe.
WOW! Those '68’s are absolutely gorgeous, Andrew. You’ve certainly got the knack for developing a plan, executing it and getting great results!
As much as I love my Scott Drake Magnum 500s on my '68 Cougar, these are definitely just as nice - and a whole lot cooler!
Good luck with the finishing touches and keep rollin’ that Snowball! ![]()
Looking really nice Andrew!
Personally, I enjoy masking, painting and polishing projects over the wrenching, draining and scraping projects ![]()
Take some nice beauty shots when the new wheels and tires are mounted.
- Phillip