Lots of good progress! I like the door cards and steering wheel pad, they really turned out nice.
Interior looks great. Bet you’re proud of your hard work. Cant wait to see it done.
Great work! she is looking brand new!
Thanks guys! I think if there’s one thing to be gleaned from this thread, it’s just how much time and work goes into a project like this. So many little details and challenges to get through. Every little piece that goes on needs some kind of attention or special treatment. The only way to get through it without losing your mind is to focus on one thing at a time, take the small victories as they come, and eventually you’ll stand back and realize it’s done. It can’t really be done right in a hurry. It blows my mind to think that this whole process has taken over 7 years, though. The progress feels good, but I can’t wait to be done!
Great progress. Interior looks great!
Will you be driving it this summer?
This is the biggest thing I have noticed during my project. If you where simply just hanging on new parts it would be fast and easy but in most cases you have to do something additional before installation ie clean up, polishing, modifying to fit etc. Its worse the closer to factory correct you go as you really need to pay attention to the details. I started my dash pad install last weekend. (I have very limited time to work on my car so I take what I can get), I figured the dash pad would be an quick and easy couple hr job. Nope! Little did I expect I would need to trim the vin tag location, screw locations along the windshield and trim up the lower sections to fit the dash nicely. End result was a dash pad sitting inside the car not installed due to running out of free time. This is especially frustrating for me since that is not the pace I am used to working at but I have to remind myself I am in no rush to complete and it will all come together in due time.
Thanks! I think this time around I can actually say with some confidence that yes, I should be able to drive it this summer! ![]() I’m very much looking forward to that, but also a little nervous. After all this work, it’s going to take some getting used to. I’m going to be pretty selective about where I park it, make sure I’m clean so I don’t mess up the white interior, etc.
I’m very much looking forward to that, but also a little nervous. After all this work, it’s going to take some getting used to. I’m going to be pretty selective about where I park it, make sure I’m clean so I don’t mess up the white interior, etc.
Yup, I hear ya on that one. Another issue I just discovered now that I put the door panels on: the outer / lower corners of the new dash pad stick out a little and bump into the door panels when the door is closed. This means rather than the doors closing perfectly and easily like they were before, I now have to close them a little harder to overcome that resistance. Now I’m contemplating whether it’s worth trying to shave a little bit off those lower corners, but I’m not sure how to do that cleanly.
You’re a better man than I Andrew. I would have destroyed half my interior ripping that headliner out or sold the car. OCD is a terrible disease.
I was wondering about this myself as I noticed I had to make sure it sat inside the pinch weld when bolted in. Not a whole lot of room in there. I should test for my old ones to see if I have the same issue.
Well, I have enough material for a little update. I finally got the restored rear window trim installed. It wasn’t too bad, and it helped that I “preloaded” the clips. In other words, I went around to each clip and bent it up a little with a small flat screwdriver. This took some of the tension out and made it easier to slip the trim in underneath each clip. It also helped a lot that I marked the location of each clip, so I knew exactly where to press the trim in. A final tip on this - just use your hands to install this trim. No tools, no rubber mallets, no blocks of wood, just your hands. It may be stainless, but it can ding easily. It is doable by hand when you preload the clips.
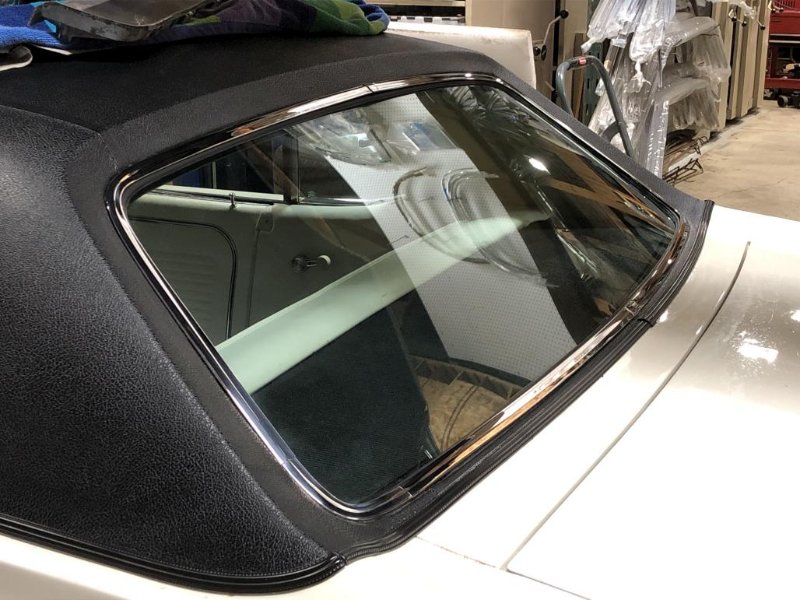
Cleaning up all the black goo took a while, and there’s still a little left to do. But I’m glad to be done with the rear window saga. Here’s hoping it won’t leak!!!
Next, I continued pressing forward with the interior. Don hooked me up with a good set of used / re-dyed black seat belts with new “deluxe” chrome bezels. Once I got those in I could slap the rear seat in.
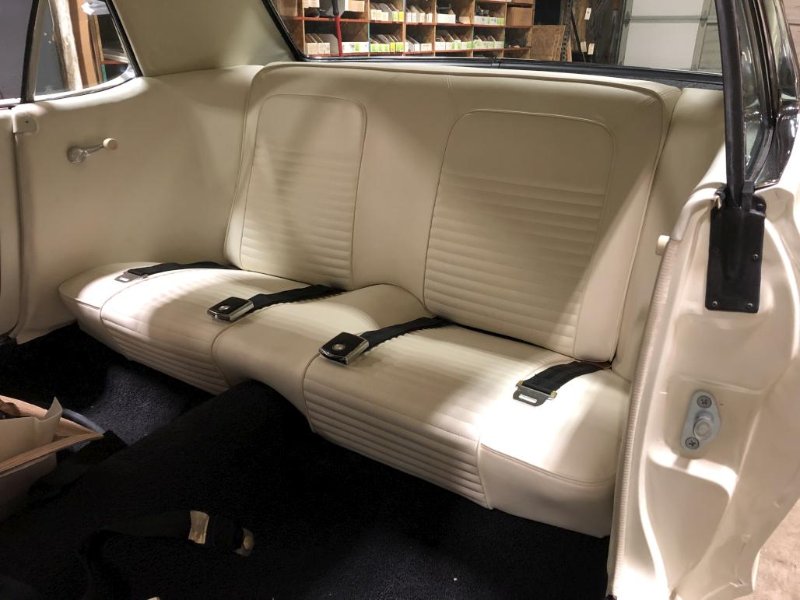
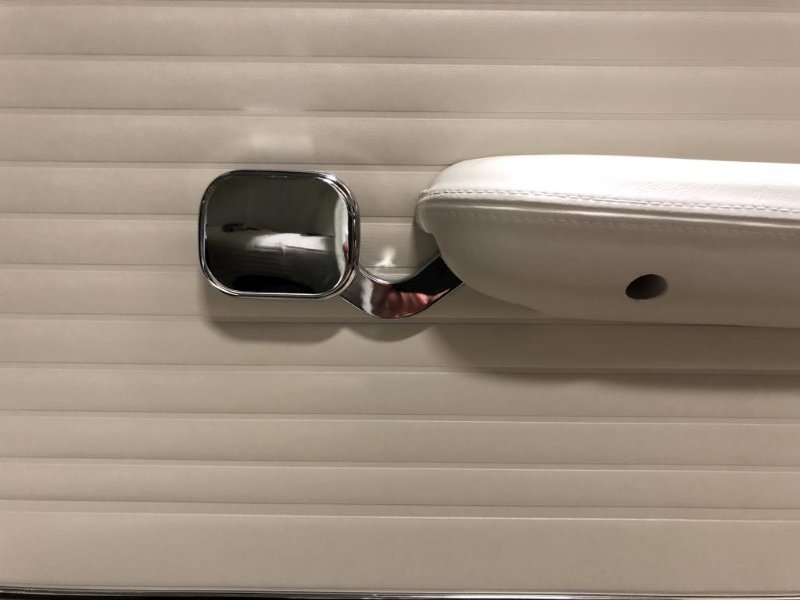
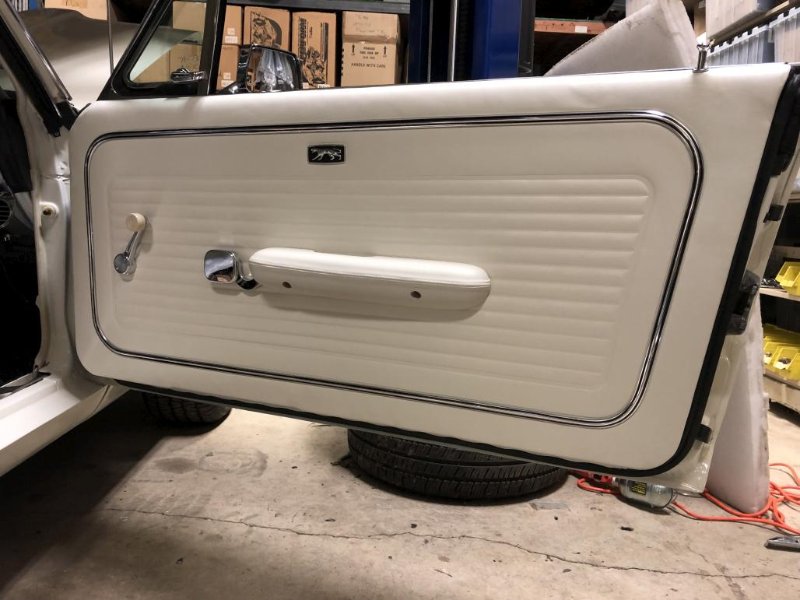
I was also able to finish up the door panels / armrests / handles. We got in the latest batch of repro Scott Drake interior door handles and they fit perfectly, which is a relief! Previous versions by them and others had the splines indexed wrong, and the handles were fitting crooked. I’m glad they got this fixed, they look excellent.
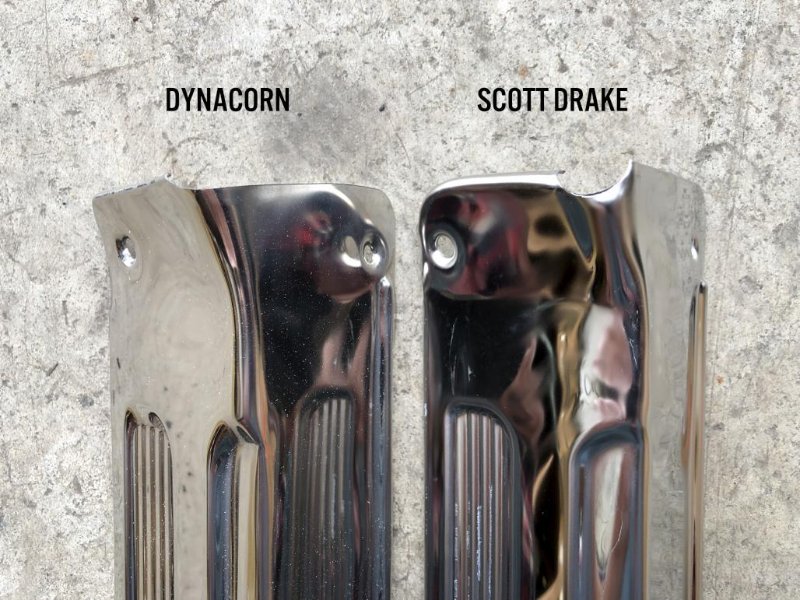
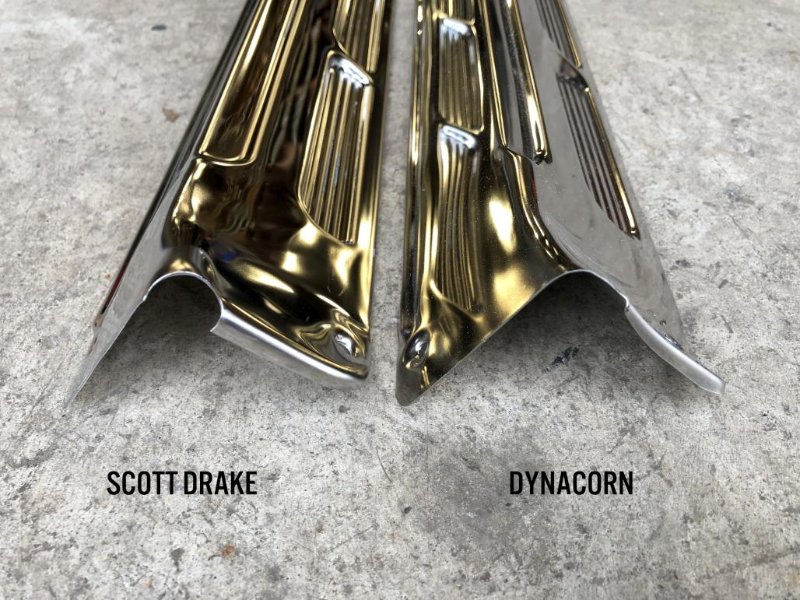
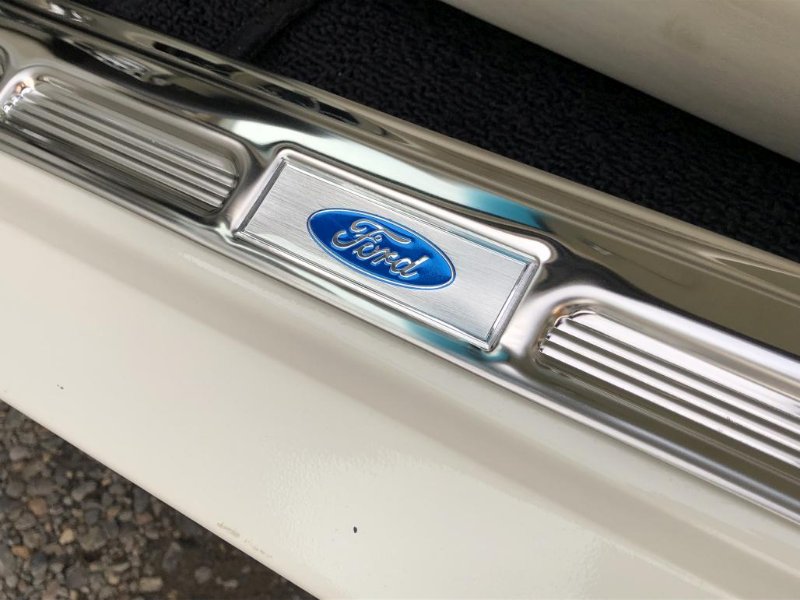
Next it was on to the sill plates. I wanted to get this done before putting the front seats in, but this is what happened when I tried to install the premium stainless sill plates from Dynacorn.

They are nice and shiny and straight, but the corners don’t have enough of a cutout for the windlace and kick panel.
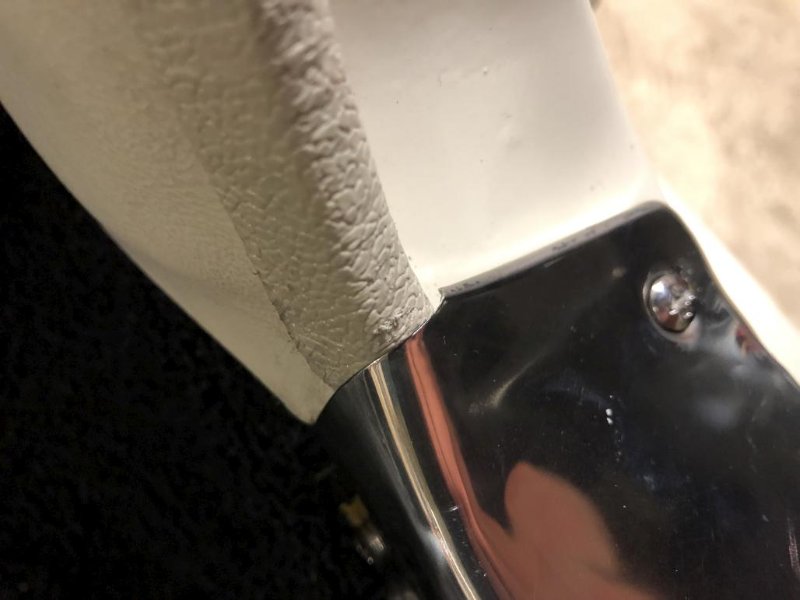
It could be something to do with my particular car, but I’ve seen this happen before. This amount of gap isn’t gonna work for me. So my options are: get a Dremel and carve out those corners until they fit right, or try a different supplier. As I write this, we just got in some alternate versions from Scott Drake - also stainless, but more original-looking, complete with some wrinkles in the stamped metal and a less shiny finish. But more importantly, they have significantly better cutouts in those corners. So I’ll report back when I have a chance to test fit that version. This may end up in WCCC changing suppliers for that product.
Anyway, next I started prepping the front seats for installation. I should have given the upholsterer the pivot washers and clips, but didn’t think about it at the time. He didn’t know better, so he used scraps of vinyl and a piece of wire here instead. So I got to pry the seat uppers off the lowers and install these myself. This kit comes with the washers, clips, and screws for the plastic covers.
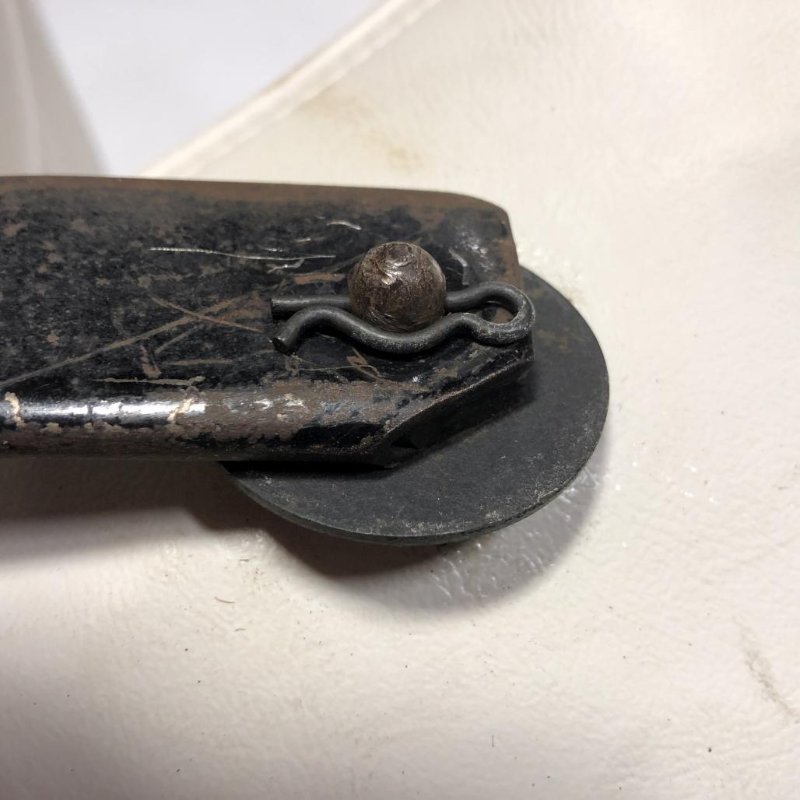
And once again I had to break out the SEM paint to get a decent color match to the seats, for these plastic covers.
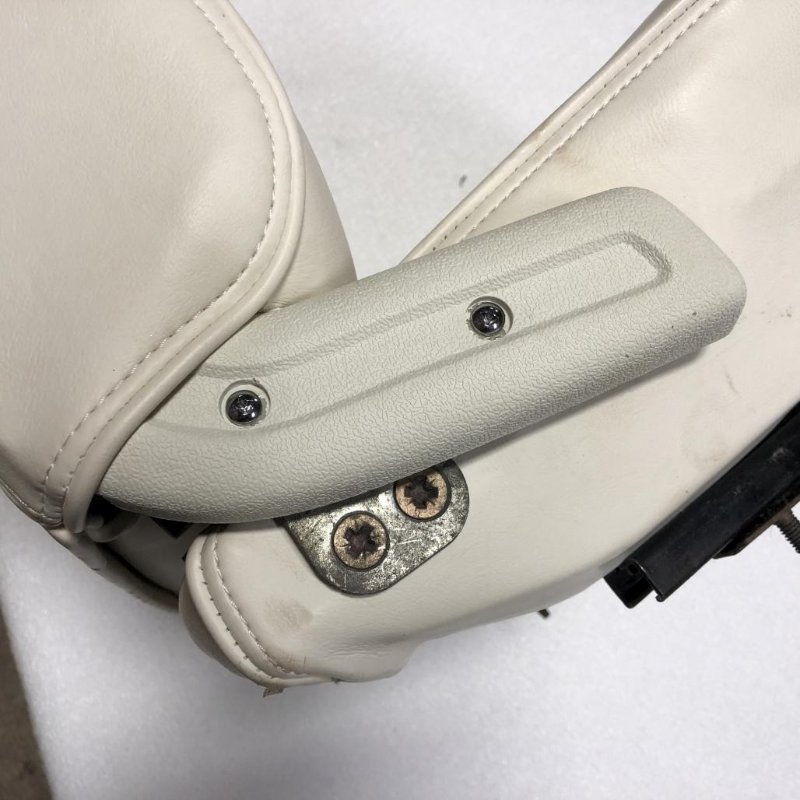
Finally I could bolt down the seats. Also installed shiny new seat back release knobs while I was at it.
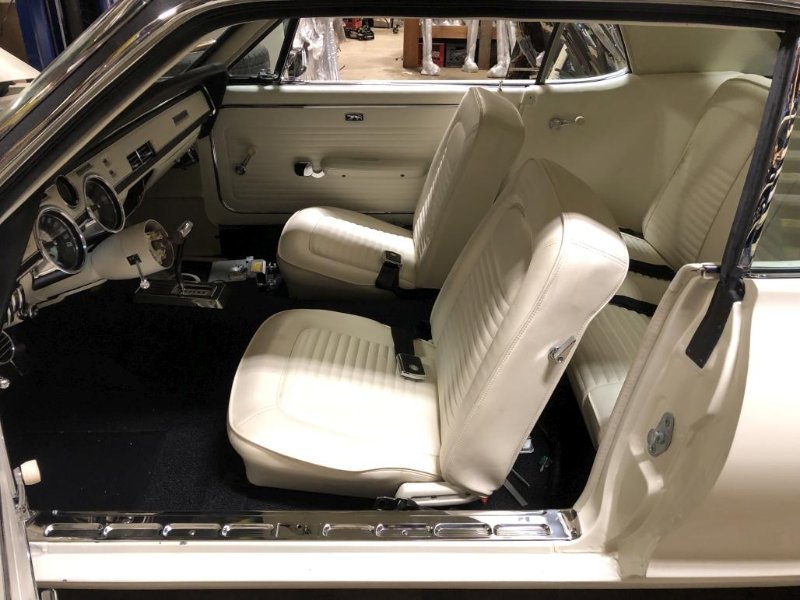
And then I couldn’t help myself, I had to bolt the steering wheel on to finish off the major interior components.
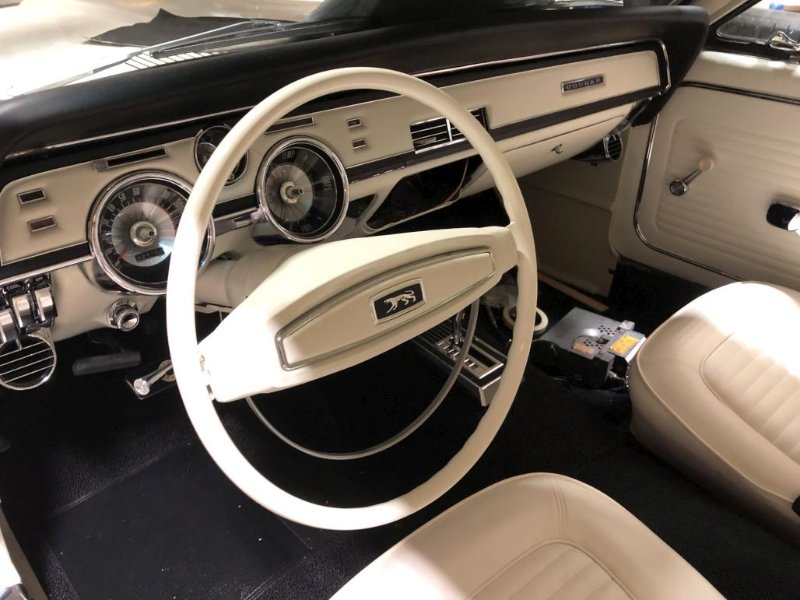
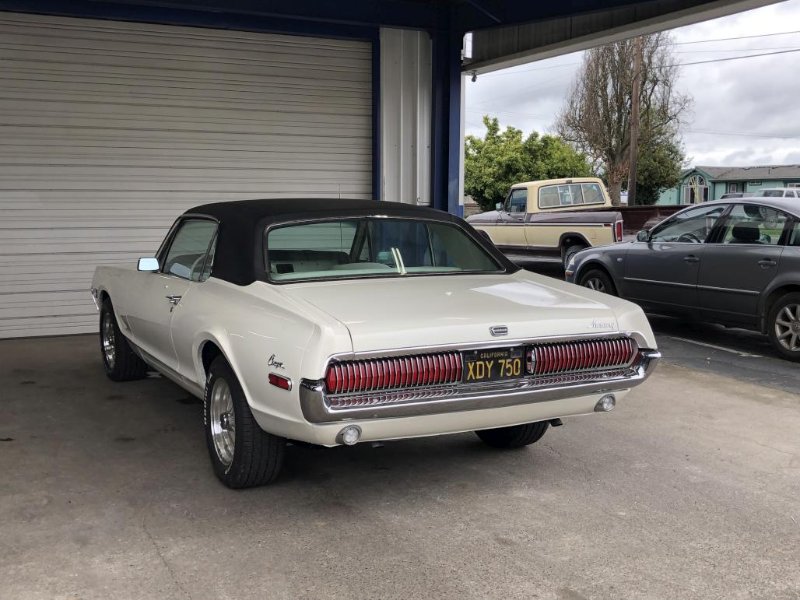
At that point I had to step back and realize… it’s pretty much a complete car again! I’m not done, by any means… there are still plenty of loose ends to finish up, but it pretty much looks and functions like a car! I took it for a quick, tentative drive right after putting the steering wheel on.

I didn’t really get going too fast because it still needs an alignment and tune up, and I wanted to make sure the brakes were ok. But it felt pretty cool to actually sit in it and drive!
Awesome! Nothing like getting in and actually driving the car after all that work, nicely done. How do you like those new wheels, are you keeping them on the car?
Nicely done Andrew. Next time you need to do a burn out for us.
Andrew your Cougar looks excellent! That interior is gorgeous.
Steven
Thanks! I’m not totally sure on the wheels (Legendary GT5). They are a sample set that Don bought tires for, mainly to use for pictures and such. So I don’t own them. I think Don’s plan is for me to get used to them and end up buying them ![]() I do like the look of them, but I was originally planning on going the “classy” route with skinny whitewall tires and either nice hubcaps or styled steel wheels. Not sure yet, we’ll see!
I do like the look of them, but I was originally planning on going the “classy” route with skinny whitewall tires and either nice hubcaps or styled steel wheels. Not sure yet, we’ll see!
Nice work! Even that slow speed short trip is very rewarding isnt it?
I personally like the wheels you have on it now
Short update, not a whole lot to report, but here ya go.
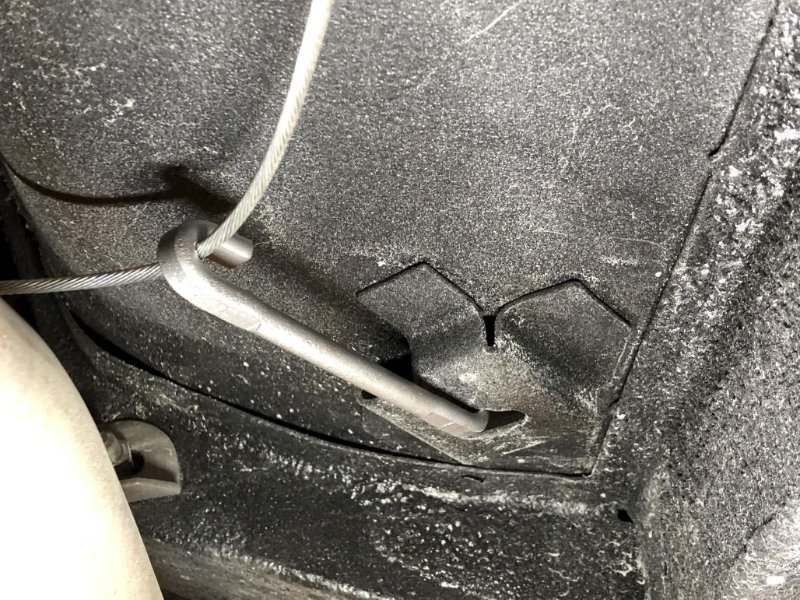
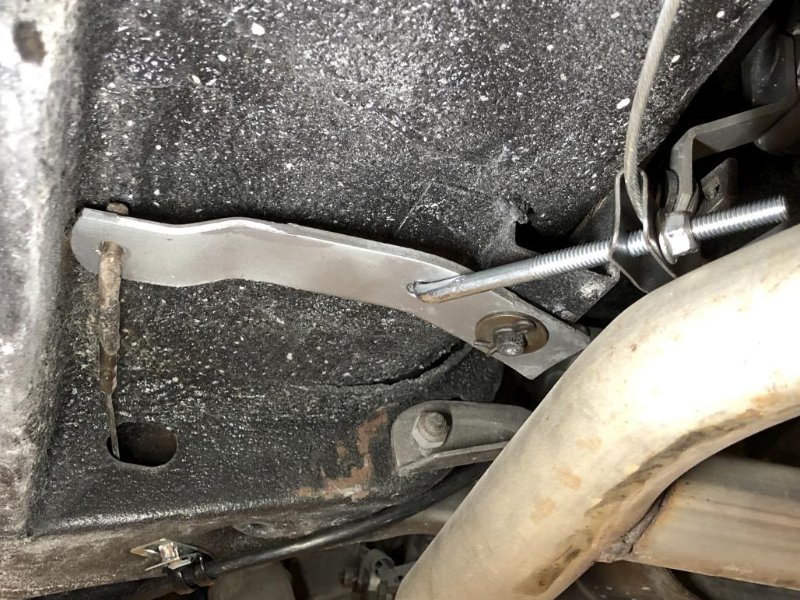
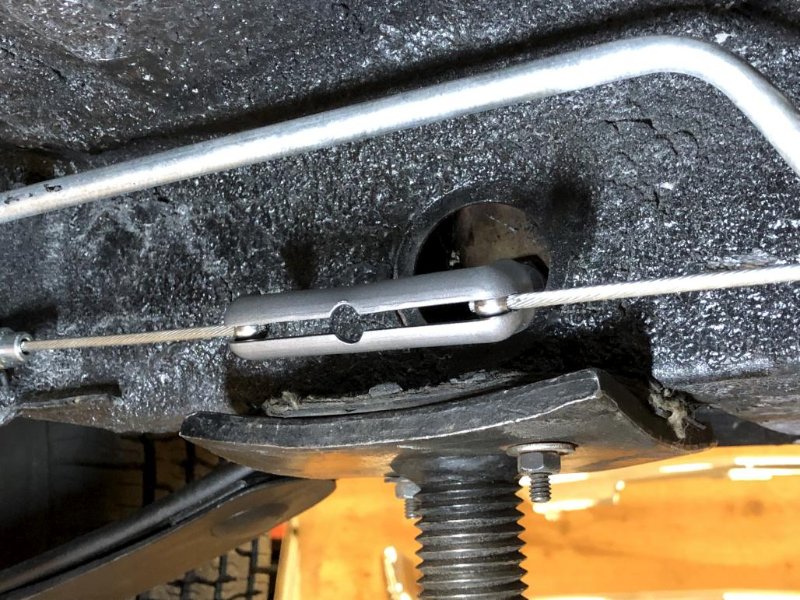
One of the things I had to button up was the parking brake cables. I found the various pieces and cleaned them up, except for the original front cable, which I never removed. That’s one of the few things on the car that’s still old and ugly. Not worried about it… I did get a new adjustment rod because I couldn’t find mine. And yes, I did install the rubber plug for the leaf spring bolt after the 3rd pic was taken. The adjuster / equalizer touches the exhaust a little so I’m not sure if that’s going to be a problem, it’s something to keep an eye on. My exhaust system was done by a shop about 10 years ago and I just left it alone. A correct H pipe would probably solve this but I don’t think I’ll mess with it unless it becomes a problem.
Next a small update on the sill plate saga. We got in the Scott Drake version of the stainless steel sill plates and decided to switch over to that version. On the pro side, they have a better / more correct cutout for the windlace and therefore fit better. As a small con, they have some stamping wrinkles near the outer corners, so they aren’t as “perfect” looking as the Dynacorn ones, which are very flat. But in reality, I think the SD ones look more factory correct, with the added benefit of being stainless steel.
Fit is better, though admittedly still not perfect on the DS. For some reason the PS fit better in my case.
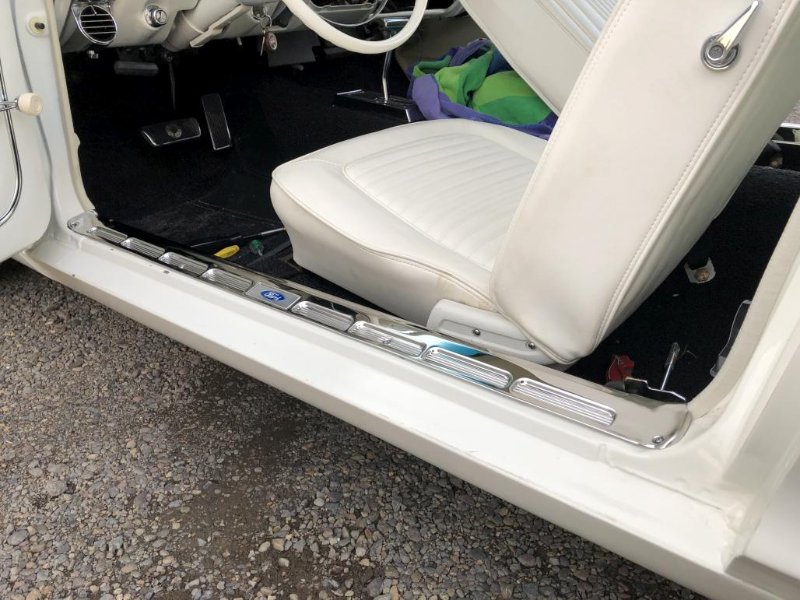
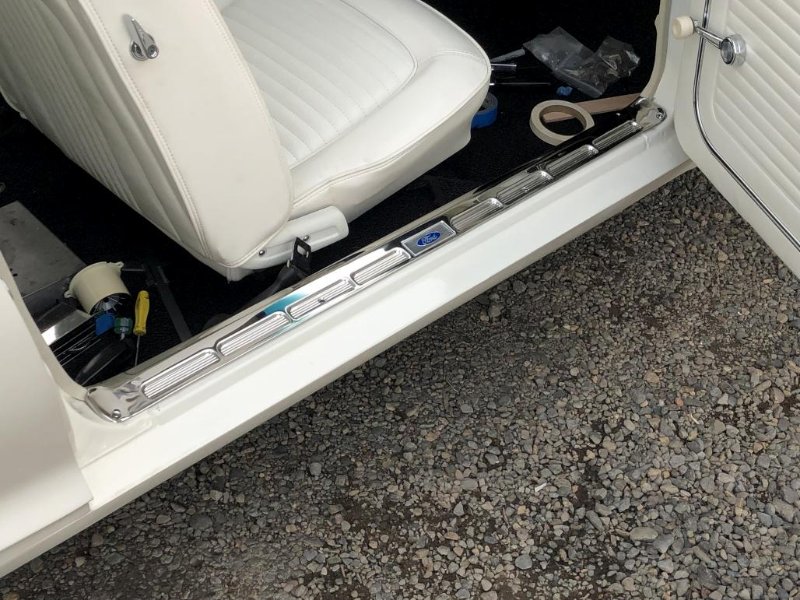

Of course the finishing touch was to add the Ford decals.
Lastly and probably most significantly, today I took the car on its first real maiden voyage! Drove it to the nearby small town to get the front end aligned. It needs it badly, camber is off and the steering wheel is way to the right. I told them to just get the geometry right, and if I need to pull the steering wheel off to re-center it, I can take care of that. But she ran pretty well overall and it was pretty cool (and a little surreal) to actually drive it a meaningful distance on the road. It will take some getting used to, but will feel better once aligned and tuned.
My to-do list is getting shorter all the time! Some things I still need to address in no particular order:
- Source and clean up good original horns, install
- Dash re-do (waiting for vacuum plated bezels, should arrive next week)
- Repair dash face pad crack if possible, reinstall
- Install radio, glove box, ashtray
- Clean up spare tire jack, find appropriate spare wheel & tire
- Install taillight protectors
- Black out paint for pinch welds / lower body
- Touch up white overspray on undercarriage (fog over with chassis black paint…)
- Get exterior paint final detailed / wetsanded / buffed
- Get pinstripes done
- Install restored wheel lip mouldings
- Install stainless vinyl top retainer strips
- Install heater hoses (currently just looped off)
- Get carb and timing dialed in by someone who knows what they’re doing
…and that’s about all I can think of right now. Not bad! The timing with the season is pretty good, looks like I’ll actually be able to enjoy it a bit this year.
It looks really nice Andrew, you must be proud of how well all your hard work turned out. Enjoy!
Congrats Andrew. She turned out spectacular. Cant wait to see more photos especially with your photography skills.
So whats going to be the next project car? Can’t stop now with this build under the belt.
Looks great Andrew. That first real road test drive is an amazing and terrifying experience worrying if anything is going to fall off cause you missed it along the way ![]()
Andrew, How did you finish your A pillars? Is that just paint and the little pillar trim clips?