Ah, I see what you mean now! Good catch, I’ll have to add that to my list of little details to address at some point.
Time to bring things up to speed! My goal is to get it done, or at least done enough to drive, by the end of the year. It’s getting harder to work on it this time of year, when it gets dark at about 4:30 and it’s getting too cold to paint things. The cold also makes rubber and vinyl items harder to work with. And it’s generally less fun. But things are happening!
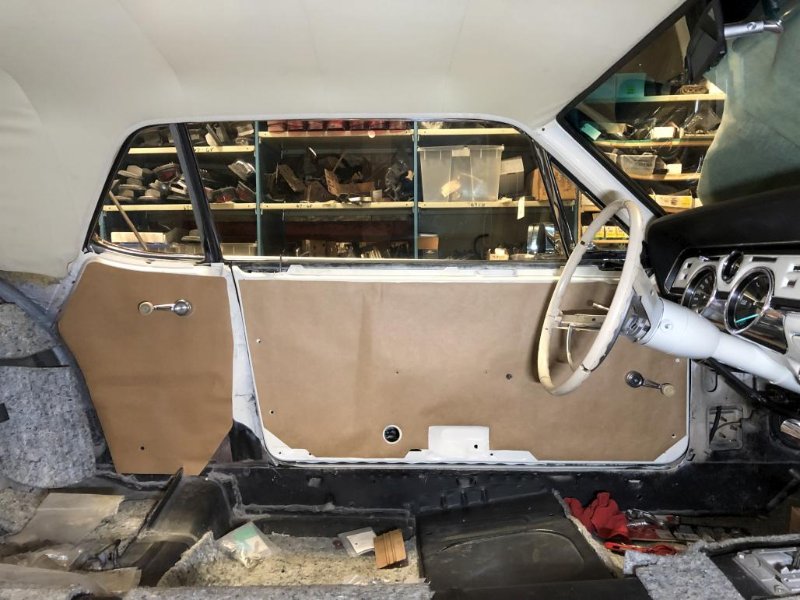
The next big thing on the list was to get the windshield in. Getting past that hurdle would allow me to start on the dash, and get all that stuff together. I bought a new Pilkington windshield from Summit for about $115 with free shipping. Amazing deal, and it might have been a fluke because I don’t see it on their website anymore. I had called Pilkington directly and their price for the glass was similar, but with over $100 in shipping cost. So I think I got lucky.
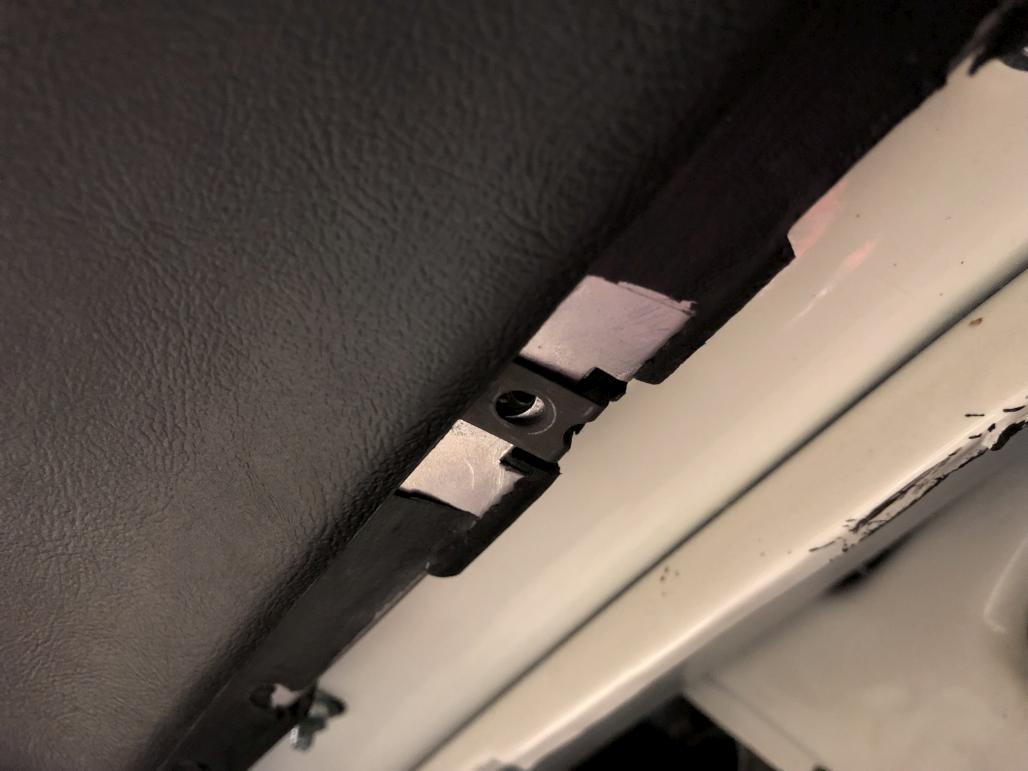
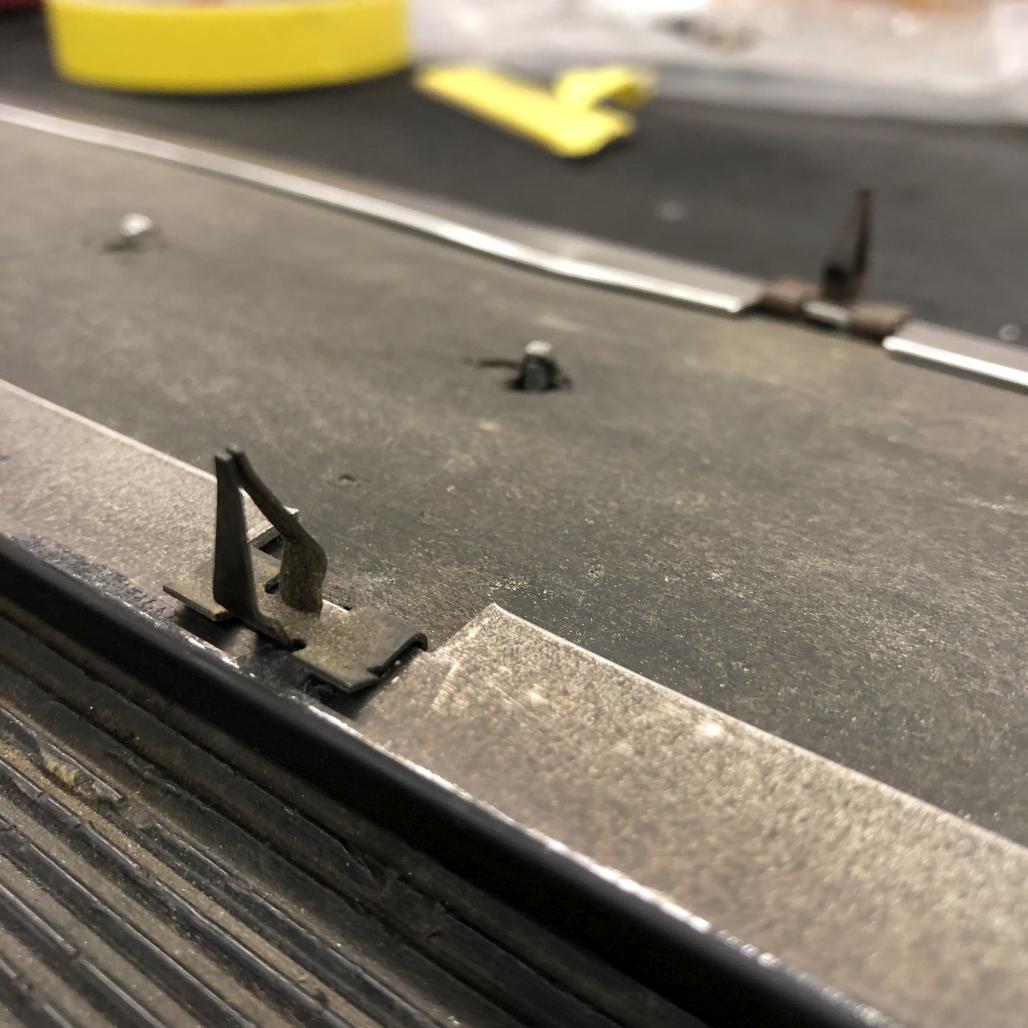
Before I could get the glass in, I had to replace some of the posts that hold the trim clips. Luckily there are these little repair studs that you can just screw in. I needed some for the back window as well.

Fast forward, and it’s installed! Don actually did the install, and I held a video camera. So look for a “how to install a windshield” video soon (I’ll post it here too).
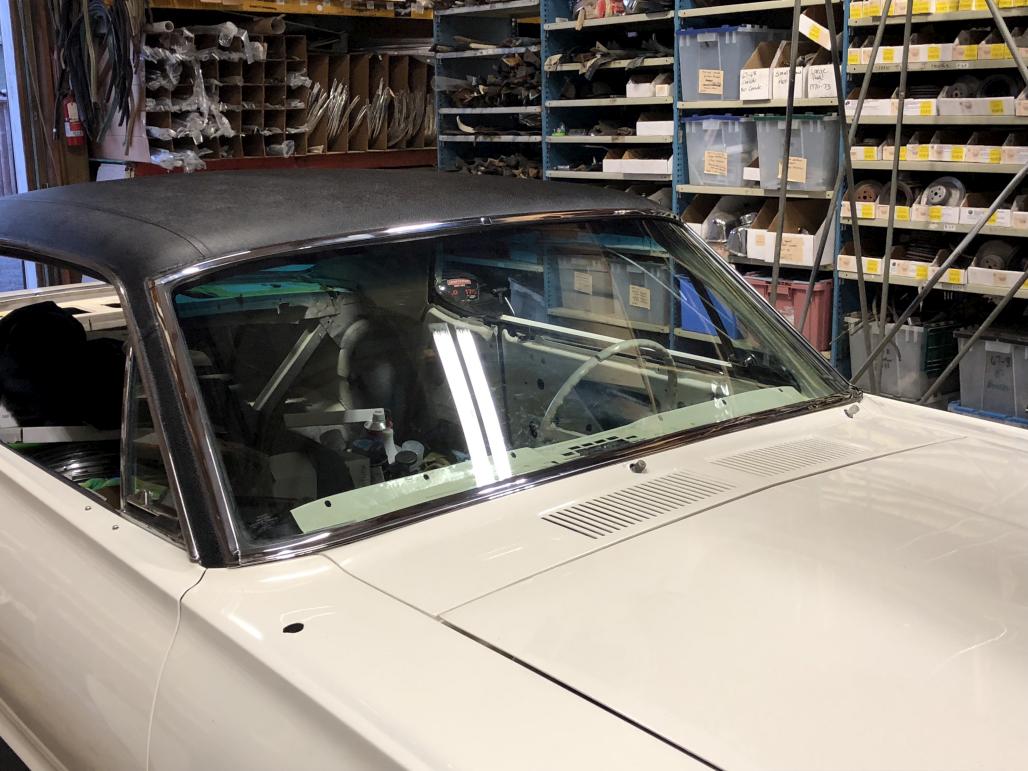

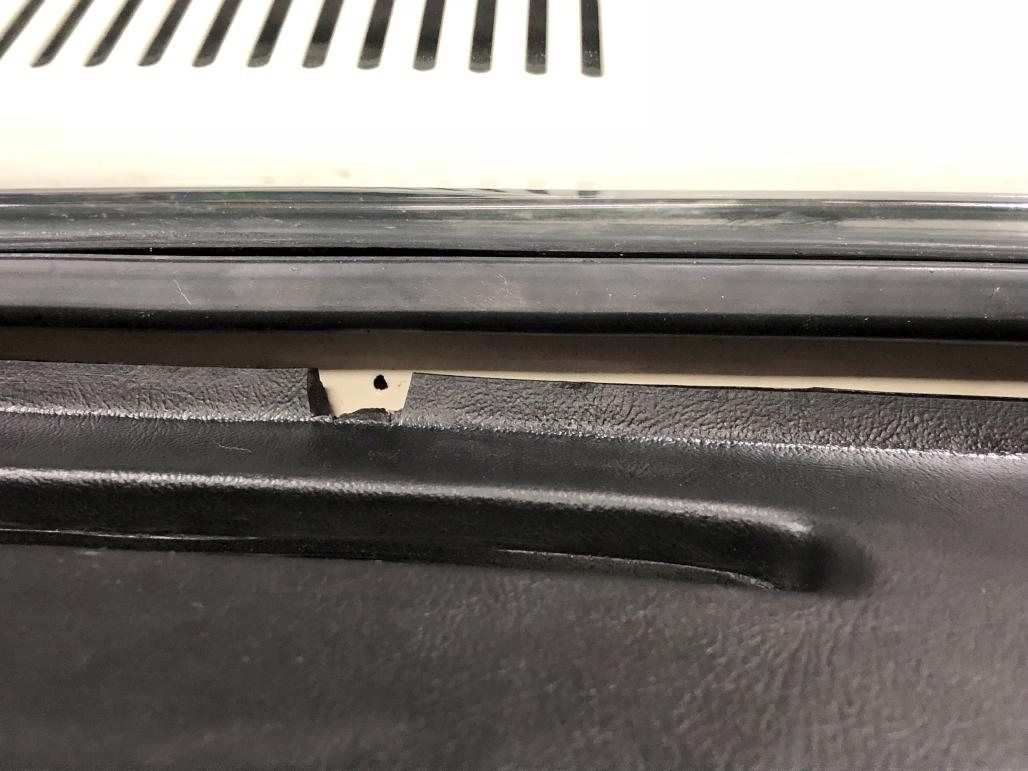
Of course I got restored trim, which looks nice and shiny. The only issue is with the lower left corner, it doesn’t seem to quite fit right there.
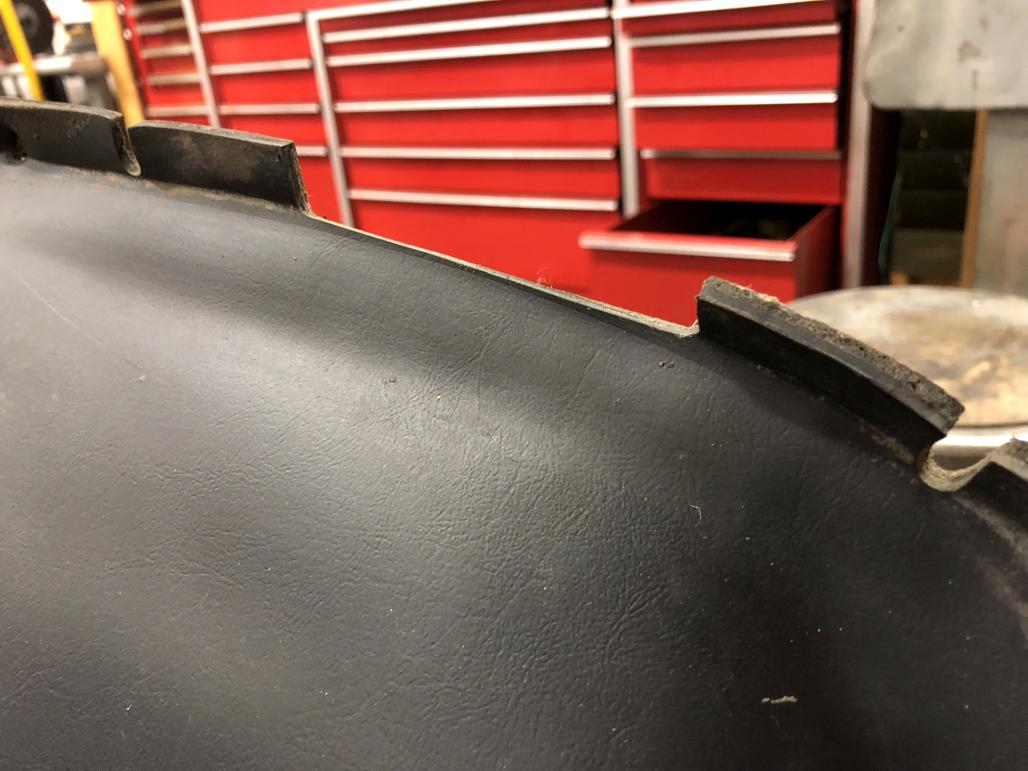
With the windshield in, I could finally get to work on the dash. My original dash pad was decent, but the speaker grille was completely split open. Kind of a bummer. So I bit the bullet and got a new dash pad. I knew it might need a little modifying to fit, but there are some things I wasn’t expecting I’d have to do.
First of all, the original pads had notches for the screws that hold on the metal trim strips by the windshield. The new ones don’t.

Secondly, and this is a 1968 only thing, the original pad had a cutout for the VIN plate. So that’s something else I’d have to recreate.
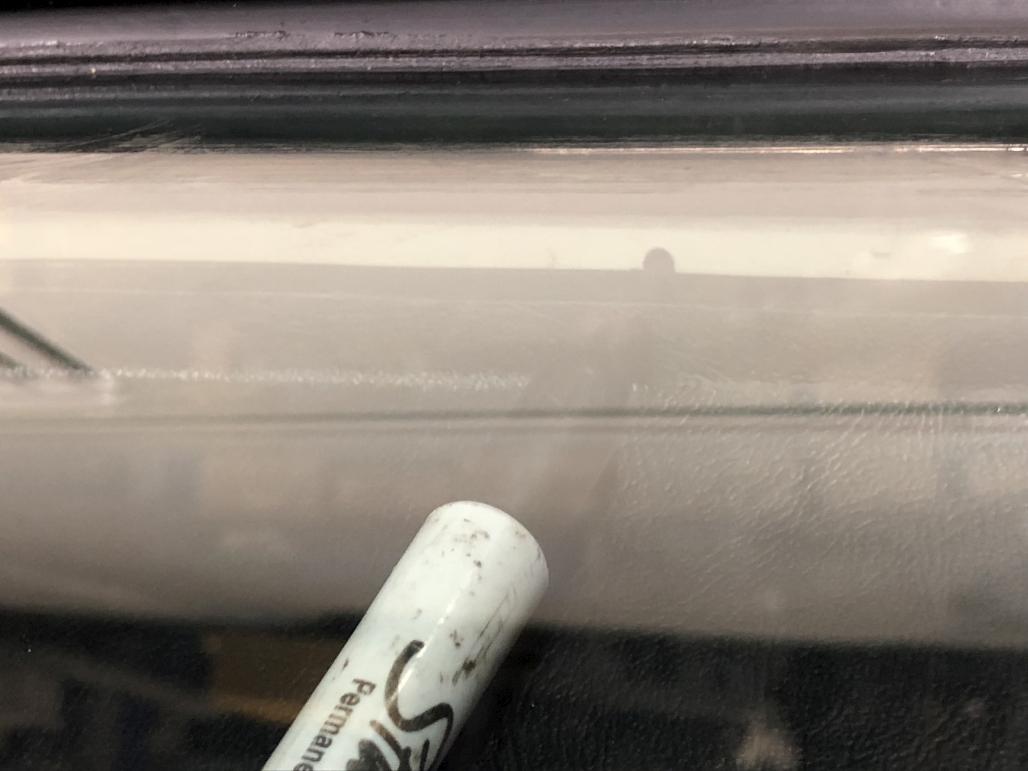
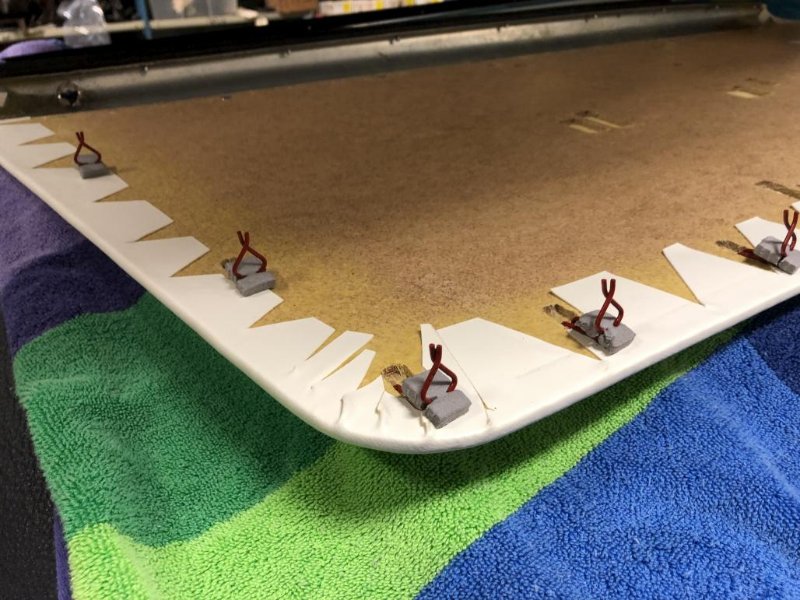
So for the notches, I figured the most accurate way to place them would be to temporarily install the new pad in the car and mark where the holes in the metal were. Here’s a crappy picture of that process.
Then it came back out so I could cut them. A little crude but these will be hidden.
And back in the car. Ta-da.
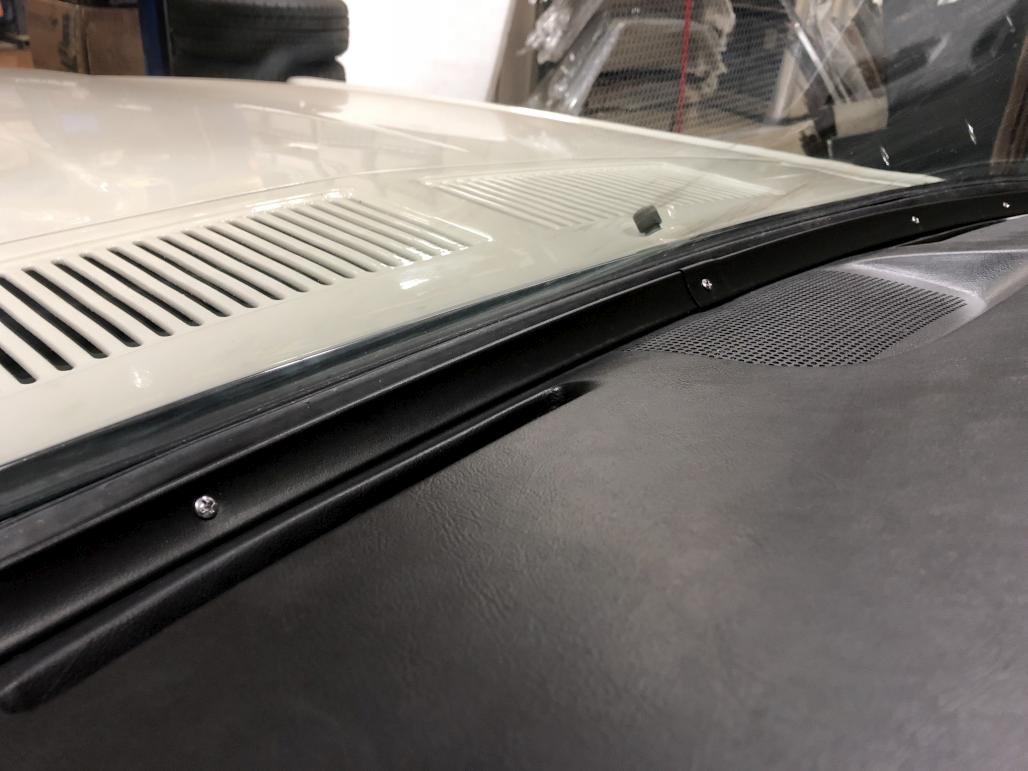
Then the next challenge was to actually get the metal trim on. I got new screws and repainted the trim with SEM Trim Black. I didn’t blast them first, just cleaned them and sprayed over the old wrinkle finish so they would still look right. Getting them installed was a little tricky. I used an awl to locate the holes and then got whichever screws started that I could. The outer corners were the hardest part. I had to push down on the trim to get the screws started. It’s also worth mentioning that the goal here isn’t to get those screws tight, because that will start to bend the trim. Just get them in enough that the trim sits even all the way across.
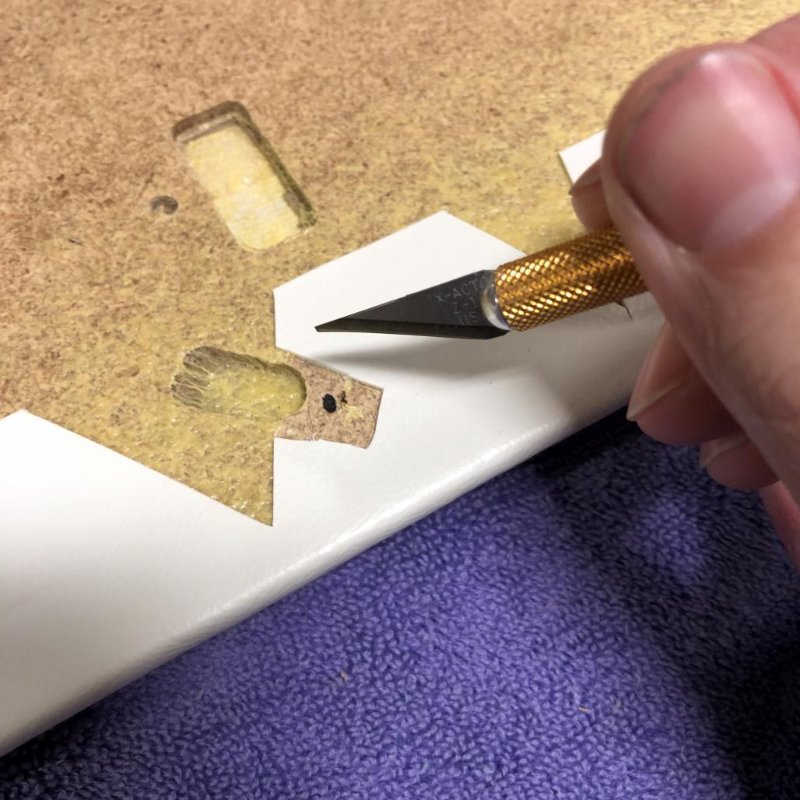
Next I felt like putting something shiny on. One of WCCC’s signature items is the reproduction A/C vents. I got the complete kit for '68 with the knobs and everything. When I held up the vents to their mounting places, however, I noticed another problem with the repro dash pad. This isn’t gonna work…

So out came the knife again.

Same thing on the left side. This is after trimming. I just cut right along the edge.
Next I could hook up the controls and stuff. Luckily I still had my old vents, so I could transfer over the needed hardware. I also bought a new heater control cable because my old one was shot. I had to adjust it a bit where it connects to the heater box, it seemed a little too long and didn’t work quite right when seated against the built in stop on the cable sheathing. Got it working well though.

Installed! I had to hunt around a little for the correct screws for these things. And yes I know I have paint runs on my dash, shut up.

Getting the plastic elbows and new hoses installed was especially tricky on the driver’s side, but not so bad on the PS. Also I was lucky that I still had my old vents, because I realized I needed this special spacer piece and the corresponding nut for the back side of the passenger vent. Like most of these pieces, it just needs to be snug. Over-tightening will create a dimple.

Anyway here’s an overall shot with the dash pad in. It definitely has an upward bow. One of these days I might try to put some weight on a board on top of it to try to flatten it out.

You can see that I also put my headlight switch in. My original was kinda crusty, so I ended up getting a new '67 switch. I got this one because I no longer need the vacuum ports since I changed over to electric headlight actuators. The only thing I had to do was salvage the original spacer and epoxy it to the new switch.

In hindsight I’d recommend doing this differently, to avoid getting epoxy in the threads. Rather than a clamp, screw in the actual bezel nut to hold the spacer in place while the epoxy dries. Anyway…
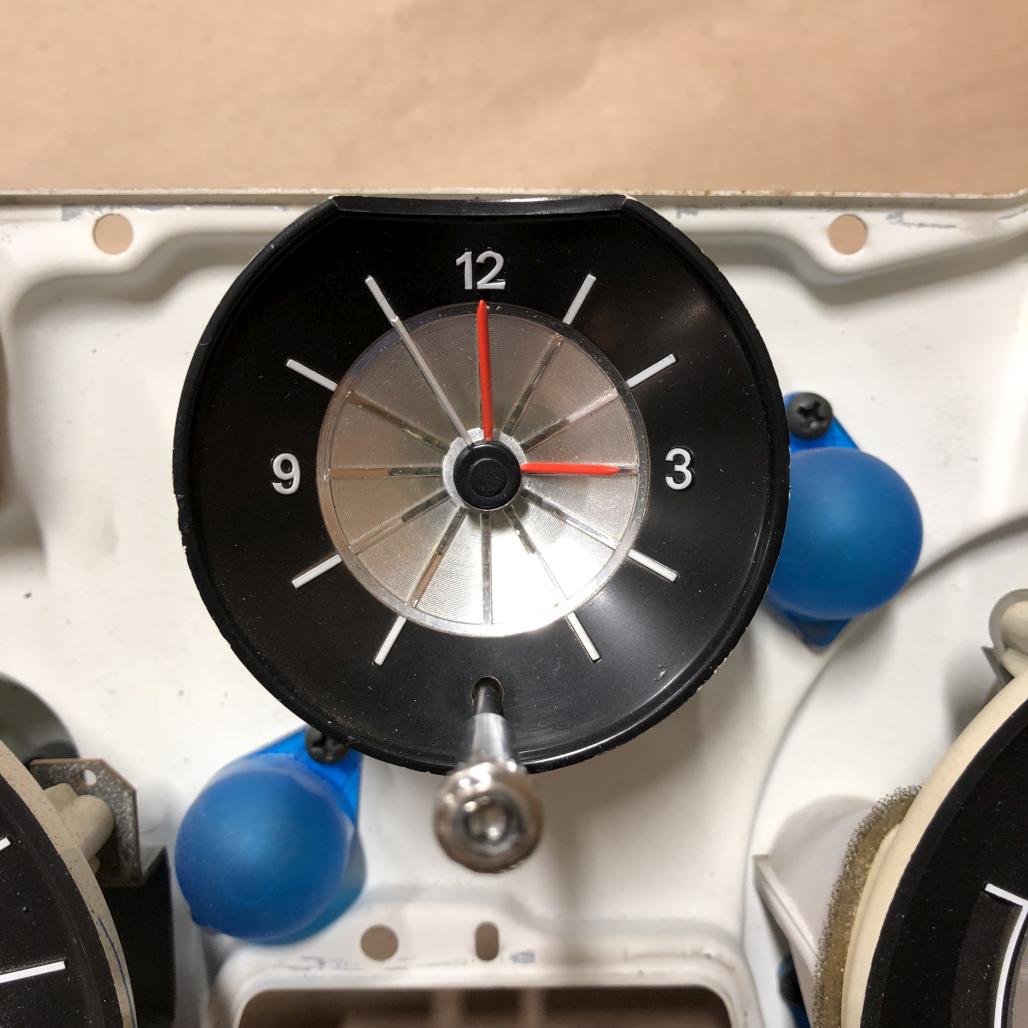
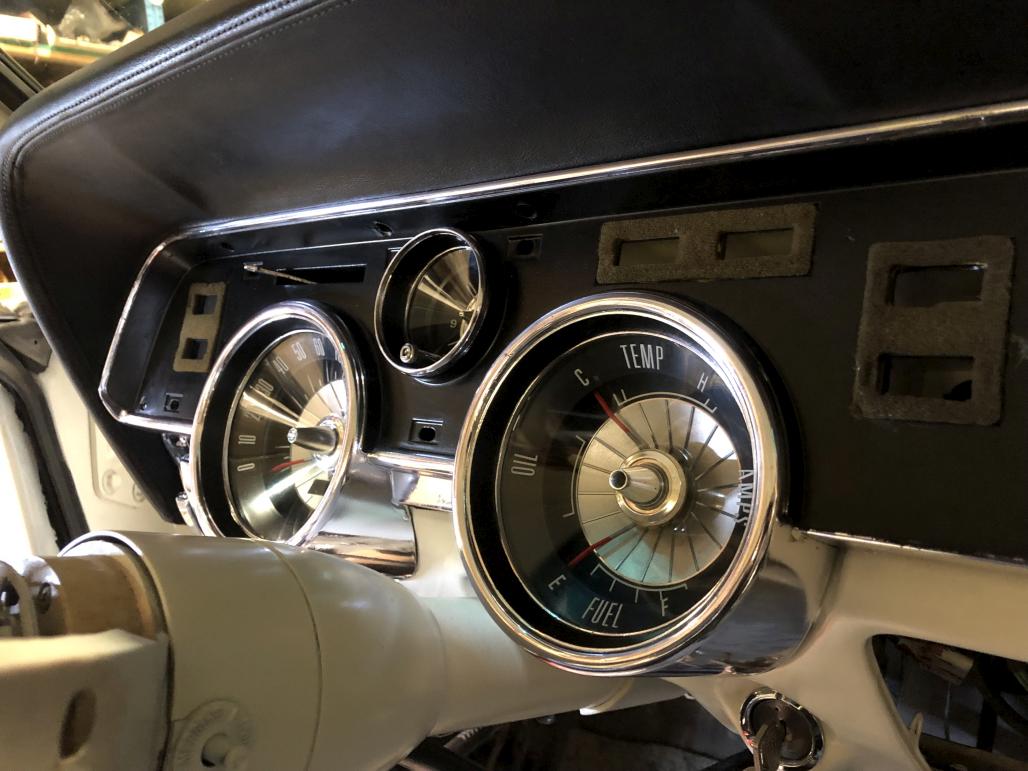
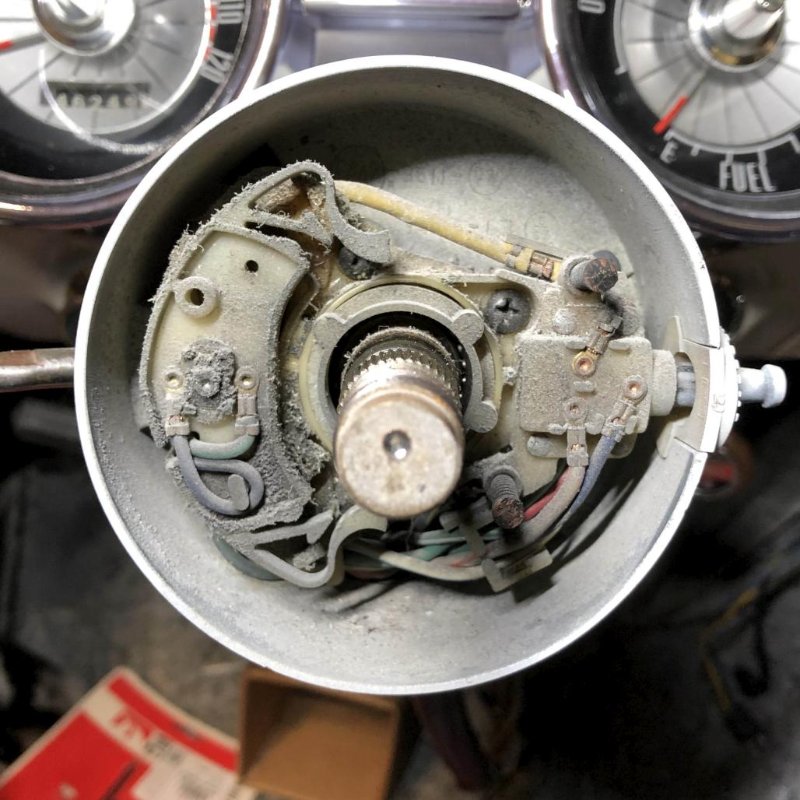
Next it was time to get to work on the gauges. I was kind of excited about this. Here’s a before shot:

The only thing seen here that isn’t original is the clock. I just had the blank panel there originally, but opted to use that space for a rebuilt quartz clock. The wiring is already in place and it’s a nice sublte stock upgrade. I was previously planning on using the Rocketman mini tachometer, but decided to go with the clock instead. This is a 289-2V with a 3-speed automatic, I really don’t need a tachometer.
Here’s a “before” shot of the speedometer. You can see that the needle is pretty faded.

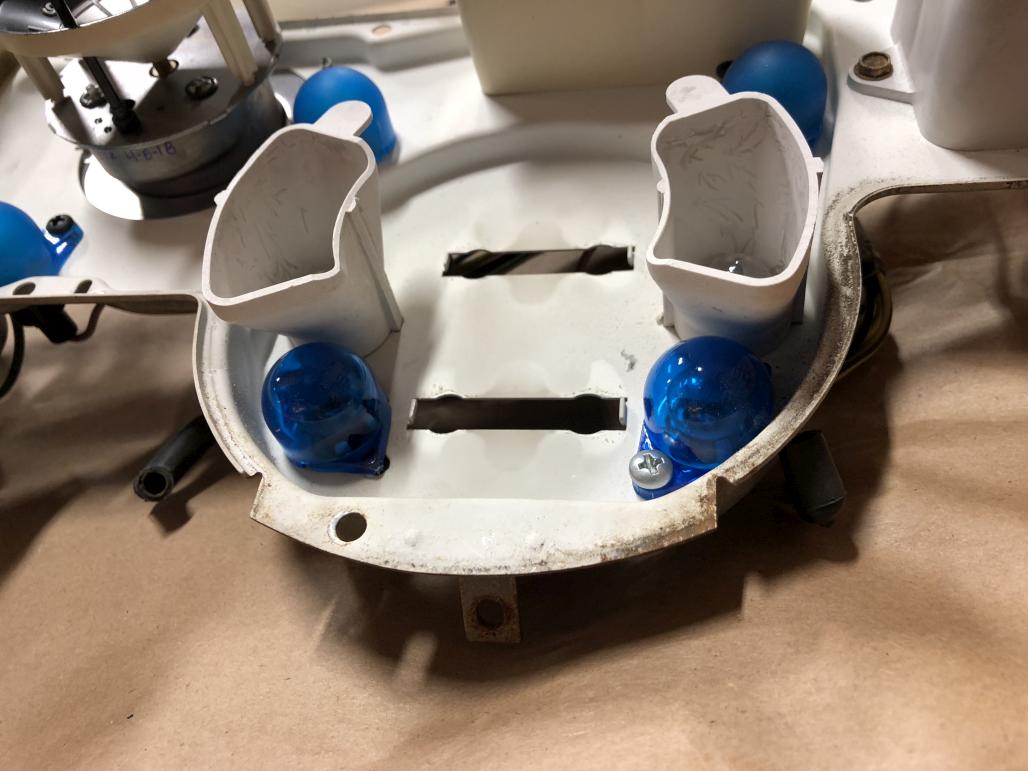
So one of the first things I did was to upgrade the lighting. I started by replacing all the blue light diffusers / filters. These two can only be accessed by removing the right-hand gauge.
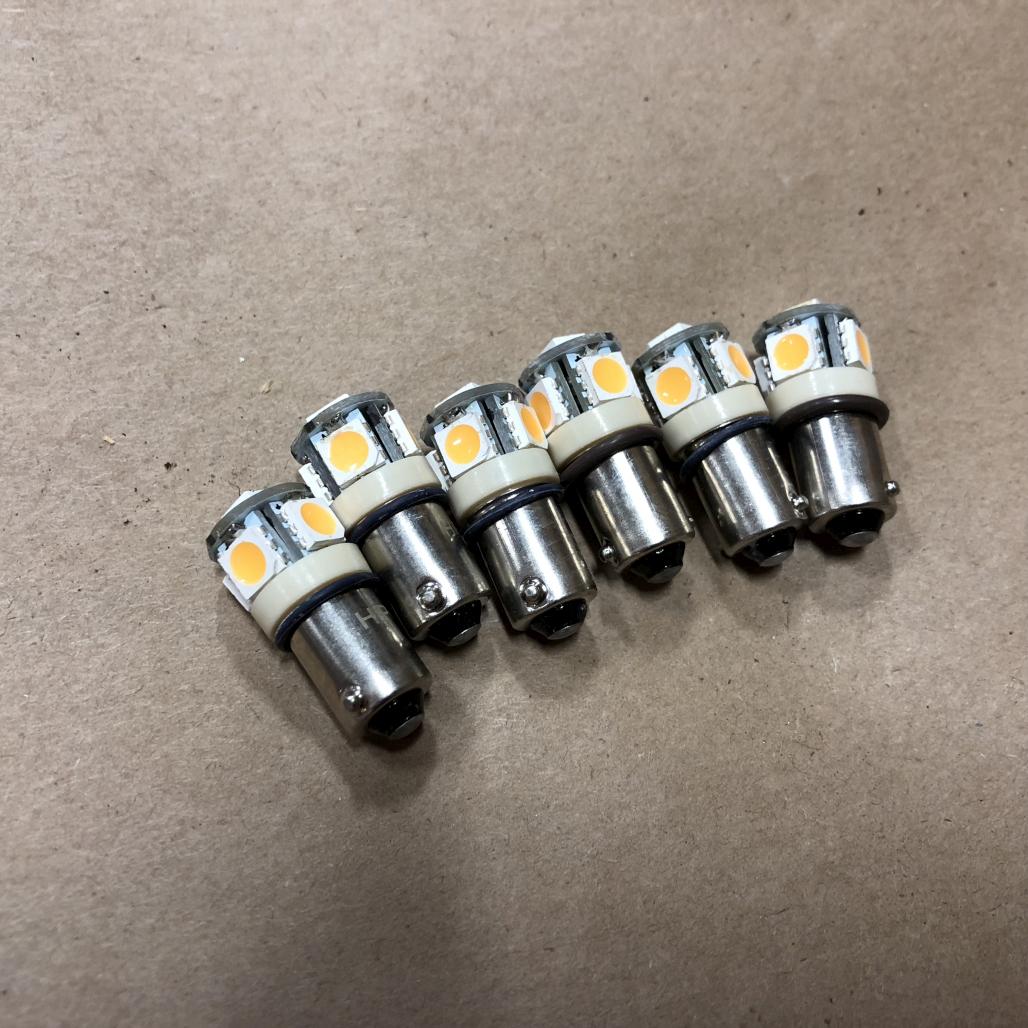
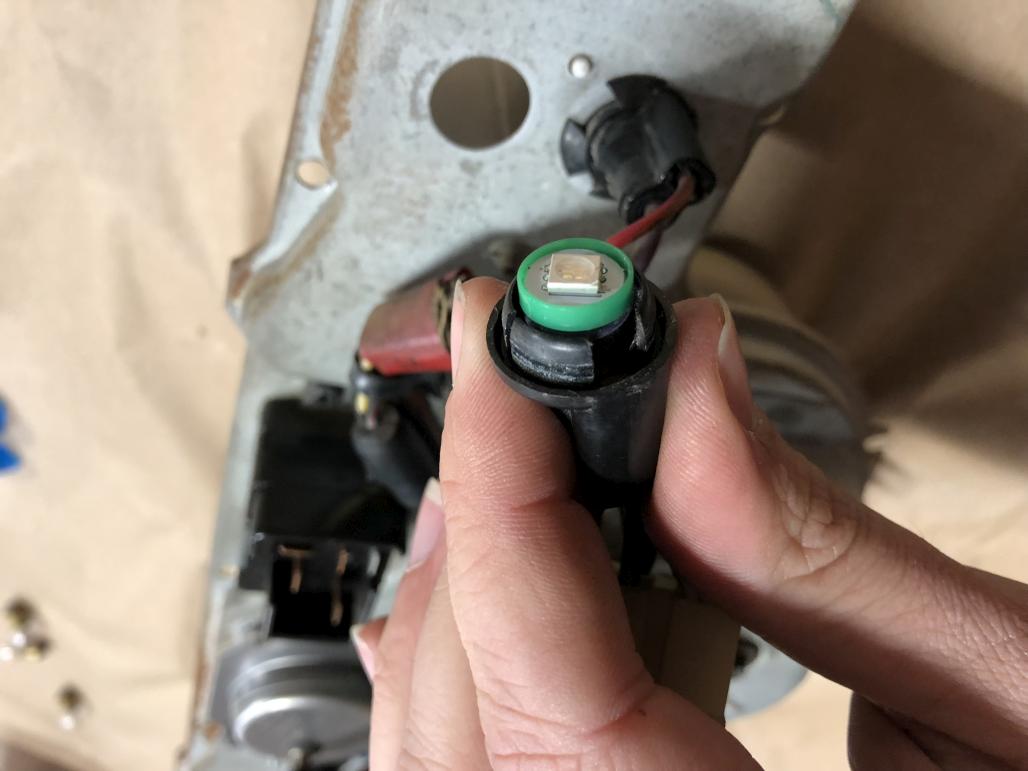
Then it was time for the gauge LED light kit!
Next it was time to freshen up the orange needle paint. I did this on both main gauge needles, as well as the radio dial needle. A good tip I learned from Darrell was to use the back end of a small paintbrush, rather than the bristles themselves. This paint is nice and thick and you seem to get better control and precision with a wooden stick. It globs on nicely and flattens out as it dries.


Next I got even more adventurous. It happens that while I was doing this project, I saw some pictures of the 2k-original-mile '68 Cougar for sale online. There’s a closeup shot of the speedometer that clearly shows that the extra hash marks above 70 mph are orange. This is interesting because I didn’t recall seeing that on other cars, and confirmed this by looking through the box of 67-68 standard speedos at WCCC that almost all of them were completely faded to white. Some had very faint remnants of orange though. I wanted to recreate this cool detail, so here goes.
I decided to go for a half-safe approach by masking off the bottom edges of the hash marks. I felt like I could have better control on the top edges. I sharpened the wrong end of a paintbrush for a more precise tip. It helps that the hash marks are raised up, otherwise I probably wouldn’t have attemted this.
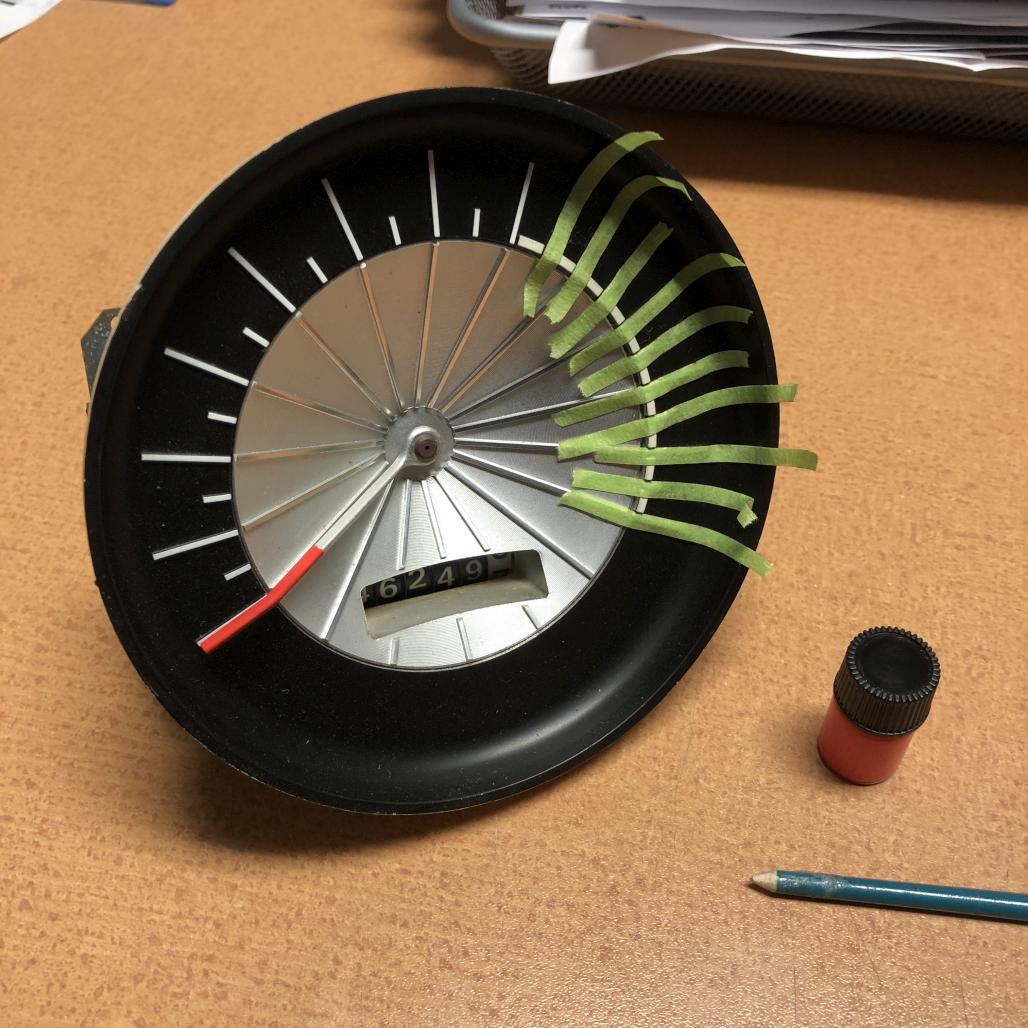
As I went along, I peeled off each piece of tape to do the next one.
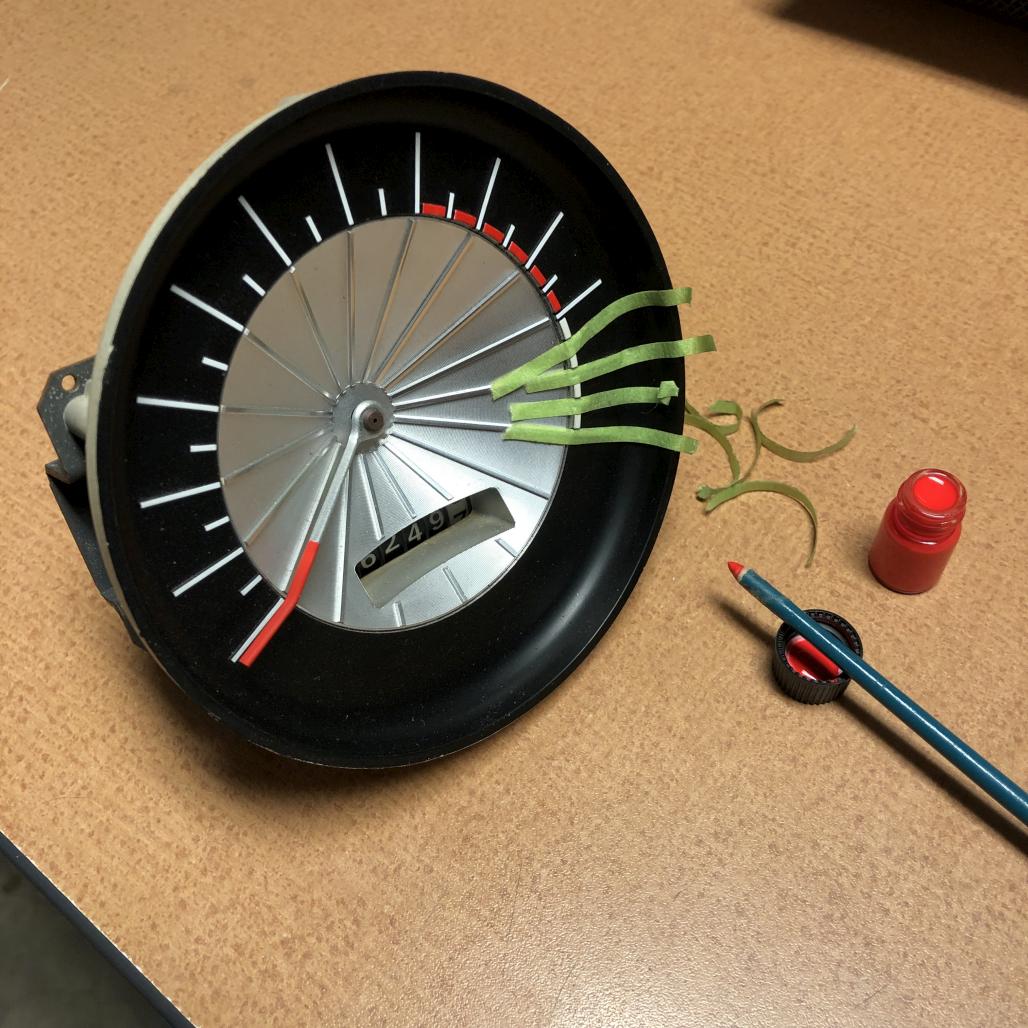
Phew! It turned out great, and I’m glad I did this. Painstaking but worth it.

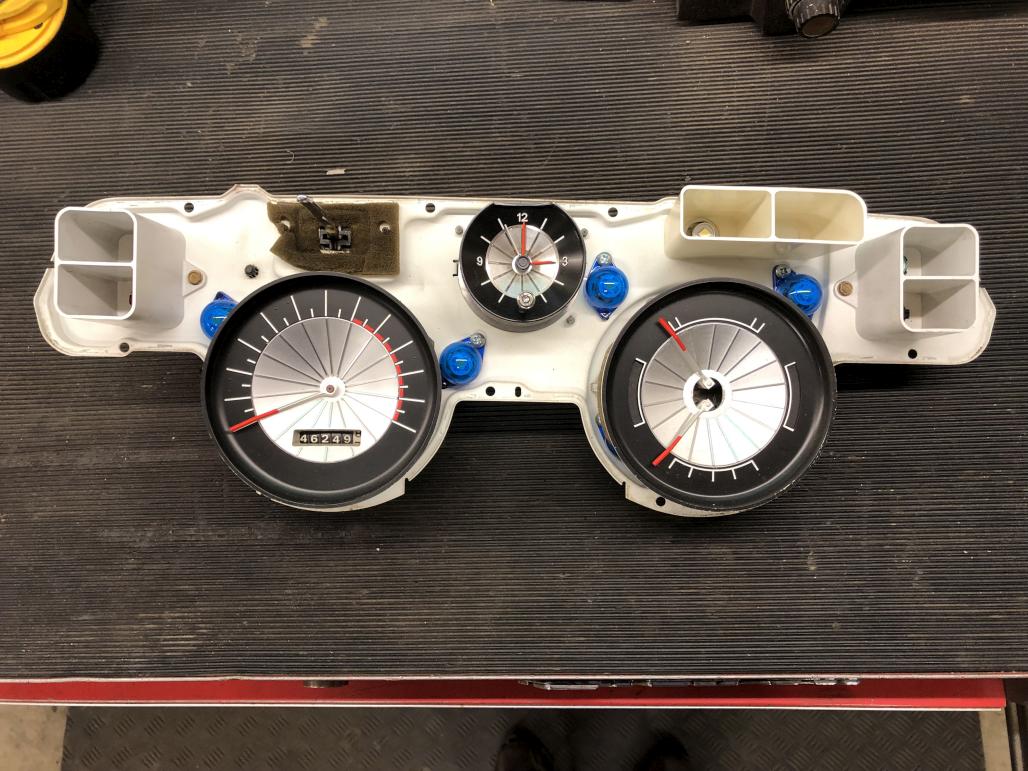
Here’s the freshened cluster back together:
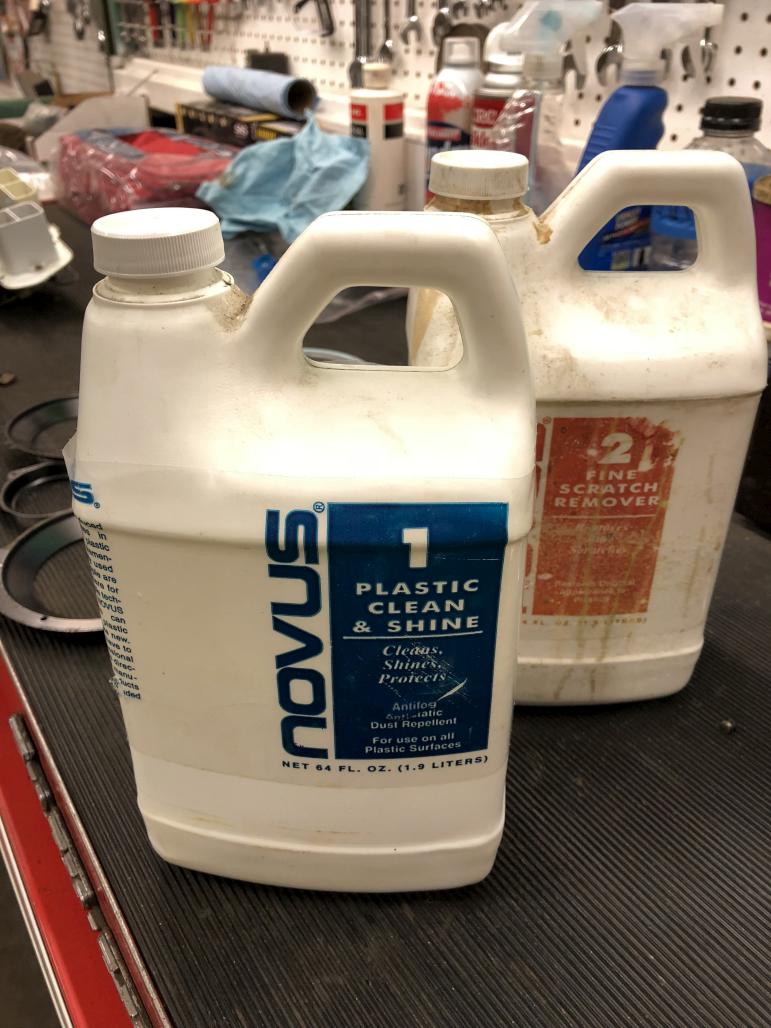
Next I polished the lenses using this Novus stuff. It’s awesome. I just did it by hand with a microfiber cloth. Probably could have gotten even better results with some form of power tool, but I’m happy with how they came out.

Found some good used cones for the lenses. For the clock lens I got lucky and found a center cap that had previously been rechromed.


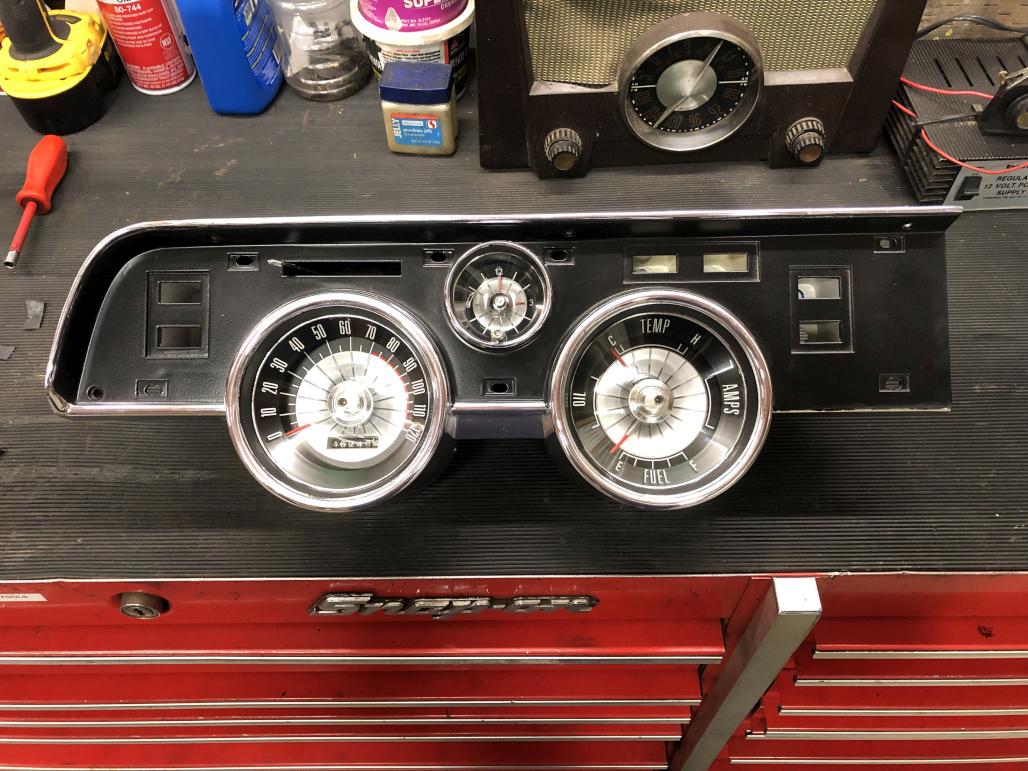
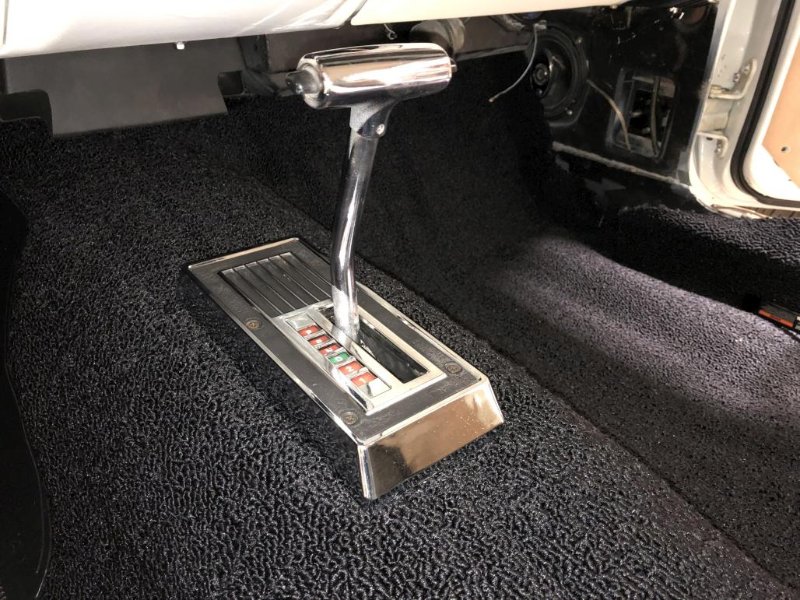
So the next big piece of the puzzle was the chrome plastic dash bezels. As you guys probably know, WCCC has been struggling for years to find a reliable, quality source who can restore these bezels using the “spray on chrome” method. Sadly I had sent my original pieces away during one of those attempts, and they never came back, and / or got lost in the shuffle of other core pieces that got returned. At this point my only options were to either get alternate cores and send them to someone like Instrument Specialties to get vacuum plated (to the tune of about $700 and 6+ months) or dig through the few “failed attempt” restored bezels at WCCC and find something that would work. I got lucky and found a set that looked decent, with acceptable blemishes. Still had to pay up for them, but about half of what vacuum plating would have cost. At the end of they day, they look fresh and shiny, so it works for me. Anyway, here’s the left piece with the gauges and lenses installed.


Then I glued back on the little foam pads that I had been saving all this time. Luckily I had been smart enough to remove them from my original bezel before sending it away. I used weatherstrip adhesive, but that might have been overkill. A little contact glue would have been fine.

Next, before installing the bezels, make sure these little clips are in place on the dash pad. If you don’t have your originals, there is a hardware kit available. They are a little tricky to get to stay in place on the new dash pad, since the material wants to push them back out. You can poke at the material to give the clips more breathing room, and squeeze them together a little before installing so that they grip the metal more tightly.
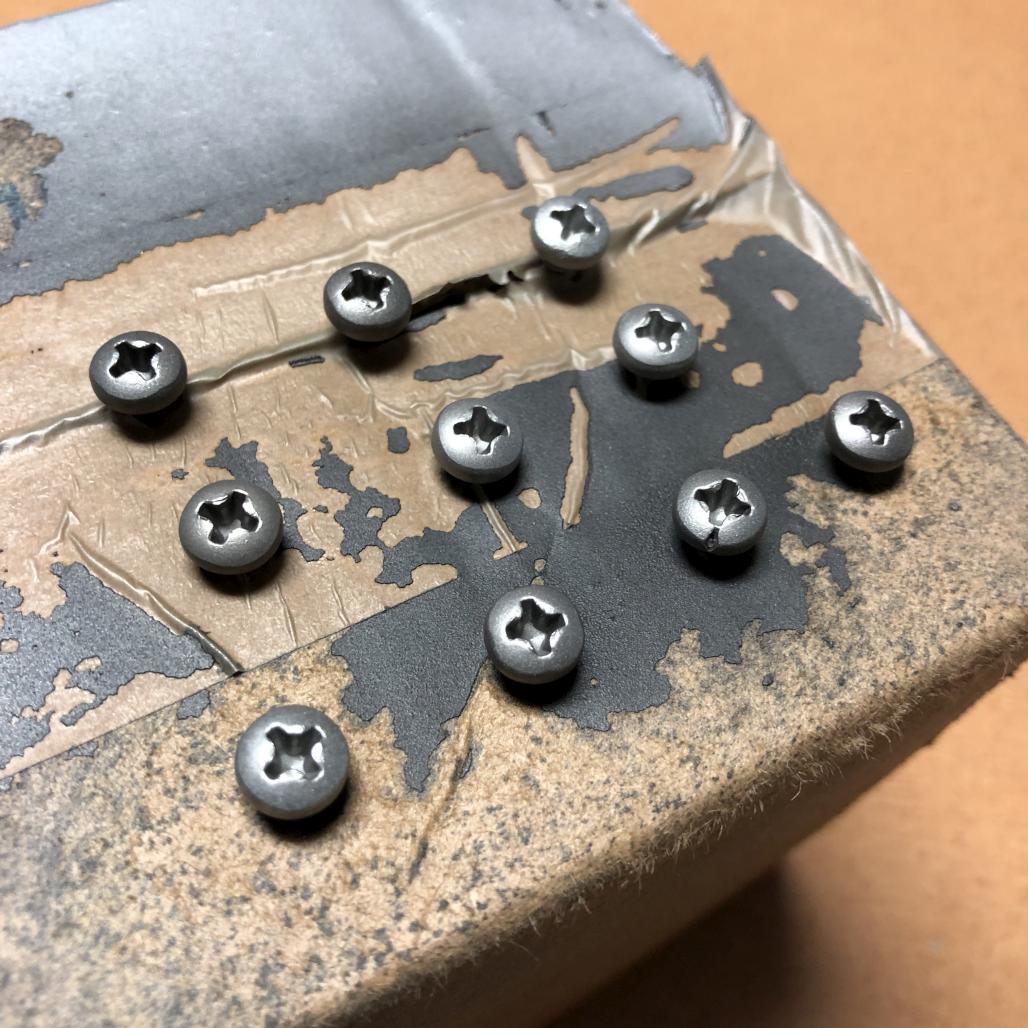
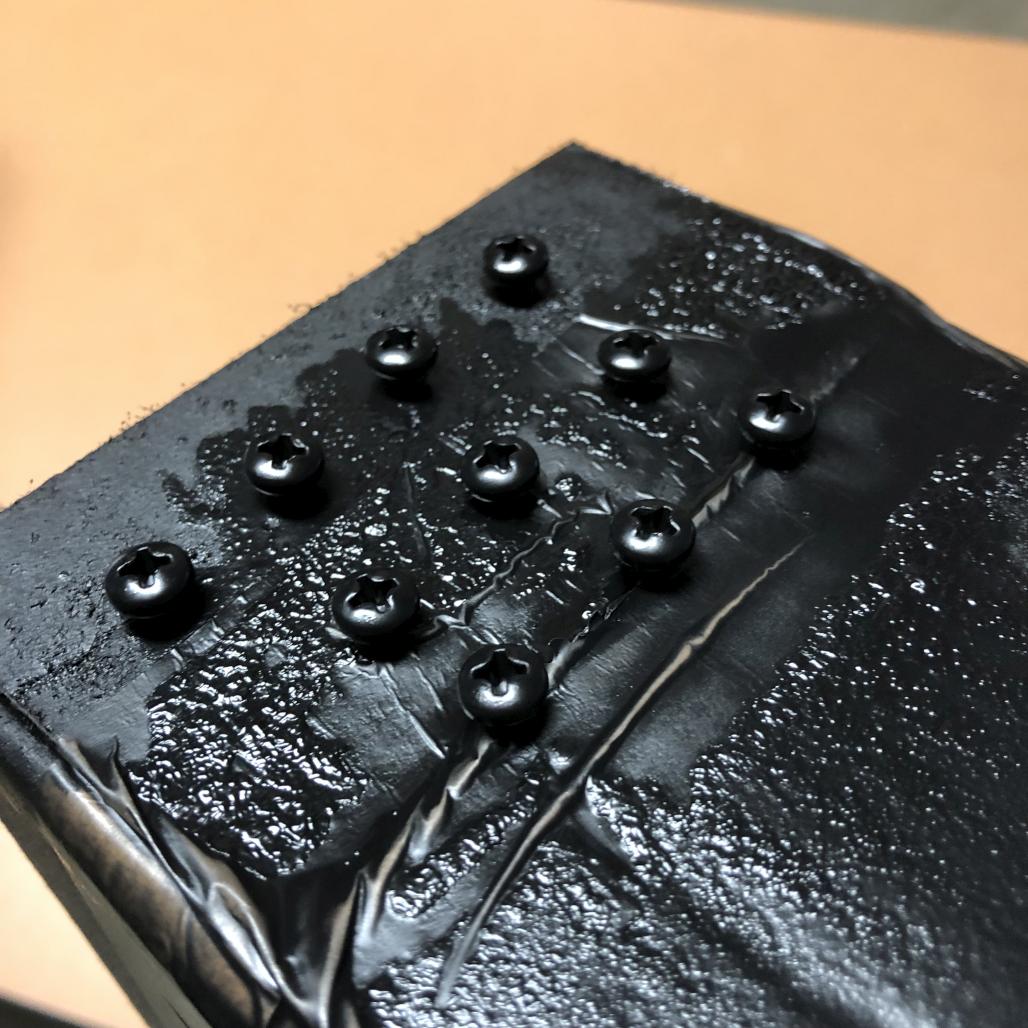
I had my original screws, but wanted to make sure they were fresh black to blend in to the bezels. So I blasted the tops and hit them with Trim Black.
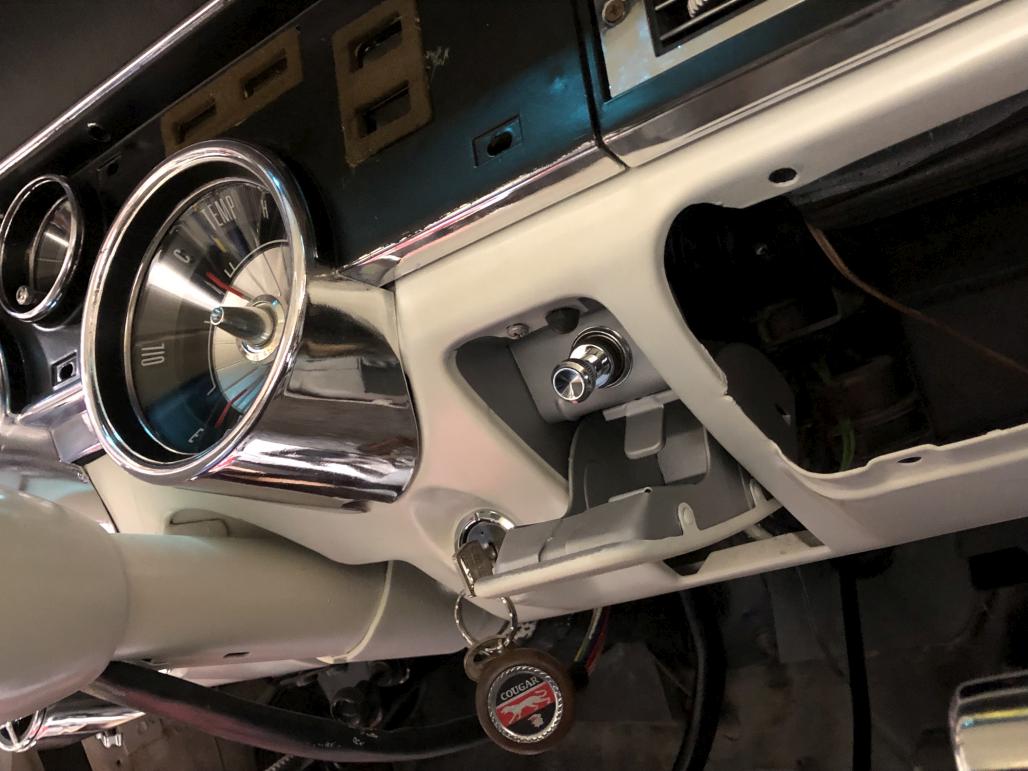
Finally I could install the bezels. The passenger side goes on first, followed by the driver. Obviously, these are somewhat delicate and you want to be careful not to over-tighten anything, especially the studs on the backside. The A/C center vent uses special screws that sit flush.

The driver’s side was a bit of a struggle. Plugging in the wiring wasn’t too bad, but attaching the new speedometer cable was difficult. The nut didn’t want to start. My one luxury was that I hadn’t attached the other end to the transmission yet, so I could have as much slack as I wanted. Finally got it on. The other challenge I think was partly due to the new dash pad. It was a tight fit, and I was a bit nervous as I was trying to shove the whole thing all the way back into place. But it worked out in the end.

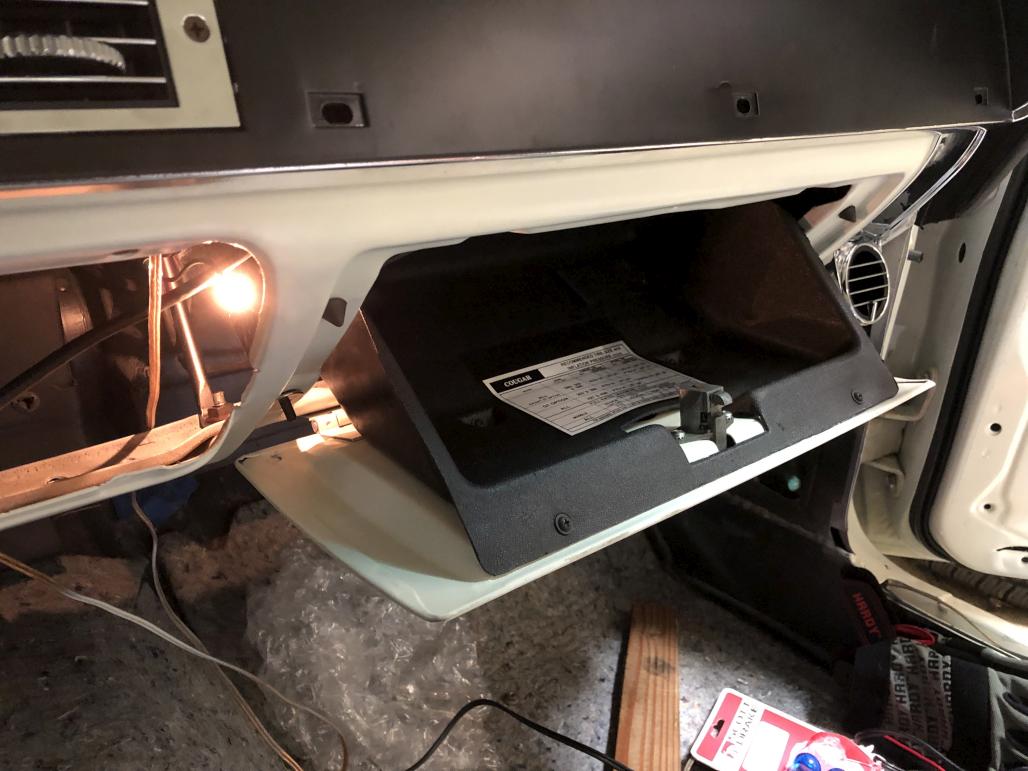
Then I went ahead and installed my freshened-up ashtray assembly:
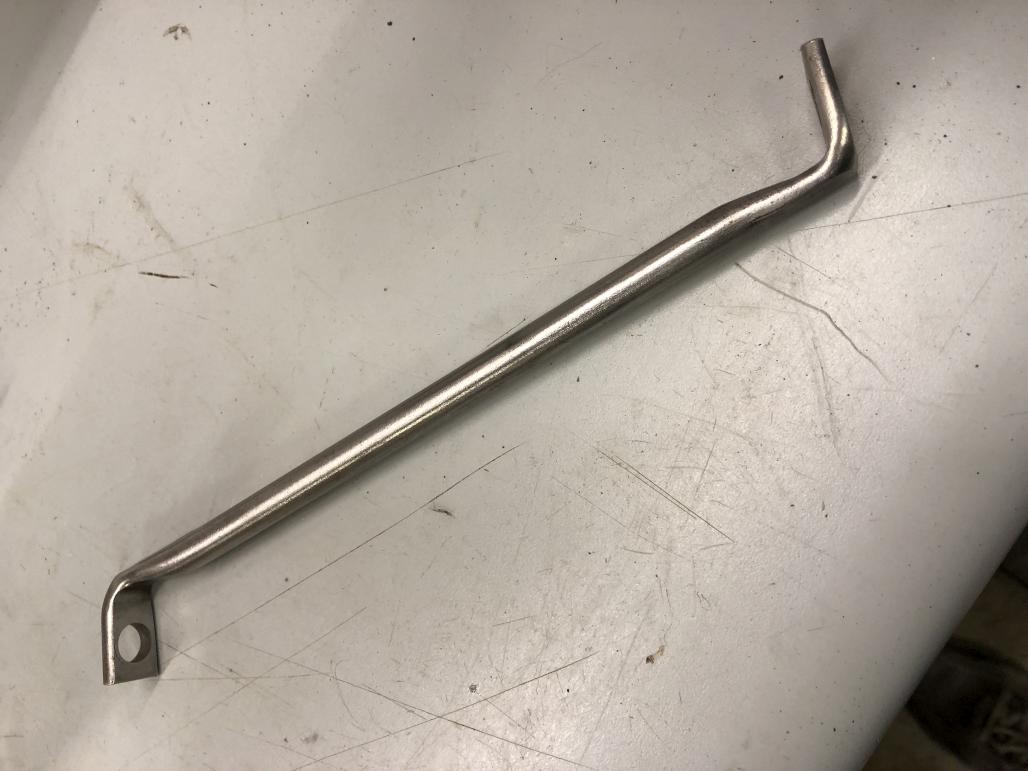
Then cleaned up, clear coated, and installed this dash support bracket. Note that it uses special large Phillips-head bolts, and a nut on the bottom one. I had to hunt around for these. Found some in a parts car in the yard.
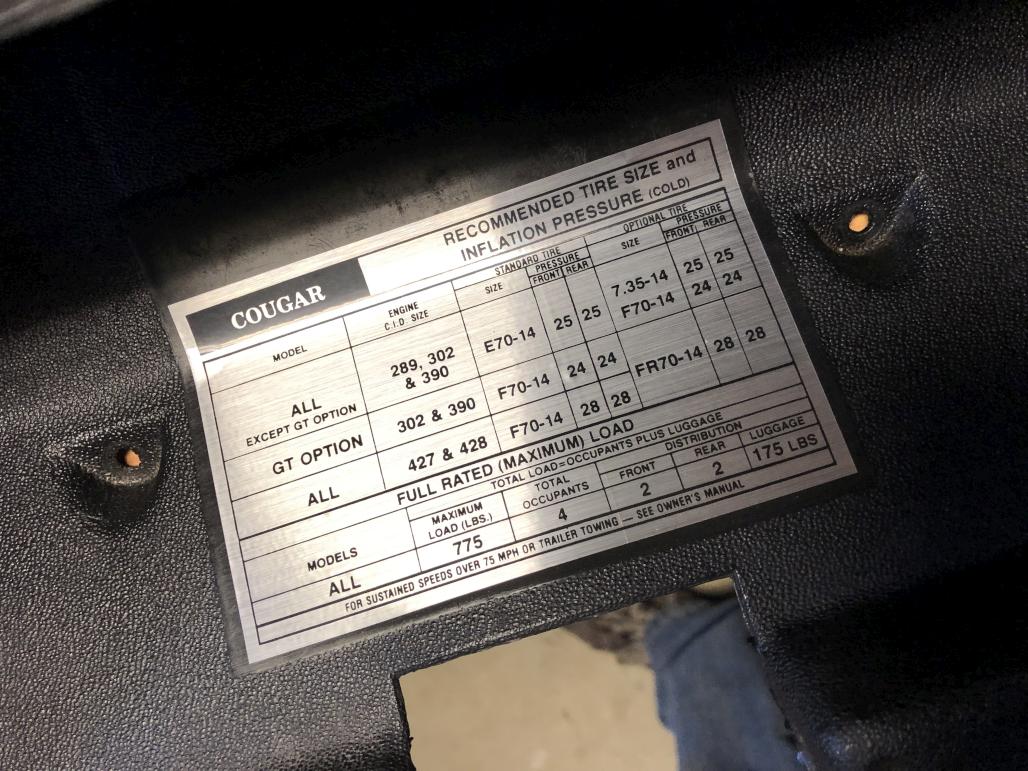
I cleaned up my glovebox liner and installed a new tire pressure decal. The original was still there, but some of it was missing and it was about to fall off.
Then put the glove box together. Luckily all the little bits and pieces are available. I had my original latch and lock, but needed all the screws. Here are some links to those: Glovebox liner screws , Glovebox latch screws , Glovebox catch screws , Glovebox hinge screws. I also put on a new lock bezel, as well as a new light and switch. Don’t forget the rubber bumpers. It all may seem minor, but it’s nice that all that stuff is available. I swear, the hunt for correct fasteners takes longer than anything else.
Alright, now the finishing touch is the face pad. My original was in pretty good shape, except for a couple little cracks. I opted to salvage it and throw some fresh paint on it. I used SEM “Super White” which will be a pretty good match for my upholstery. Also freshened up the steering wheel pad while I was at it. I had painted it a few years ago but used “Phantom White” at the time, which is a bit darker.

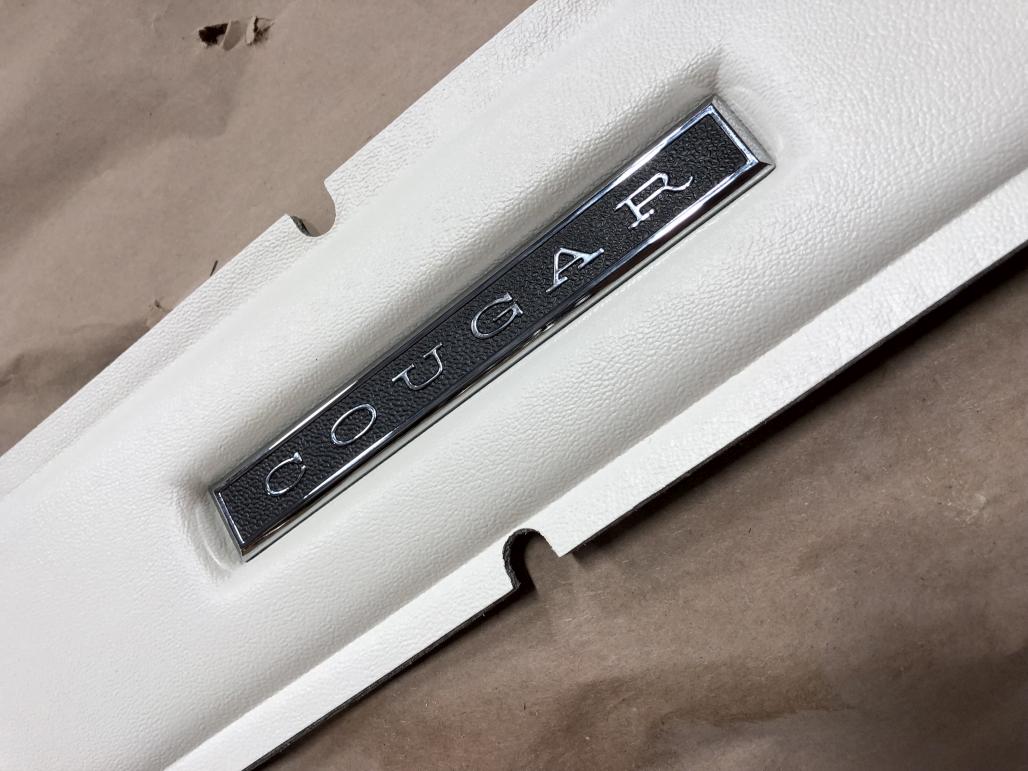
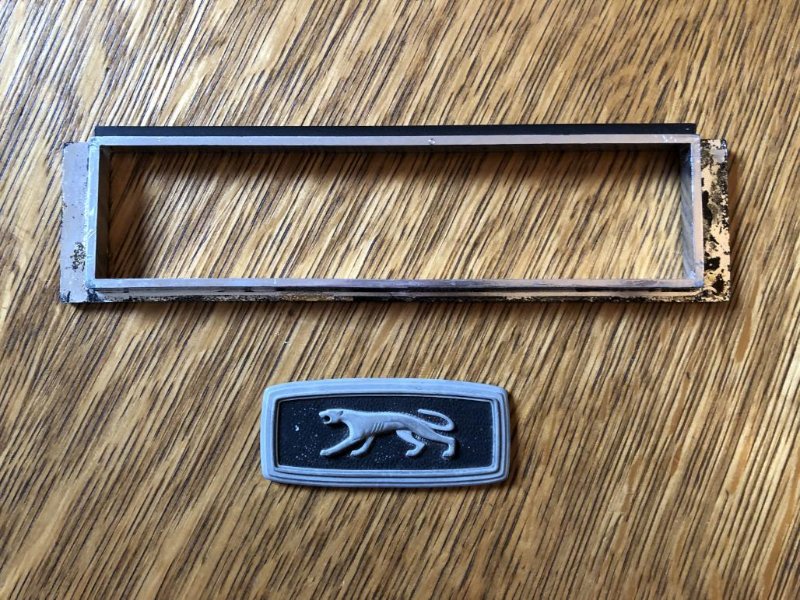
New standard dash emblem courtesy of WCCC. Nice piece, would reccommend.
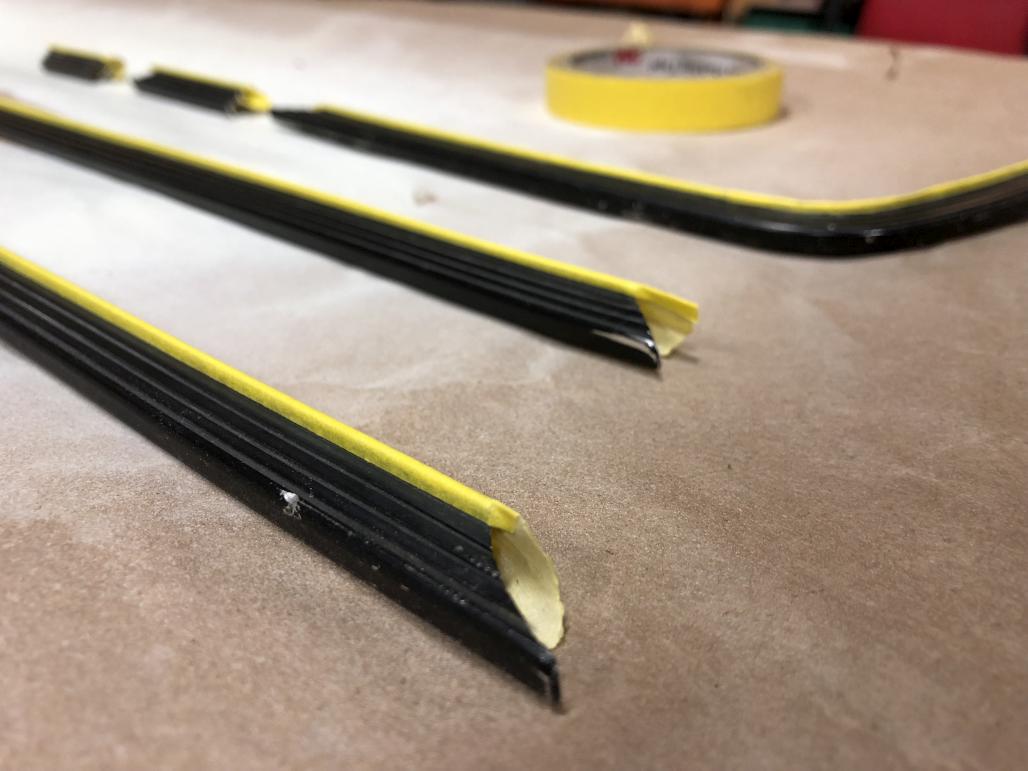
Next it was on to the black trim pieces that surround the face pad. They needed some straightening out and cleaning. There were also some divots in them from when the first body guy tried to remove the plastic bezels with a screw gun. ![]() The very edges of them stay shiny, so I masked them off.
The very edges of them stay shiny, so I masked them off.

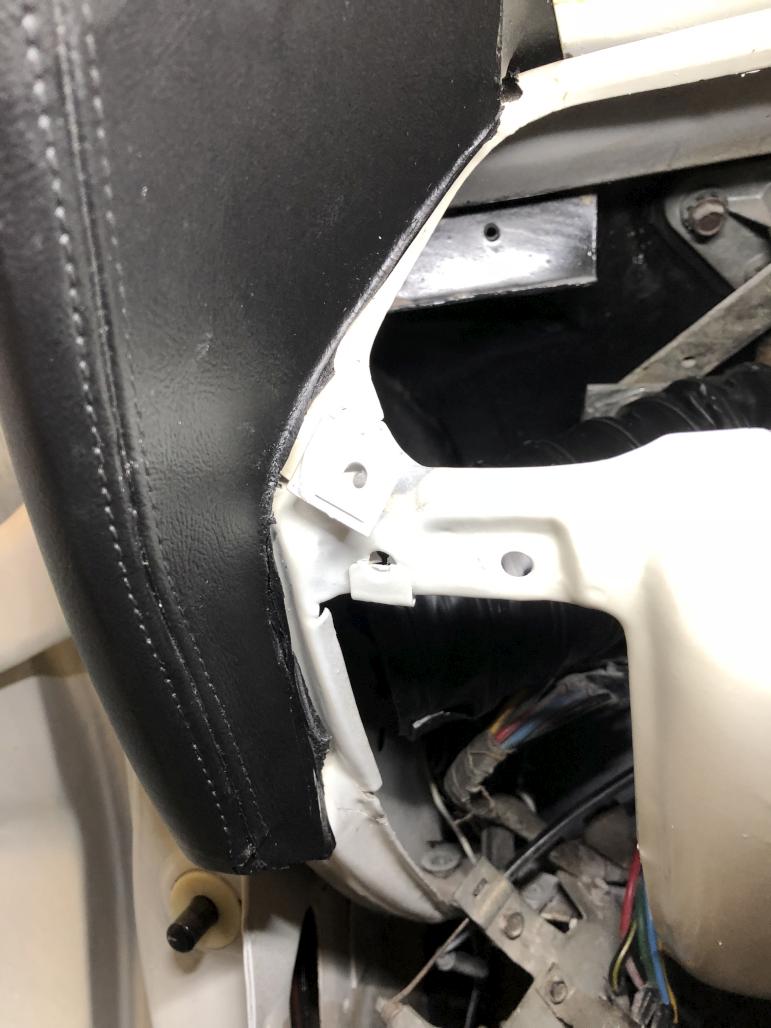
Also note that the LH corner piece is broken. It’s supposed to be one continuous piece rather than two separate ones. But it will still be held firmly in place and not be noticeable.
Closeup of one of the many divots:
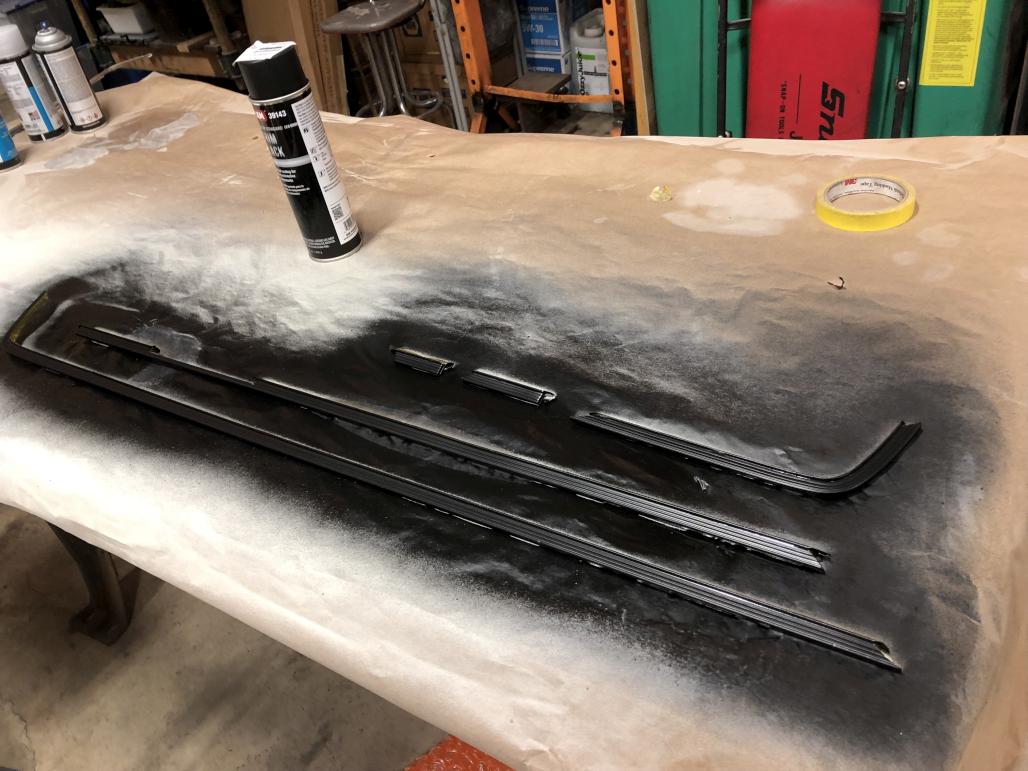
Then after a good wipedown, out came the SEM Trim Black again. It gave these a nice finish and hides those divots well.
Finally, after attaching the trim pieces to the face pad and reinstalling all the little indicator lights and bezels, I put these unobtanium clips in place. I’m lucky that I still had most of my original clips, only missing 2 of them. Not even WCCC has any of these usually, so I had to make do and put the clips I had into what seemed like the most important spots.
These clips suck. Difficult to line up in the correct place, and installation is generally quite sketchy with this fragile, valuable piece, especially when it already has some little cracks in it. Anyway, after some struggling, I got it in.


Sharp-eyed viewers will note that I forgot to put in the rectanular plastic bezel for the center A/C vent. It goes under the face pad. Oh well, I’ll do that later. Might send the bezel somewhere to be “chromed” anyway as I didn’t have good results with a chrome paint pen.
Anyway that brings things pretty much up to speed! Rear window is one of the next hurdles, then I can probably do the carpet and other major interior pieces. It’s a bit hectic but I’m encouraged by the way things are progressing.
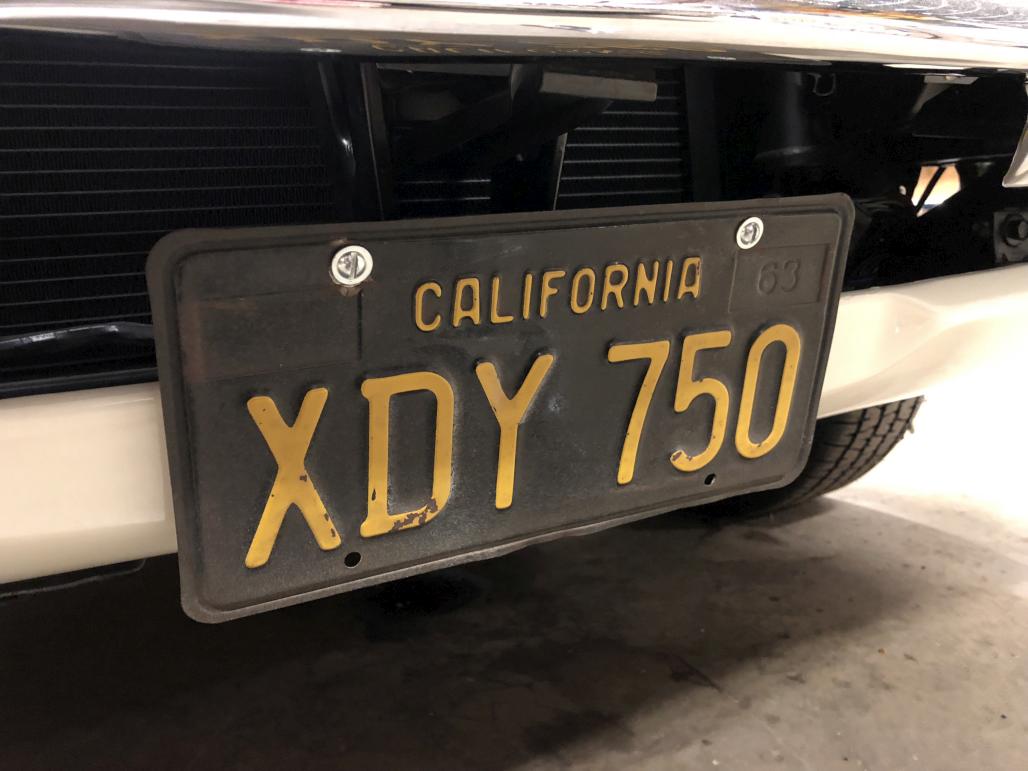
Oh, before I go, here’s one last detail. I gave the front of the car its identity back by reinstalling the front license plate. Freshened up the bracket and used new hardware. Not shown are the two little rubber bumpers that go in the bottom holes, which I installed after the pic.
Wish me luck with the rest!
Nice work Andrew. I really like the attention to detail on the speedometer.
Looking good Andrew. I can’t wait to see her done.(I bet I’m not the only one too)
Nice work. I enjoyed reading the update.
Thanks guys. I’ve still been making headway but my end of year goal isn’t gonna happen. Oh well! That’s okay. In other news, I may have to pull my instrument cluster back out - the fuel needle goes all the way up beyond Full when I turn the key on, and there’s hardly any gas in it. So could be a ground issue or IVR. No way to really know without pulling it back out. ![]() Will cross that bridge a little later. Also no turn signals. Blah.
Will cross that bridge a little later. Also no turn signals. Blah.
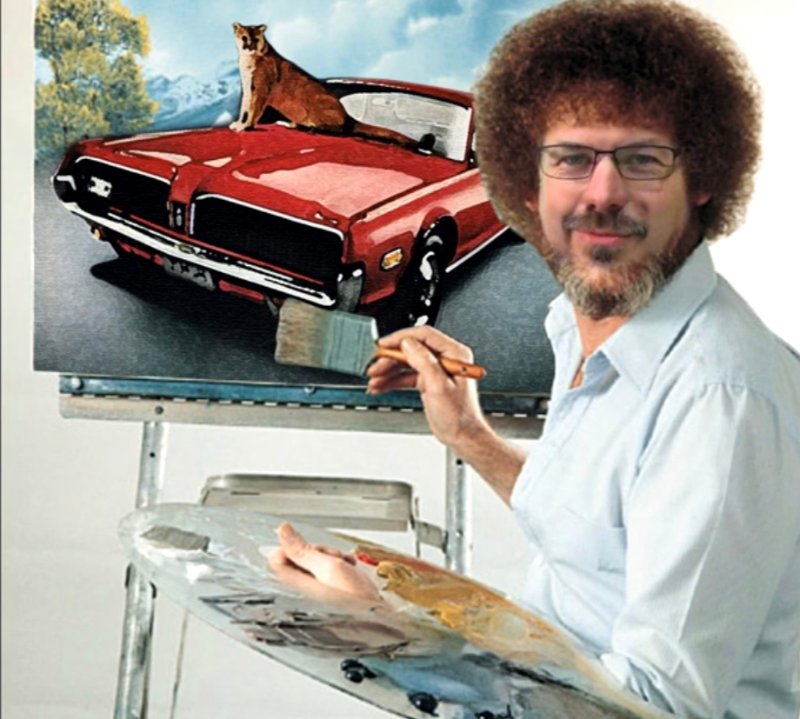
But all I wanted to share for now is this new video! It sure is nice when you can get free labor from Don Rush. ![]() I shot the video for free too, so it was a win-win. This is the windshield installation, and it went easier than I thought it would. I think it’s one of those things that seems intimidating until you do it, as long as you know a few basics.
I shot the video for free too, so it was a win-win. This is the windshield installation, and it went easier than I thought it would. I think it’s one of those things that seems intimidating until you do it, as long as you know a few basics.

Anyway I’m taking a break for the holidays, but will be back at it in January.
Great Video! too bad I paid to have mine put in, after watching this I’m sure I could have done it. made me laugh when you cut to Bob Ross ![]()
anyway, looking good Andrew.
Great video, now that I think about it Don pretty much is the Bob Ross of classic car restoration ![]()
Now THERE you go!
Thanks for posting your progress. I know I’ve said it before but your thread is really helpful in putting mine together. I reference it pretty frequently if I have questions on how something goes together. I did not take mine apart and it’s been 20years since I’ve worked on a classic car. I have the assembly manuals and workshop manual but sometimes a real color photo on a real car can not be beat.
I really dig the windshield install. I’ve watched a couple videos before and I cant stand the people installing(trying to tell jokes and entertain rather then instruct.
I also liked a couple of your tricks(edger string and clips on first)
Keep at it Andrew and reward yourself for the small victory’s! Your on the down hill stretch buddy!
LOL! I love the “Bob Rush” picture too.
“Look here, we have a happy little Cougar. Just gently rub the paint, that’s it. And wipe it down. Wipe it down.”
grin
You guys are the best. Keep up the great work, Andrew!
T think we all need more of these…

But they may contain a controlled substance…
The next WCCC T-shirt??? ![]()
Well, probably time for another update! It always feels like I haven’t gotten much done, but then I look back at where I was the last time I updated this and realize that I have made some good progress.
I’m going to start using the attachments feature for images since Flickr has now decided to limit their free accounts to 1000 images… I already have 900-something on there so… yeah.
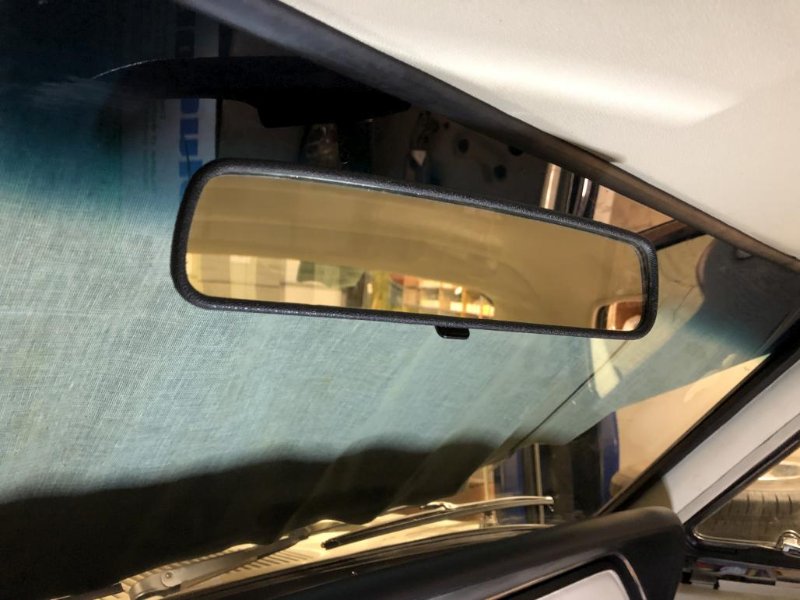
Rear view mirror glued on. I reused my original housing but installed a re-silvered lens. Also replaced the mirror mount and arm with new ones.
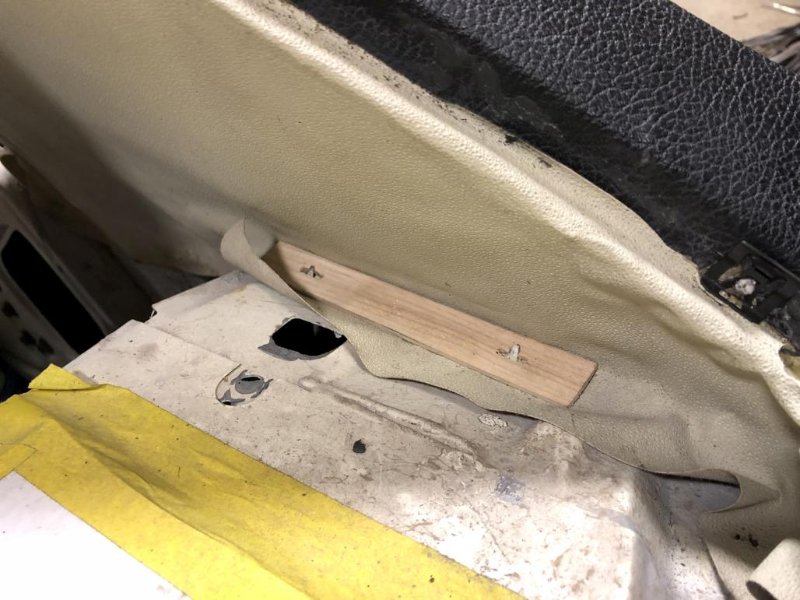
Next, I was getting ready to install the rear window, but had one little loose end to finish first. I was reminded about the little headliner hold-down strips by Royce’s build thread. So I found an original from a parts car and used it as a template to make new ones out of wood (free paint sticks from Lowe’s). Originals are some kind of cardboard, I figured wood would be a bit stronger.

They are held in place by two pointy metal tabs built in to the package tray.
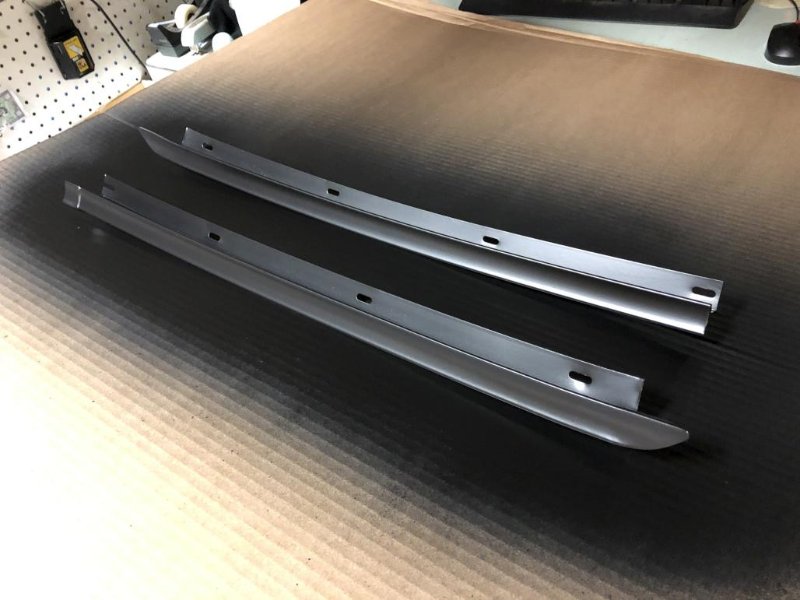
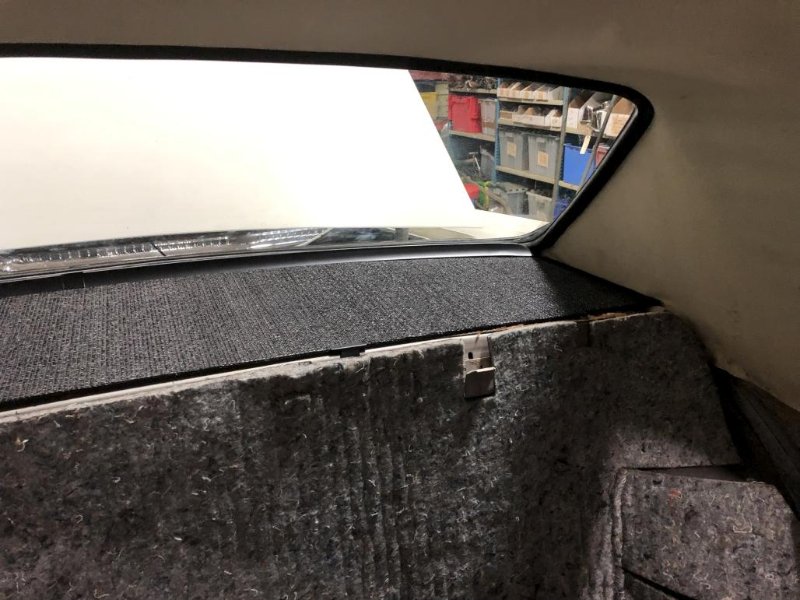
Then the rear window went in, using the same basic method as the windshield. We didn’t put the goop in yet, but at least got the rubber & glass installed in the car. So the next order of business was to blast & paint the rear trim pieces and install them along with the package tray.
This is still the package tray I made back in high school (or early college?) out of masonite and garden shade screening. It does a nice job of hiding the 6x9 speaker cutouts while being basically transparent for sound. That said, I’m not worried about wiring up the full stereo system now, just trying to get the overall car finished and together.
I used new clips for the front of the package tray since my old ones were missing. Used ones might be better quality. You can also see I installed the rear seat back insulation, which was part of this kit. It’s held in place with pointy metal tabs just like the headliner retainers. No glue or extra fasteners were needed, the factory attachment points seem to work well. There are a few along the top, and a couple on the diagonal support pieces.
One of the next things I did was to install the vapor shields for the doors and quarters. I used the 3M Strip-Caulk all the way around the perimeters to attach them. I almost got through the whole restoration with one box of the stuff, but had to get a second. It has come in handy for a lot of things. Anyway, those circular holes on the doors were covered over with gaffer tape after this pic. Being a Standard, I have no lights in the door panels.
Meanwhile, there were a couple small plastic pieces I wanted to get “chromed”. Since there’s still no good spray-on-chrome service that I trust, I sent them to get vacuum metalized by Vacuum Orna-Metal in Michigan. Here’s a before shot. Steering wheel center emblem and A/C center vent bezel.
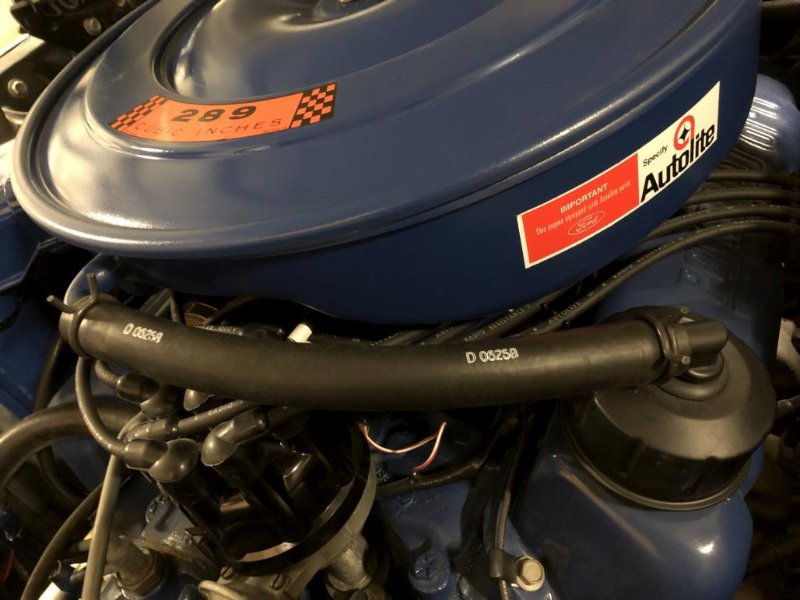
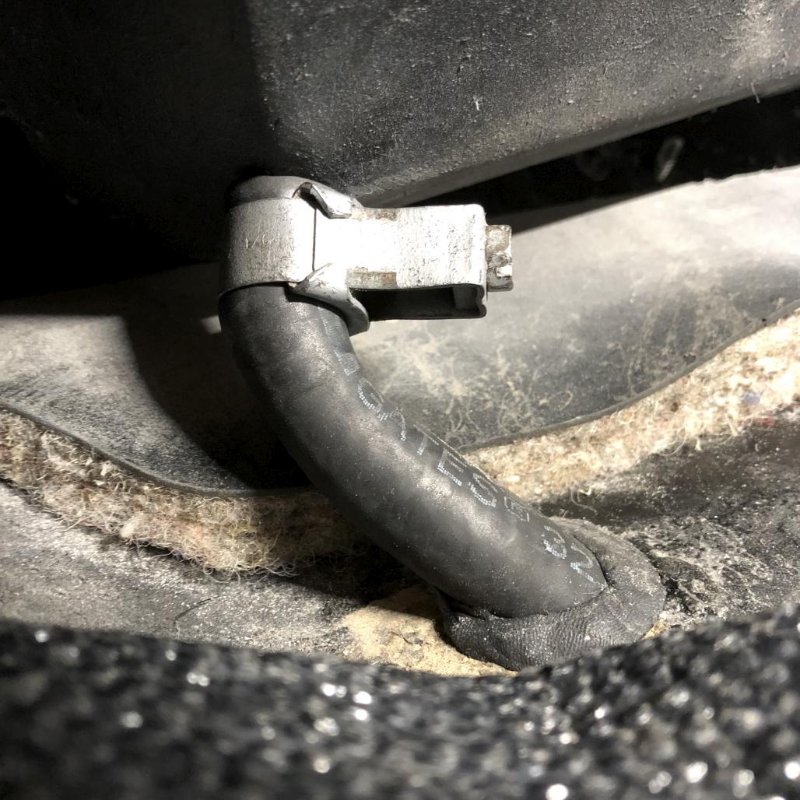
Now a couple random things to fill in the rest of the 10 attachments per post. My old breather hose was rock-hard and starting to crack. Luckily, these new date-coded breather hoses just became available, so I got one that was close to my build date (actually coded for about a week after my car was built, but close enough for me). Also installed these clamps even though I haven’t noticed clamps on other cars. Just means I’ll have to take the oil cap off with the air cleaner, which might be annoying.
Another example of all the little things that eat up time. I cleaned up and repainted my original sun visor bracket, using SEM “Super White” (which in my case matches my whiter-than-stock interior pretty well). New ones are available in black but my original seemed ok.
Finally here’s a shot of the LED dash lights in action. Also you can see the beautiful crack in the face pad, right in my sightline. Not ideal. I may end up taking this stuff apart again, at which time I may try to fix this. Not sure how, though.

More to come in next post.
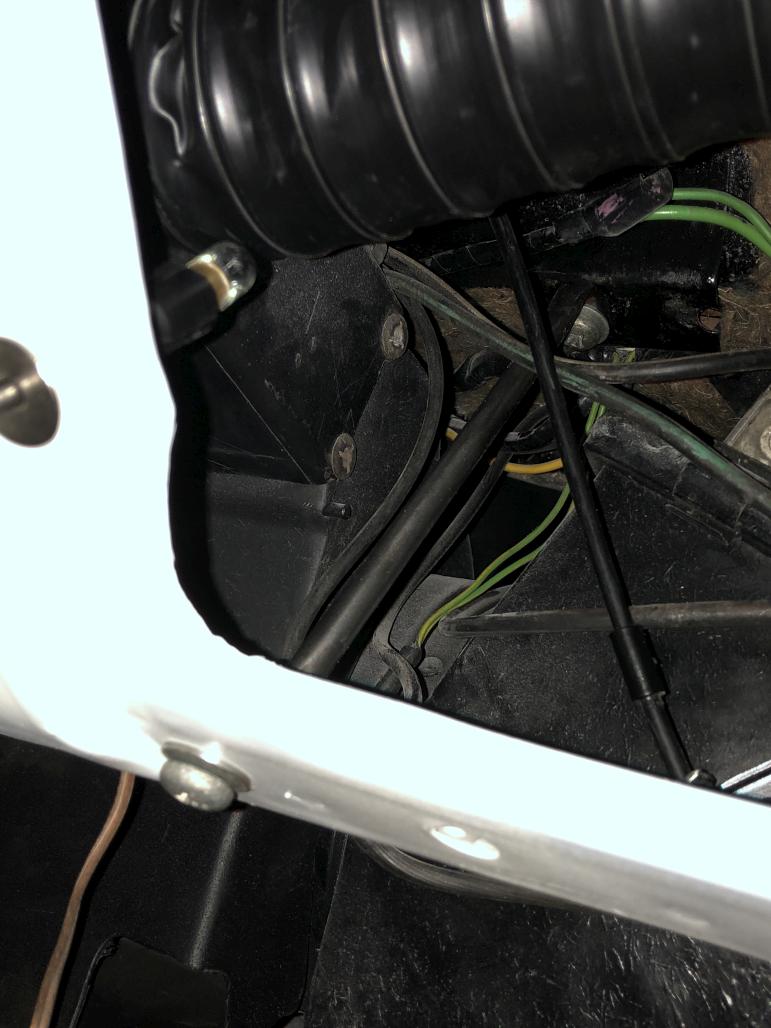
So at this point, I started thinking of what else I needed to do before installing the carpet. One of those items was to finish wiring up the electric headlight motors. The trigger wire is meant to hook in to the center wire of the high beam switch, so I’d have to run the (blue) wire from the front of the engine bay into the interior. I wanted to hide it so it wouldn’t look out of place. What I ended up figuring out was to fish it through a ribbed vacuum hose that looks OEM, and use a body plug as a grommet for the hole in the firewall, previously used by the 3 vacuum hoses for the headlight system.

First task was to get the length of the hose right, then cut a piece of strong wire a little longer and fish it through.
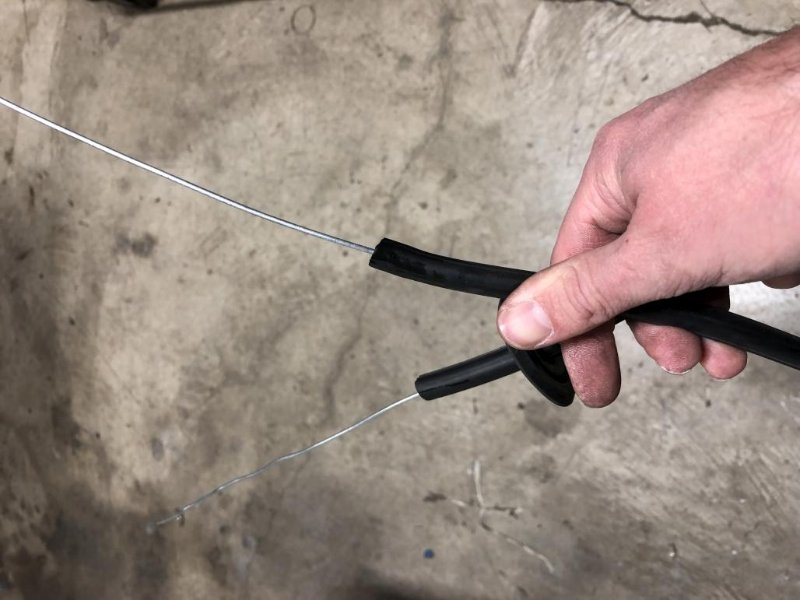
Next, hook the wire up like so and wrap in tape.

Then I sprayed some lubricant inside the hose until it dripped out the other end, and pulled the wire all the way out the other side. It was a little bit of a struggle but I eventually got it through. Here’s a view from the engine bay side after installing the grommet:
…and a view from inside / under the dash.

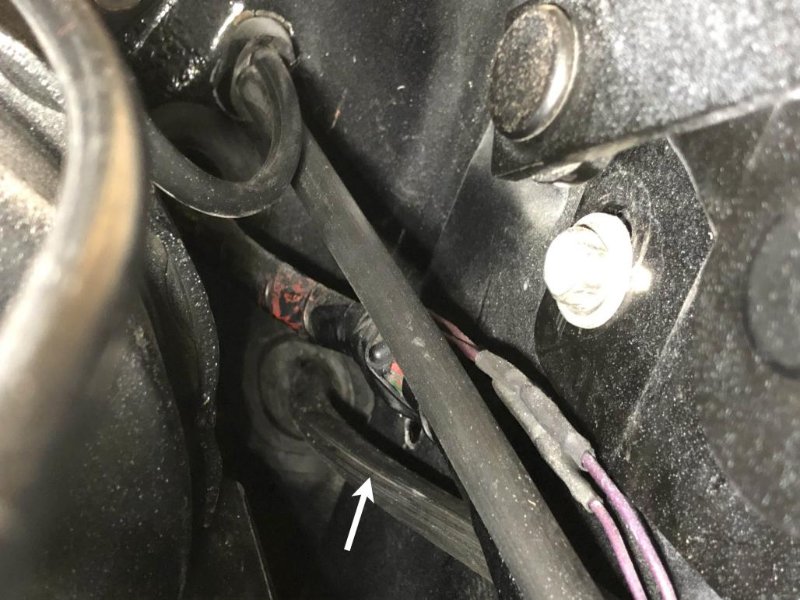
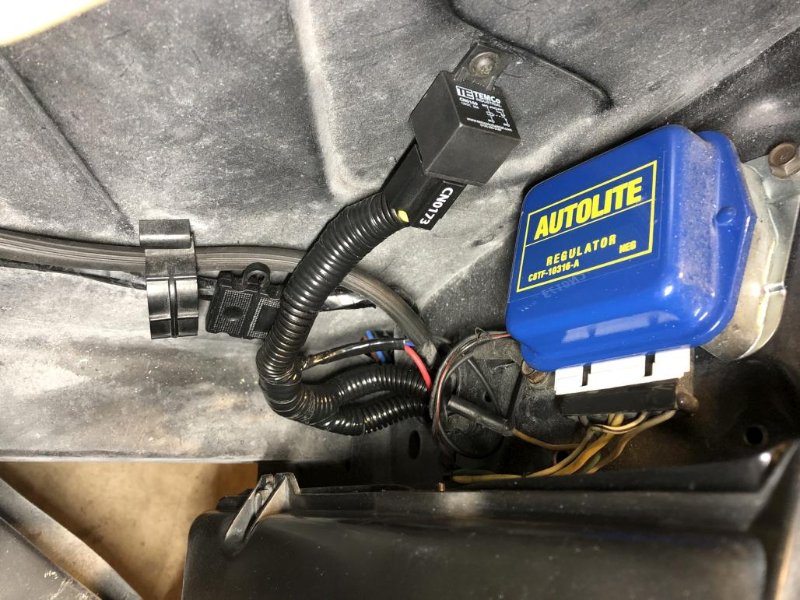
Here’s a look at how & where I mounted the relay. Driver’s side inner fender apron towards the front. The hole was already existing on the apron, though I’m not sure what for. You can see that I ran the hose about as far forward as I could to hide that blue wire. For the ground wire, I installed a ring connector and used the bottom bolt on the voltage regulator. I ran the red wire across the front where the factory wiring is, but think I’ll do the same vacuum hose trick to hide it. Currently, it snakes up under the battery tray and attaches to the positive side of the starter solenoid. Not too obtrusive.
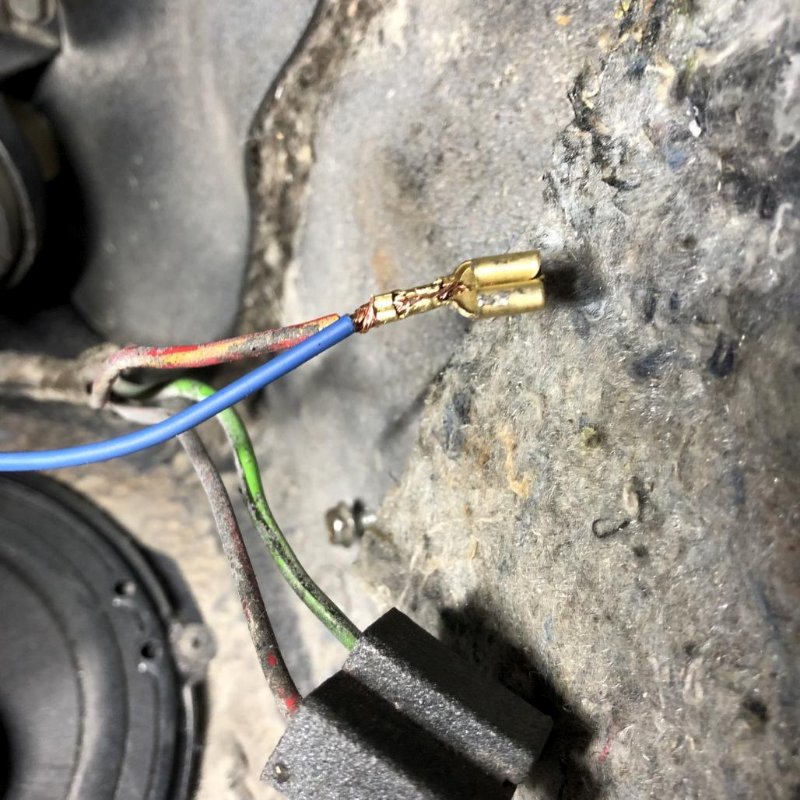
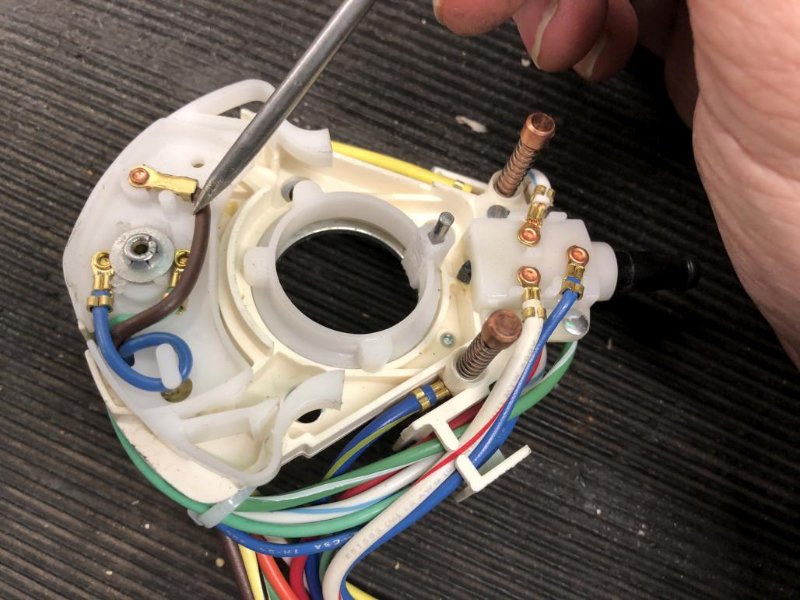
Anyway, the last task was to connect the trigger wire. So first you have to remove the center wire from the high beam switch plug. This is accomplished by poking up the little tab on the connector and gently pulling.

Ideally, you’d want to open up the crimped connector to free the original wire without cutting it. I tried but I just couldn’t get it. So I cut it off as closely as I could. Then took the connector over to the bench and after a bit too much of a struggle, was able to get the old copper out and open it up. Then I could combine the two wires together and crimp it back together. After this pic I wrapped it up in electrical tape.
Then I could reinstall the connector into the plug, plug it in to the switch, install said switch, tape the trigger wire to the existing wire holder with cloth tape and intall that, etc. Turned out to be a pretty clean installation.

Finally, here’s a quick look at how sneaky this is. I know it’s not going to fool everyone, but it maintains a stock appearance.

The electric motors work very well. I did have to remove the arms from the motors and move them one tooth over from where they were set. They were clunky with their initial setting, but work nice and smoothly & quietly now.
Still more to come…
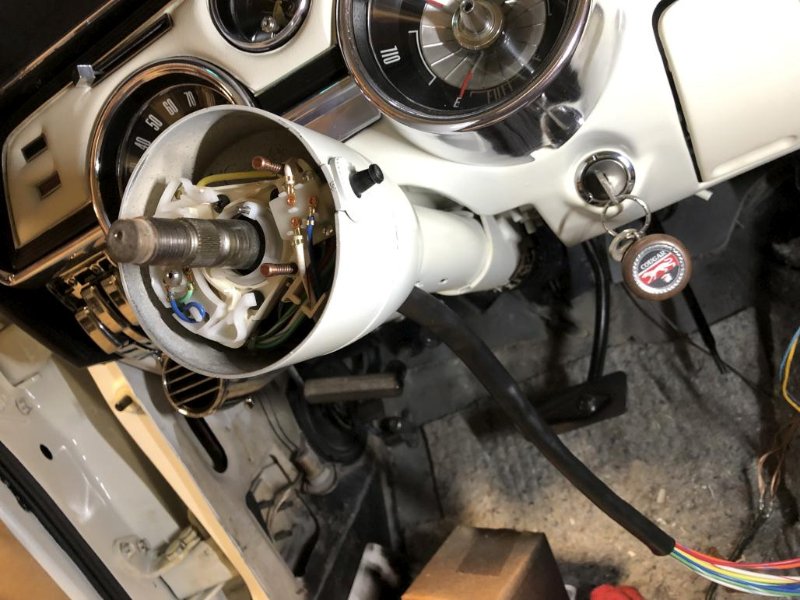
For my next little project… I found that the turn signals weren’t working properly anymore and traced the problem to the turn signal switch (with some help from WCCC electrical guru Richard). So I pulled off the steering wheel and this is what I saw:
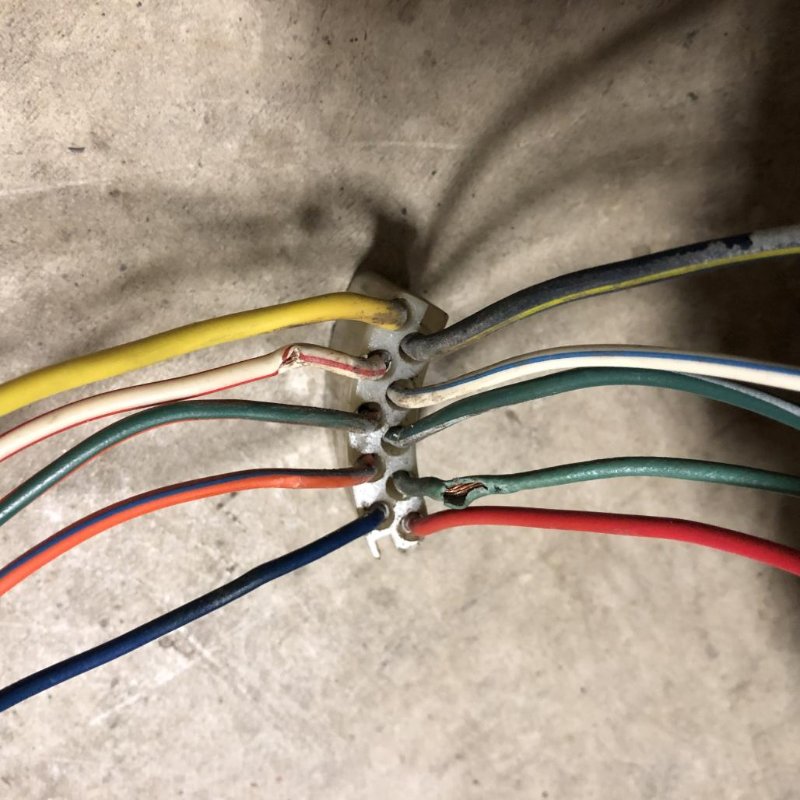
I’m not sure why I didn’t try to clean it and see if I could get it working again. I just opted to replace it with a new switch. I feel kinda guilty now, but I ended up cutting the wires to the plug. Anyway, I kept that as a reference to where the individual wires on the new switch would have to go in the new plastic plug.
Pinched wires are a result of me pulling the whole thing through the column with the plug still on… anyway…
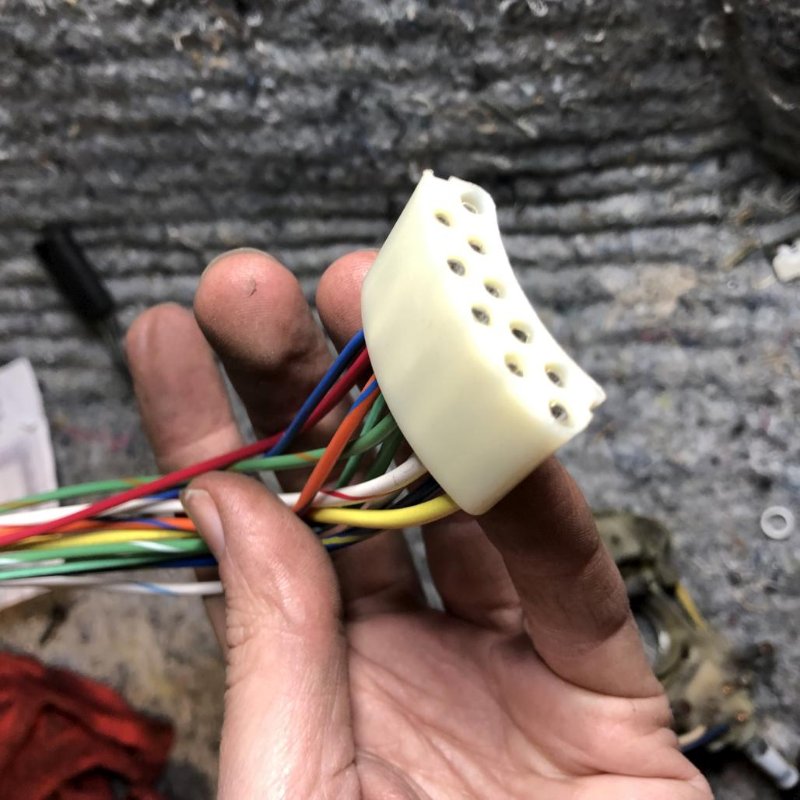
The new switches are for multiple applications, so there are a couple extra wires in place that aren’t used on my car. I carefully compared the original switch with the new and found that these two needed to go away. This brown one:
…and this yellow / black stripe one:
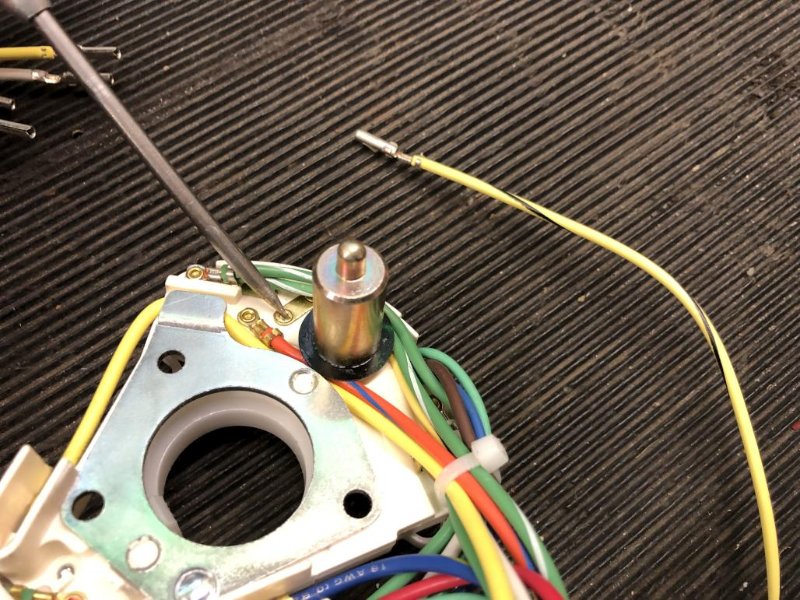
After removing them from the situation, I could fish the new switch through the column:

…install it, and transfer over the protective rubber sleeve from my original switch:
…and then install the wires into the new plug, using the original as a reference. I traced all the wires to make sure the colors were the same, and they were.
And finally here’s the result, and now the turn signals work again.

Overall the new switch seems fine, but it feels more brittle than the original. The plastic makes more of a “CRACK” noise when you turn the lever. Maybe it just needs to wear in.
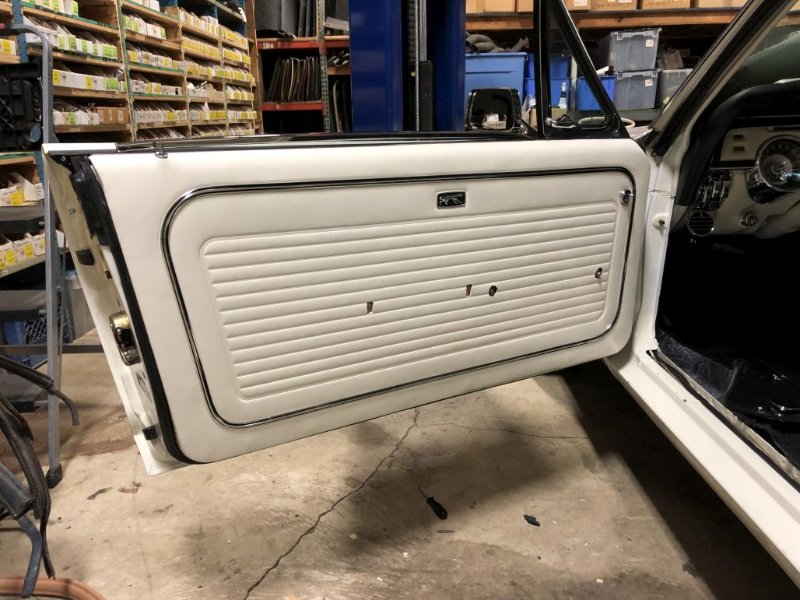
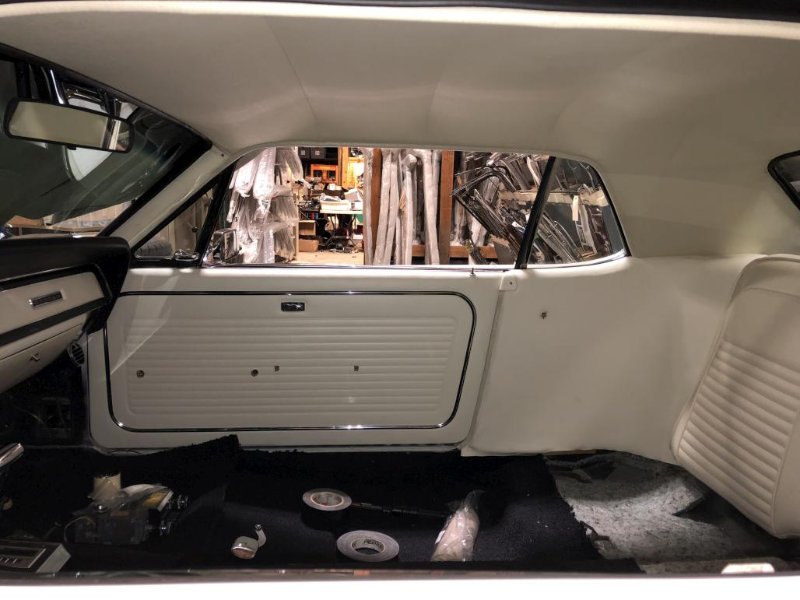
So, on to more interior stuff. One big milestone is that I got my new door panels from SMS! I go more into that whole experience, with more pics, in this thread. It took 9 months but I am happy with the results.

So right off the bat you’ll notice that there are no holes in place. So I started by cutting the holes for the lock knob grommets, and installing them. Luckily, since I provided SMS with the WCCC backer boards and my original metal rails, all the holes for handles and armrests and lock knobs were right where they were supposed to be. More on that later.
And there’s still more to come…
Alright, so around this time I was finally ready to throw down some carpet. But first, I made some extra little insulation pieces for the seat butt areas. The 7-piece insulation kit came with an extraneous piece that I couldn’t figure out what it was for, so I cut it up.

Then it was on to the carpet! I opted for the regular OEM style replacement carpet rather than the mass-backed version, since I had already put down insulation. The regular one does come with some padding on the underside for the footwell areas.
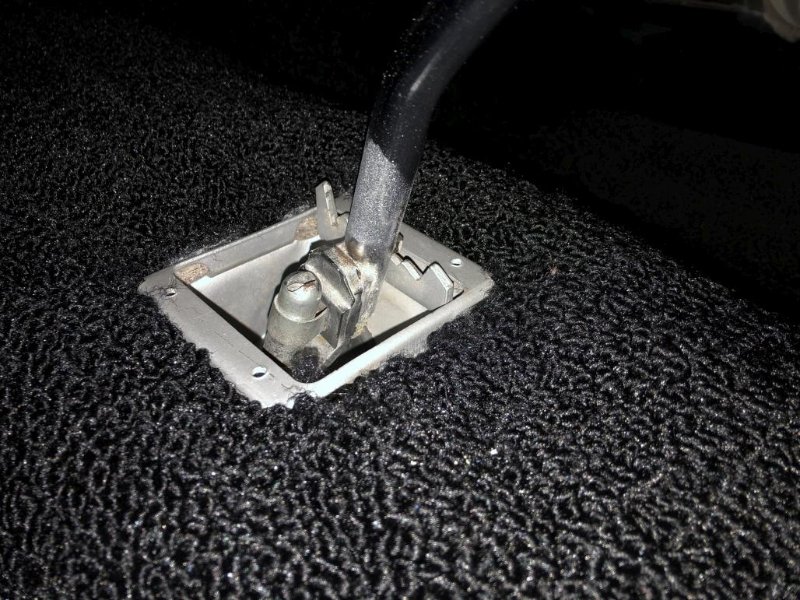
The rear section was pretty straightforward, but the front requires a couple holes to be made. So I fiddled around with it until I like where it was sitting, then made holes for the high beam switch and the shifter. The carpet kit comes with a little plastic grommet for the high beam switch, which is nice. But where the hole ended up for me was a bit off from where their padding would suggest:

For the shifter, I started with a small “X” to get the carpet over the lever, then carefully cut out the rectangle just big enough.
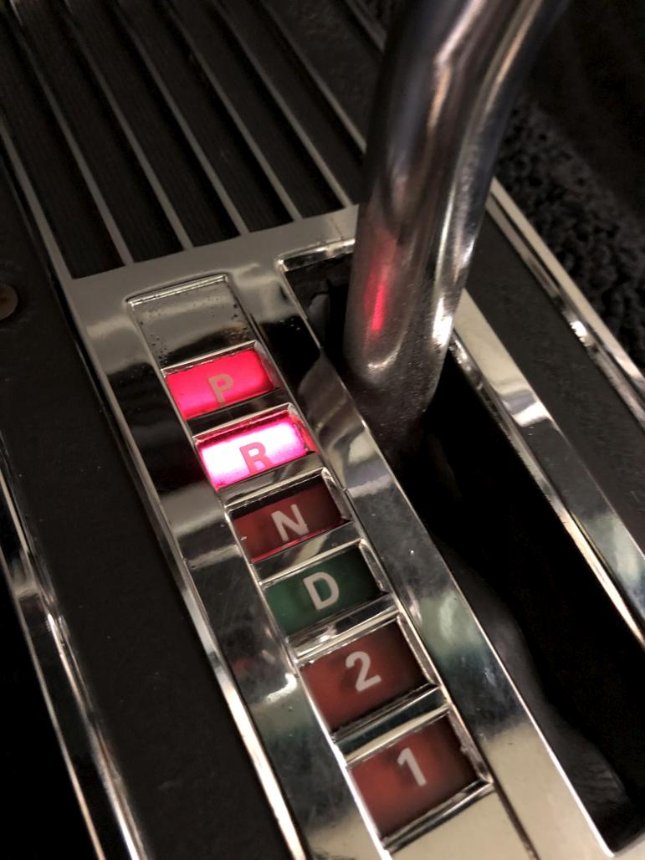
Then I went ahead and installed the remaining shifter bezel pieces to help hold the carpet in place. Nevermind the white overspray on it, I cleaned that up later…
So here’s a handy tip. I was a little perplexed at first as to why my shift indicator lights weren’t lining up. When I was in Park, it would light up the R, etc. Turns out I had the little plate under the bezel upside down. The ends should curl down towards the carpet, rather than up towards the bezel. So this problem is now solved.
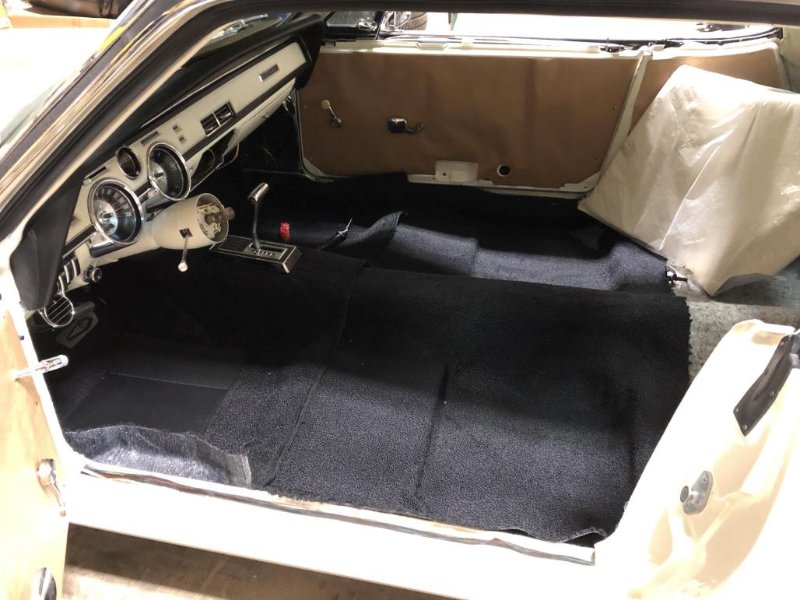
Anyway, here’s a “pretty much finished” shot, before doing final trimming:
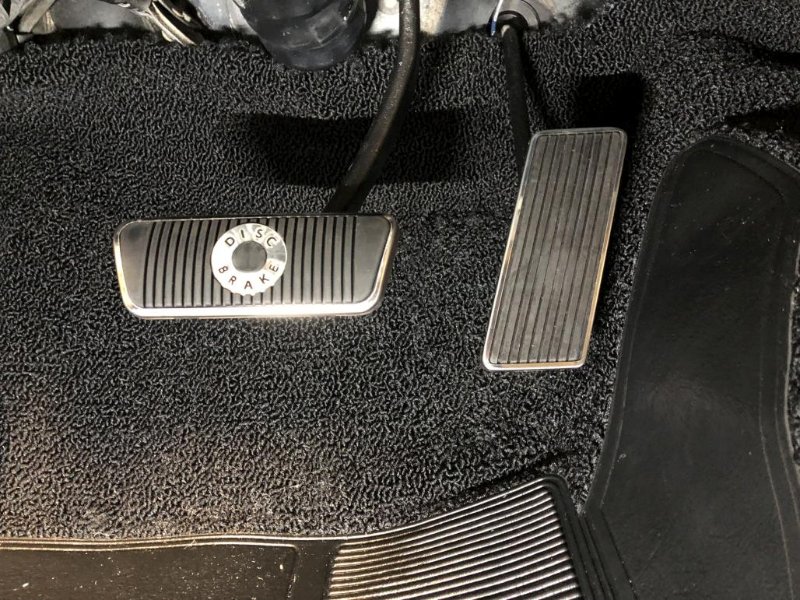
Definitely starting to look more like an interior now. So, one of the next things was to install a new gas pedal, along with a new spring and special screw, as well as a new disc brake pedal pad and trim.
Also, I finally got around to making a drain hose for the heater box. I couldn’t use the repro hose because my box had been repaired with a piece of copper pipe that was a different diameter than the original drain tube. So I got a piece of appropriately-sized hose and glued a washer on the end to mimic the small hole in the original. I think the idea is to prevent mice from crawling up there.

Installed, and gooped around it with some more 3M Strip Caulk.
Here’s a handy tip relating to the carpet. When you go to locate the holes for seats and seat belts, start off with a small awl, then a bigger punch to widen them a little. When you’re sure of the location, use a soldering iron to melt a hole through the carpet in the correct spot. This creates a nice round hole with hardened edges, so there’s no worries of snagging fibers or unraveling strands when you go to screw things in. It also makes the holes easier to see, which will come in handy especially when it’s time to put the front seats in.

Still more to come…
Now that the carpet was in, I was looking forward to installing the rear side panels and door panels. I started with the rear panels. I had gotten them re-covered with some extra vinyl I requested along with my seat covers, so they’d match. Luckily for me, having just a basic Standard car, there’s no fancy pattern on the rear panels, they are just plain vinyl. So all I had left to do was cut holes for the window cranks, make some refinements to what the upholstery guy did (too much padding which I had to trim away from the edges that mattered, didn’t account for the corner cutout where the metal plate goes, etc), and install the beltline strips.
I’ll spare you the whole story, but I spent some time trying to make the included staples work, only to find that they were way too short, and there was no way they’d work.
So on to Plan B. I drilled 3 holes in each beltline strip, placed them on the panels and poked through the holes with an awl as a guide, then drilled 3 identical holes in each the panels.

Then I used some small pop rivets, and this actually worked out very well.
I made sure to get them nice and tight, so that the heads are embedded below the felt and won’t scrape the glass.
After that, I got them installed along with the windlace and metal corner pieces, which I had repainted. Finished pic coming later.
Then it was on to the door panels! I carefully cut out the holes for the window cranks, door handles and armrests, making sure the placement was right by holding the panels up to the car, starting with small holes and slowly enlarging them. Plus the built-in holes on the backer boards are pretty spot-on. Then, using old panels as a reference, installed all new padded clips, making sure they were all facing the right direction.
Just getting all those clips in and seated properly took some time. For some of them, I cut reliefs in the wrapped-over vinyl to give the clips a flat place to sit.
Then it was the moment of truth, and I managed to get them installed, starting with the RH side.
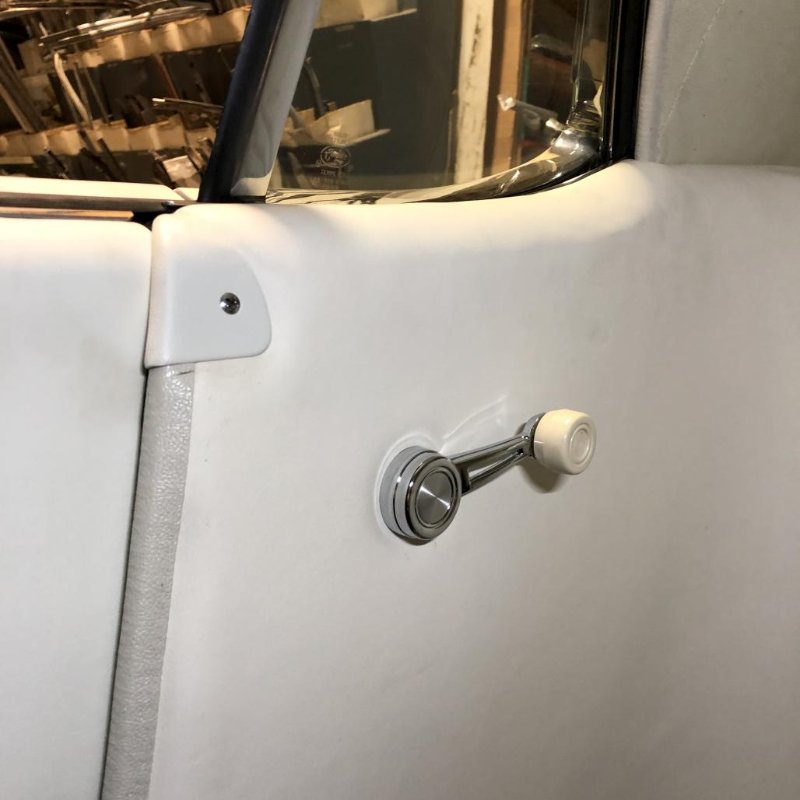
There’s an extra step on the LH side, because of the remote mirror control. After making the proper sized hole in the vinyl, I epoxied this mirror nut washer to the back side of the panel and let it dry before proceeding.

Boom:
For some reason on this one the bumps where the clips are are more prominent. Wondering if there’s something I can do to reduce that. Anyway here’s kind of a finished shot. I also put in the rear seat back, because why not? Sorry for the dark lighting. It makes the slightly different shades of white look weird. But it all looks pretty good in person.
Alright, I think one more post after this and I’ll be done with this update…
Now for a couple details and links. Here’s the new mirror nut and knob installed. Don’t forget the special tool. Also went for the longer-than-original window crank handles because they make it easier to roll the windows up and down. Don’t forget decals and screws and the nylon washers that go behind, to avoid ruining the panels. Despite all the work I did on the windows, adjustments and liberal amounts of grease, they’re still not very easy to roll. The white knobs are a decent match for me, though they would be a better match for the original Parchment, which is darker than what I now have.
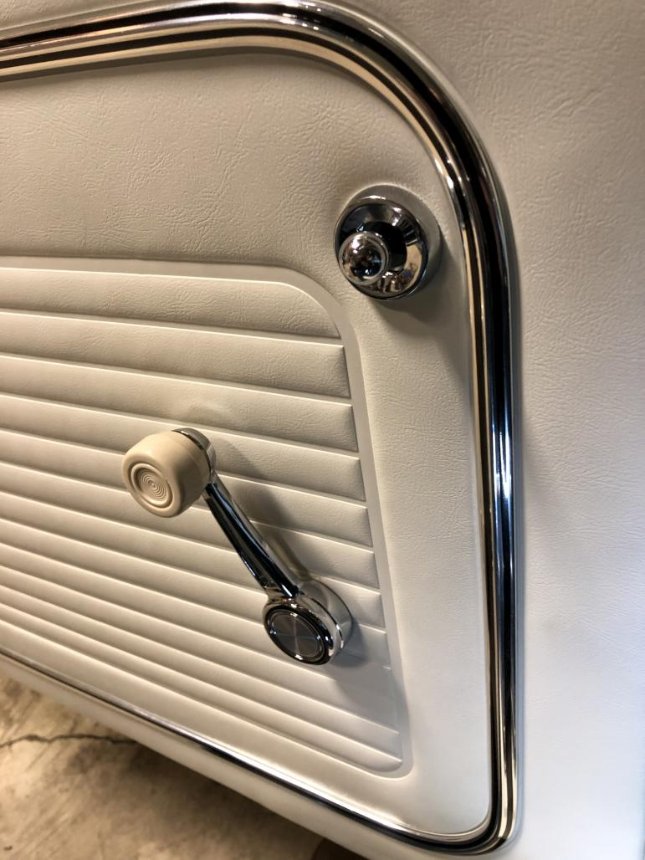
Hardly worth mentioning but here are the new lock knobs installed.

Here’s a closer look at the rear panels with new cranks installed. The metal corner pieces were painted with the SEM “Super White” paint, which matches pretty well as you can see. Also you can see that the windlace is a little darker, which again would be a better match for the original Parchment.
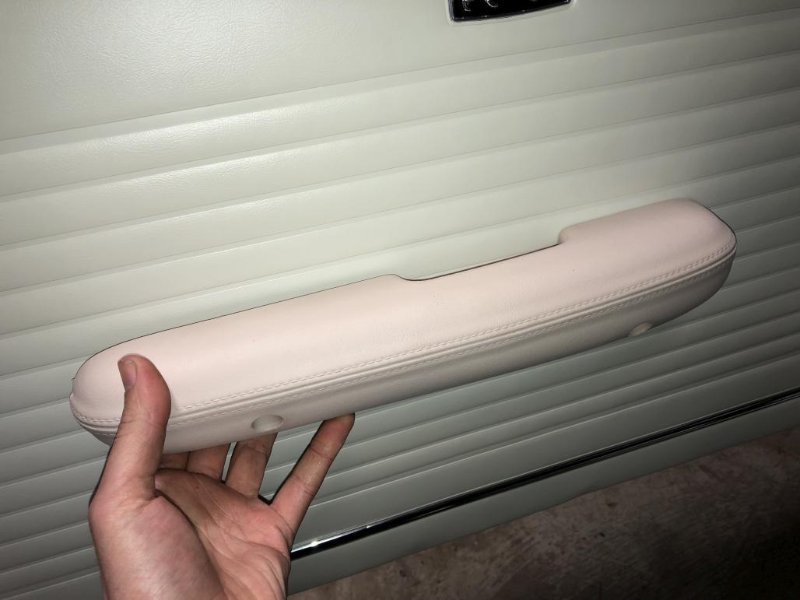
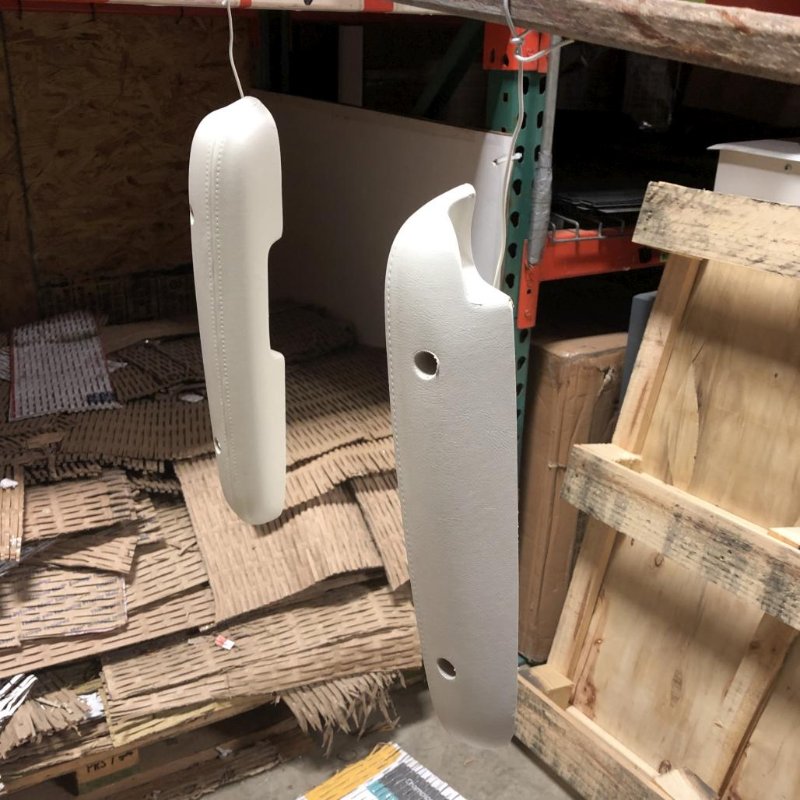
So moving on… I saw this coming, but the color on the reproduction armrests was way off from my door panels. Not even sure if they’d match originals either. So, out came the SEM paint again.
Before I proceed with those, I’ll need to install door handles. Right now I’m waiting to find out if the latest batch from Scott Drake will fit properly. I found that a LH handle dated 5/2018 fit perfectly, whereas a RH handle dated 1/2017 was a little crooked. So we have some more RH on the way to see if that issue was corrected.
Meanwhile, I got my pieces back from vacuum plating and they came out nice! I used contact glue to attach the emblem to the steering wheel pad. The bigger trim piece is the readily available reproduction piece. And I know that these pieces are supposed to be more of a satin silver, but I like the shiny chrome look.

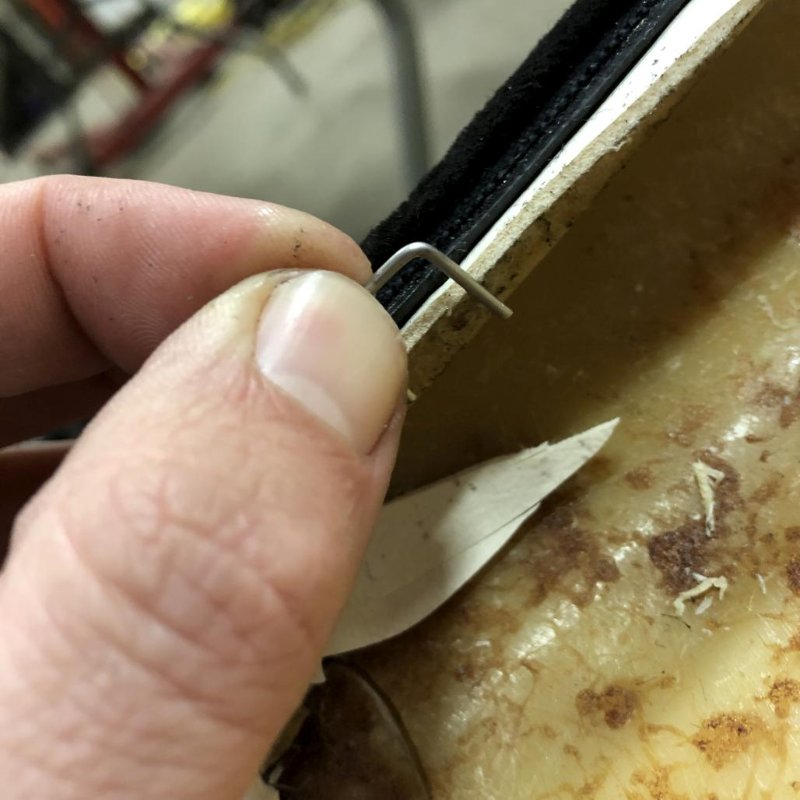
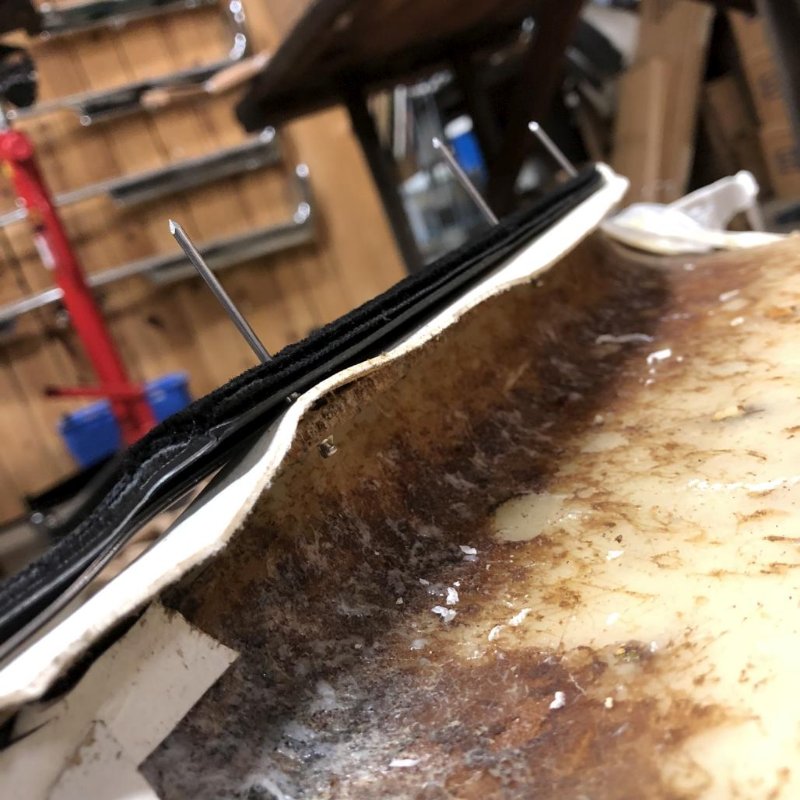
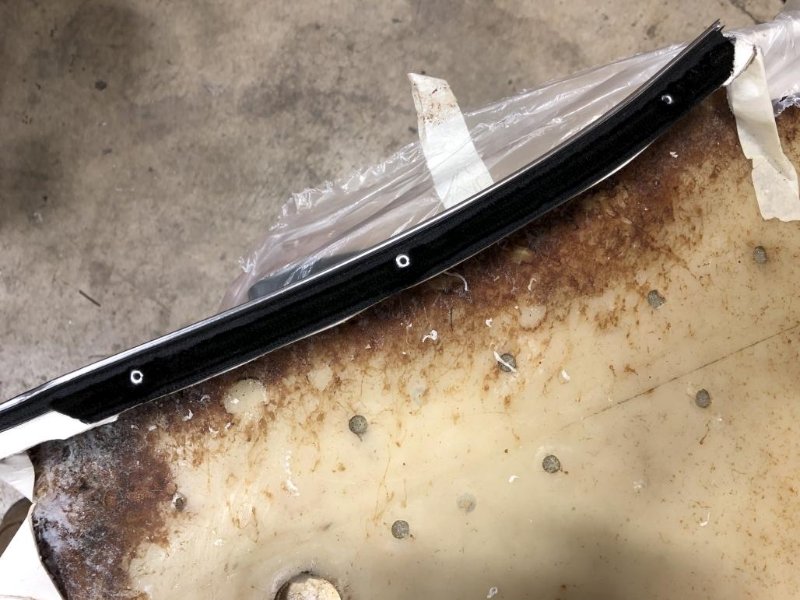
Lastly, I’ll end with the couple of things I accomplished this past weekend. I finally sealed the rear window (and this time I marked the locations of the clips for the trim):

…and the other accomplishment was to install the sun visors, complete with new brackets and screws of course. This was something I was dreading, because the headliner was installed with no indication of where the holes are. And since it’s stretched across well below these areas, there’s really no hope of feeling where the holes are by hand. So, I took some measurements on another car, and poked an initial hole through my headliner with nothing but blind faith. I then held my light up to the headliner and stuck my eyeball up to the tiny hole, and could just barely see that I was in the right spot. There’s a large circular hole for the spring section of the rod, and I was right under it. So I slowly made that hole bigger, then I could catch a glimpse of 2 of the screw holes, and it was downhill from there. It went perfectly on the RH side, but unfortunately my center hole somehow ended up peeking out from under the LH side. So that’s annoying! You can see it in the below pic. So I may take that back off and see if I can do anything to hide that.

Anyway, that’s the end of this update. I guess I need to do this more often. But things are progressing! It’s not that far from being able to be a car again. Plenty of details to finish up but I could bolt a front seat in tonight and drive it if I really wanted to