68 standard, just a classy driver!

So it’s been a bit but finally had some time to install the Wilwood brake kit I picked up a couple months back. Well partial install since I only had time for one side and not the other. I take what garage time I can get between family obligations.

The PO of my car had done a Granada disk swap in the past and while they did work I believe one of the calipers where sticking. Not wanting to mess with repairing the Granada stuff I decided to find a replacement. While there are a ton of options you can go with I stuck with the entry level stuff
from wilwood. More or less designed to be a cost effective kit for a disk swap. The rotor is pretty close sizing as the Granada rotor and should be plenty of braking for my needs. Now that I don’t have the factory drum spindle so I wanted to utilize the Granada spindle which just so happens to have the same bearing size as 70 and up. I needed to use a wilwood kit for a 70 mustang which really all that is different is brake lines and whee bearings. Since the wilwood kit uses a caliper bracket that attaches to where the dust shield mounts the way the caliper brake mounts on the Granada spindle is a none issue like it would be on other kits.

Install was pretty simple, however i doubled and tripled checked everything to make sure it would fit the Granada spindle ok. Also I want to address the front brake lines, looks like the hardline was replaced at some point and has the wrong bend near the frame.Also an adaptor was used to step up the fitting size before it goes to the wheel. I had to reuse the adaptor and bend the line to fit which I don’t care for so I’ll look into new lines for a better fit.

Spindle stripped down and ready to drill out the dust shield bolt holes to 3/8 fine thread. On the drum spindles this is not necessarily. You do need to acquire a Q sized drill bit and a quality tap. Now wilwood recommends a machine shop to do the drilling which I assume they figure drilling a tapping a hole is more then average guy would take on? They also want that hole counter sunk which makes no sense with how the bracket is built. Could be the bracket got updated and no longer needs countersunk holes, either way I felt it to not be needed for my application and I’m qualified for using a tap!


Caliper bracket mounted

Everything installed, gravity bled first which I found my issues with brake lines, after that vacuum bled the system to finish off the passenger side.


And my youngest helping out

Another thing I’m working on is getting a single din radio installed. I could not find a single din mount that wasn’t plastic and doesnt look like the metal ones are in production anymore so I cut mine.


Same Wilwoods I put on mine this winter, they work really well once the pads are bedded in. Good to see you’ve got a helper out there with you!

Good to hear, Its a very nice kit and Im happy with it. I was impressed the wheel bearings are USA made even. I almost jumped up to the next level but I didnt feel the cost vs reward would have been there for me to justify. I still need to replace the rear brake line and maybe a wheel cylinder, probably both just in case. The master cylinder was low when I popped the top to bleed the front which would explain why the brake light was on after I installed by gauges(hey it actually does work!)

He loves to be in the garage anytime Im there. I did take them for their first ride around the block a week or so ago which they loved and asked why it was so loud :laughing: (I really need to address the tailpipes as the dumps are just too annoying inside). Looking forward to more drives with the family in the future.

Not much to report besides a few headaches getting the brakes sorted out. The front was not much of an issue until
after a road test where I found a leak at the caliper fitting from what I suspect was from a lack of sealant on the fitting to caliper. It was all good until a heat soak after the initial drive and bedding in the pads. This is why I believe
It roadtests and double checking your work

My bigger issue was dealing with the rear which to my knowledge had newer wheel cylinders installed by the previous owner. It also already had a wilwood prop valve installed which I replumbed during the master cylinder install. I also wanted to replace the rear rubber brake line since it appears to be original, this was the start to another issue, I could not get one of the lines to break free with any sort of persuasion until the point of rounding the nut off. Due to its position and bend there is not enough line to cut and replace the fitting so it will need to be replaced. Realizing that was going to be a loosing battle I moved to get the rear bled to at least fix the spongy pedal and test the fronts. I needed to bleed it enough to get the old discolored fluid out but I could not get a solid pedal. Searching for leaks I found a couple small ones at the prop valve fitting, tighten in and repeat. Upon closer inspection I found what might have been a wheel cylinder leak, it was small enough not to really be leaking into the drum but since I had new ones I swapped them out and disassembled the old one to inspect. Found a rusted and corroded piston and bore which I can only assume was introducing air on the rear circuit.

Readjusted the shoes, bled again, manually this time and finally had a solid pedal! Still did not get the rear line replaced but I’ll tackle that at a later time. Gotta give the wife back her parking spot in the garage or I might not be allowed to work on the cougar at a later time! She doesn’t mess around when it’s hot out! :laughing:

Short story, even when something looks new do not assume it’s going to not give you a headache. One of my big reasons of doing one thing at a time and short road trips is to iron out all these little issues. I have little to no history on drivetrain and it was sitting for 15-20years prior to my ownership. She stops quite well now once getting the fronts seated and prop valve adjusted. Still need to change that rear line for piece of mind and repair the fitting on the front.

Next up is to clean up the carb. Got a surge at cruise and I don’t trust it in hot weather. Valves need an adjust too, hoping to have it running well enough to attend a Father’s Day car show which would be the first public appearance and the longest drive it’s had so far.

Its been a while since Ive made much progress on anything new. Ive messed around cleaning up a few things here and there but between other obligations and the summer heat not much has got done besides acquiring parts. But at least one of those things are changing and that means our summer is coming to a close, this weekend we had a bit of a cool down to 100* day which makes for decent garage day here in the desert.

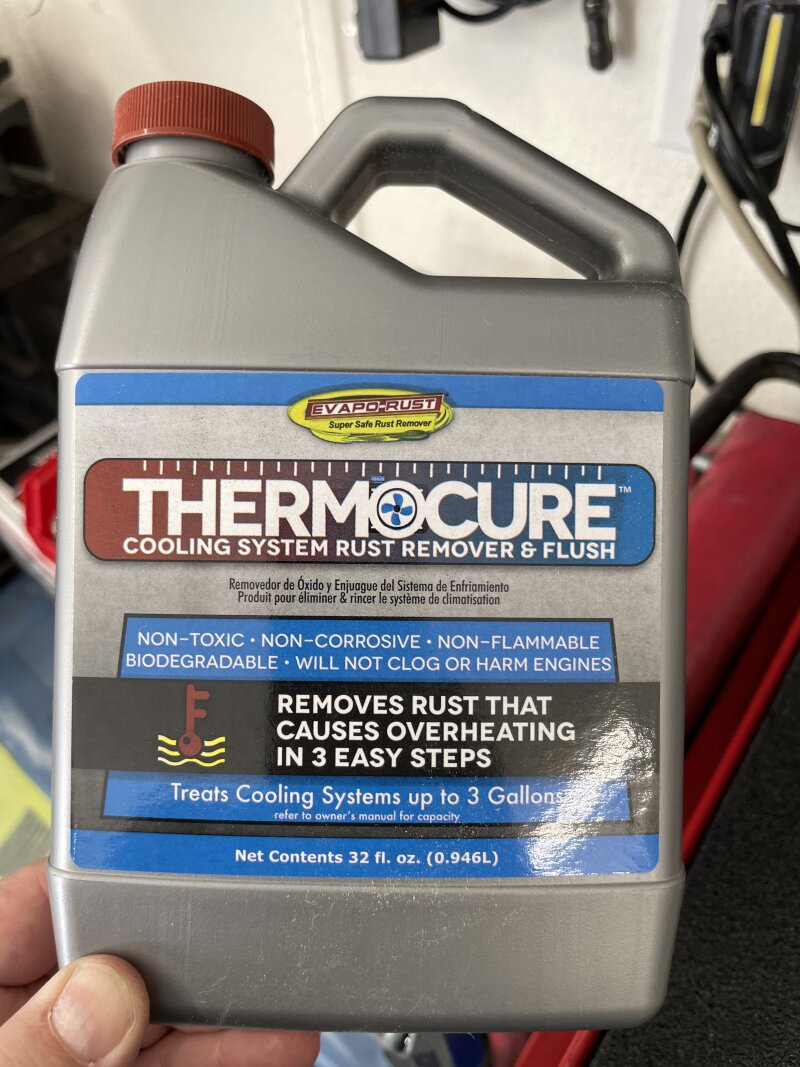
Currently I am focusing on things under the hood to get her up to a trust worthy reliable driver. I know little history besides knowing it ran ok when parked in the early 90s. It sat in a garage with the engine largely untouched until my tenure. It does run pretty well, doesn’t smoke or make any weird noises but there have been a few things Ive wanted to address like the coolant system. It was left as it was when parked which caused rust and deposits to form in the coolant system. I noticed this when installing a new temp sensor in the intake. Pulling the upper hose confirmed more build up was present however it did not cause an over heat…yet. I also found what appeared to be an original style thermostat which I though was interesting since the intake has been replaced along with a water pump and radiator somewhere along its life. First order of business was getting the current system flushed. I found this flush to work really really well getting any of the build up deposits and rust out. I drained all the coolant, removed the t-stat and filled with water with flush. Drive it a few miles to get warm and ran at a high idle for about 1hr and let sit overnight then repeated. Drained and flushed countless times to get everything out but its looking really clean now and ready for the new radiator


Since Im going with AC in the future and do not wanted to be limited to my driving based on weather a larger 24" radiator was a given. I decided after much debate to go with a copper/brass 24" 3 row from ACP as they seen to have a proven track record. I had almost gone the aluminum route since they have some really nice factory style radiators now. The aluminum was even cheaper then the copper brass but do have some mixed results. The aluminum even had a nice shrouded electric fan but I did not like the single fan setup. Side note is radiator prices have jumped substantially so kinda wished I did this a year ago but is what it is.

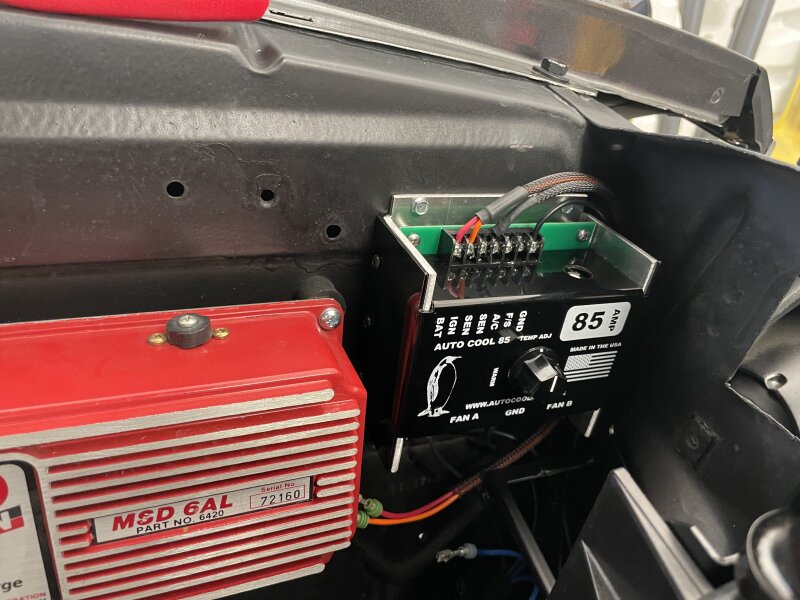
Since I dislike fixed fans for more then one reason and it seems converting to clutched fan can be temperamental based on aftermarket clutches I chose to go with electric fans. Going electric is not as easy as one might think and there are few things to consider. One of the biggest mistakes is not enough air flow through the radiator under cruise conditions from too small of a shroud. Ideally you dont want the fan to run constantly but rather cycle as needed based on temperature. With this in mind I decided to go with a dual fan setup as it will allow for more air flow through the core and the second fan can be setup to run only with the AC. This is pretty typical of a modern vehicle setup. I first saw this fan that mfc133 used here https://cccforum.discoursehosting.net/t/healing-heroes-win-the-mustangs/129/1 and really liked how it looked, fit and specs seem more then enough for my application. These have been out of stock on summit for a while but recently Ive noticed NPD start carrying them with the addition of relays and temp control. Originally not wanting to spend the extra money for the included temp/relay control as I want to wiring it myself and control with the eventual EFI system I ended opting for it as it was the only version I can find. The added benefit is I can run it this way until I can do EFI then give the EFI the control with the AC compressor ETC. Interesting enough these are supplied to NPD by Old Classic Air which appears they take the Maradyne Fans and add the temp and wiring control along with mounting hardware and sell as a kit. They list as a USA made product but be aware it is not, simply assembled here. With that said its every bit as nice as a spal fan.


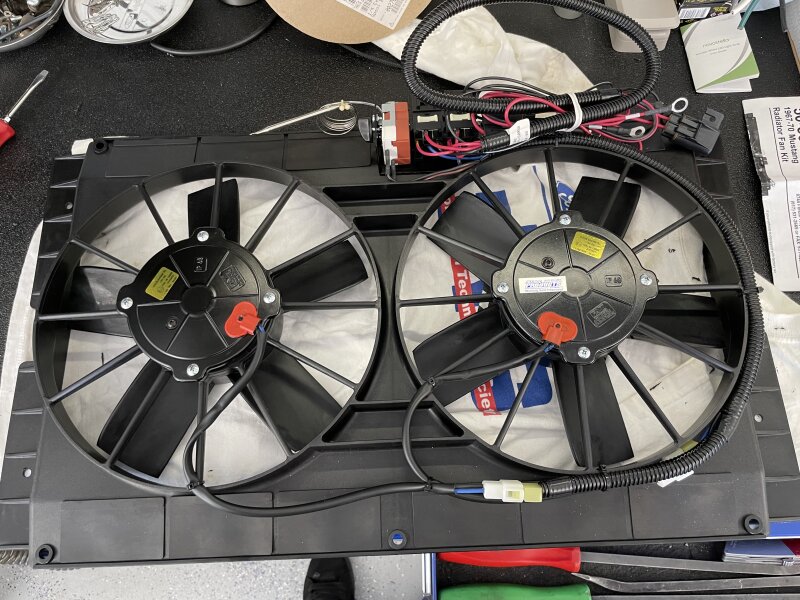
One of the features of the fan that I like, The ability for it to pass air flow during cruise. Not only is it dual fan it has flaps top and bottom to allow additional air flow.

Fit is just about as perfect as can be from a universal fan, The shroud is slightly too wide which if its a big deal could be trimmed. I plan to leave it as is. The shroud is built very well and is not flimsy at all

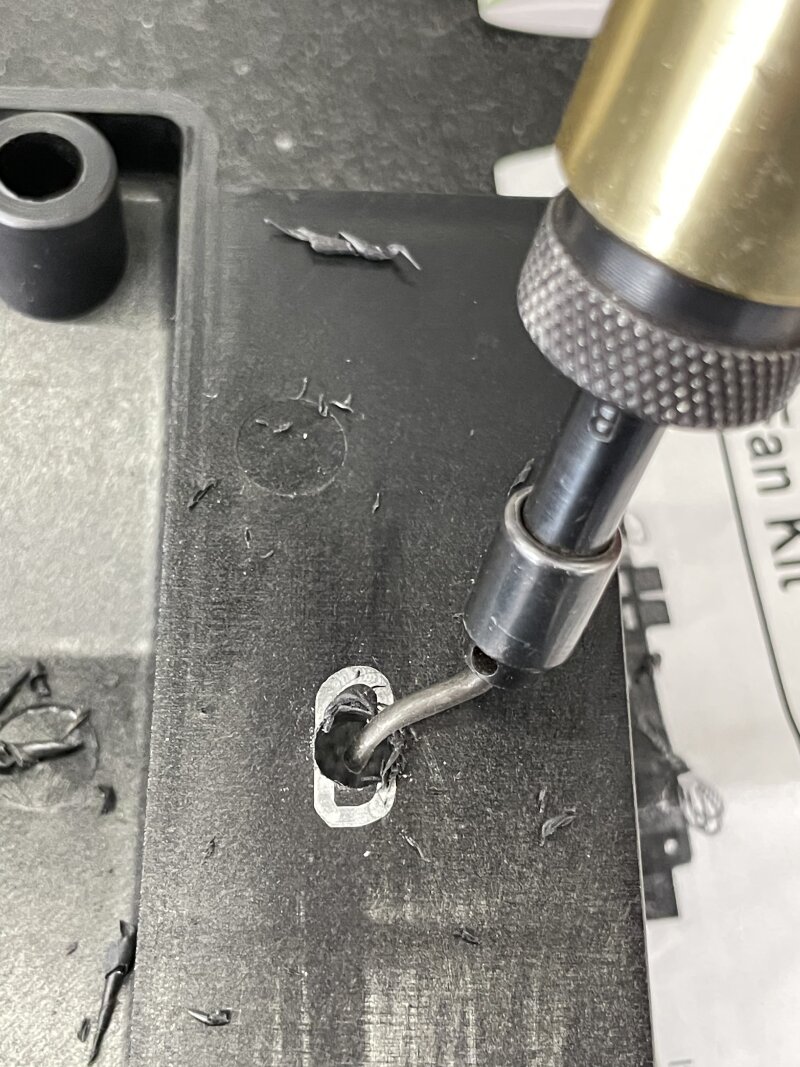
Mounting is as easy as drilling holes, quality hardware is included

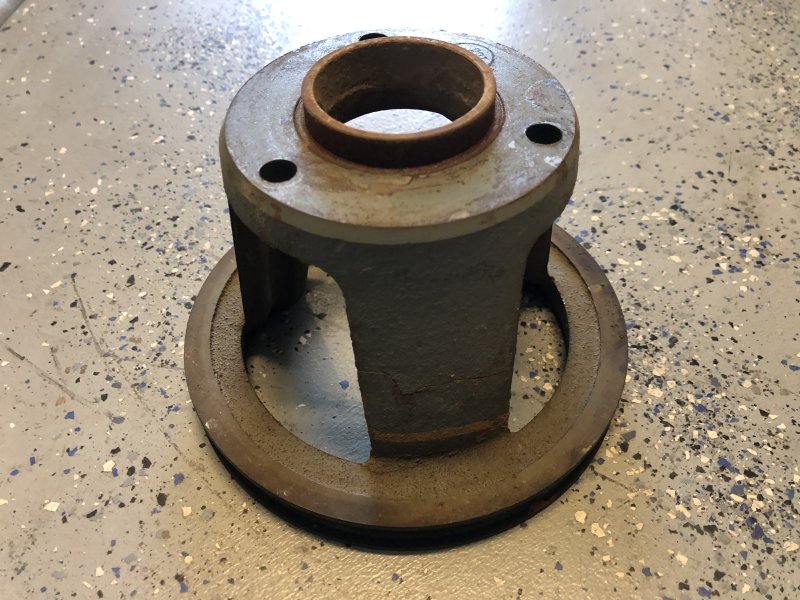
Protip, Use one of these guys to bevel your holes

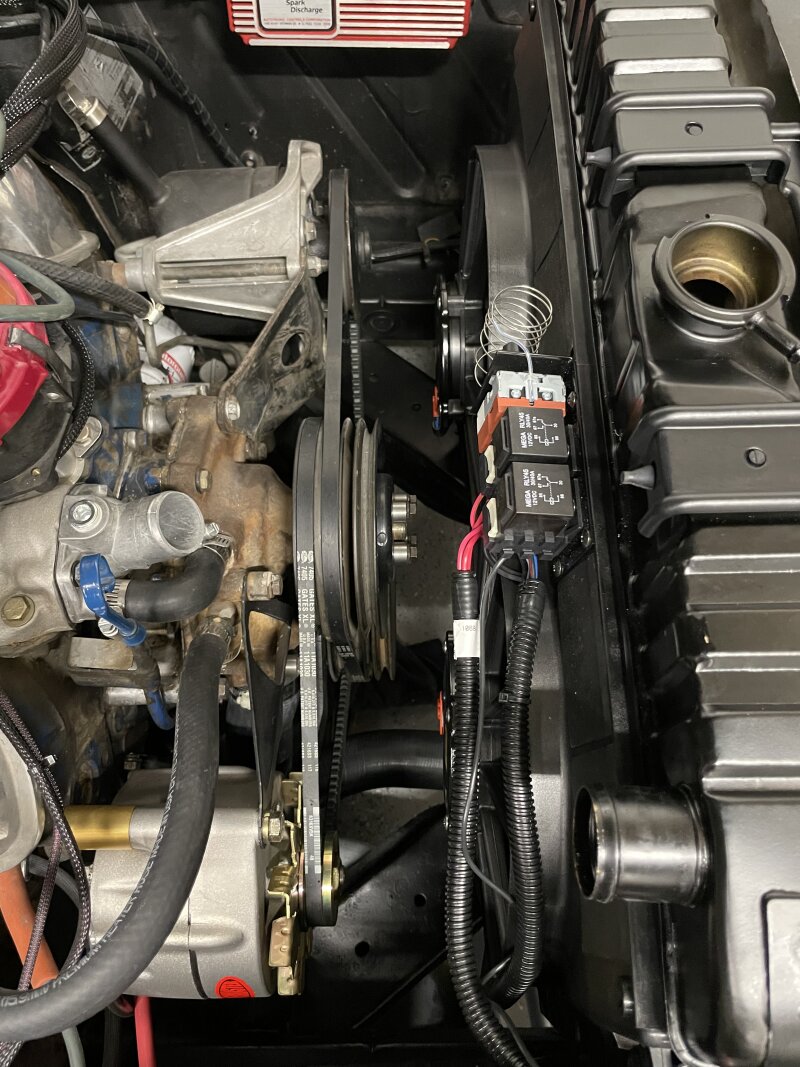
Overall thickness isn’t bad either. Should fit most combinations of accessory’s under the hood. Relay and temp control is not ideal being right on top but its cleanly mounted and wired. I will eventually change this

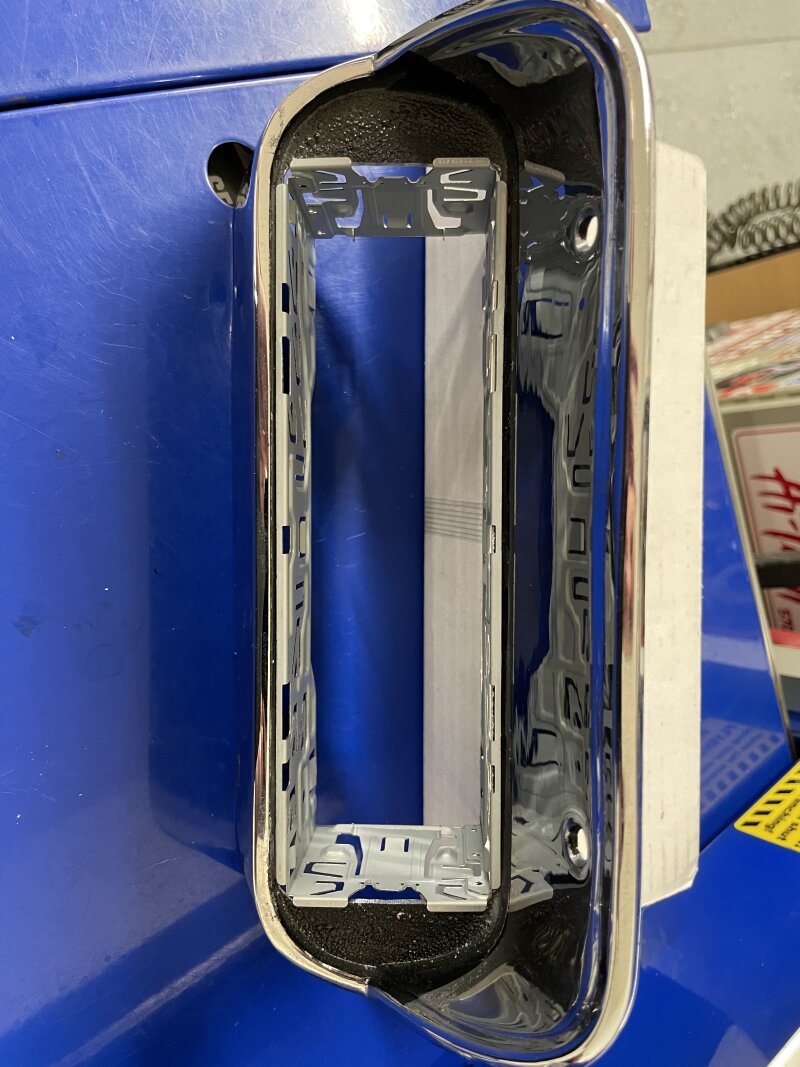
Now that the cooling system is clean I can install this radiator and fans along with new hoses. Also new t-stat and housing to ditch the lame chrome version that’s on it.

I love those fans!! Since I’ve put them on I never have to give overheating a second thought. They are loud, but to me that’s a small price to pay for the decent cooling. Using a PWM controller to run them would probably cut down the noise a bit, but I like having them triggered by the EFI.

Good to hear they are working out well for you too. If they function as good as they look I’ll be happy. I am very happy with the overall quality. I haven’t seen many generic fans built as well as these, they rival a factory style fan which I like. Thanks for sharing the info in your build!

Such is life with an electric fan, I was debating on the noise level then realized as I pulled my wife’s car into the garage all electric fans are loud anyway. Might be worth a shot playing around with a PMW control but I think you might have to have a capable motor? I honestly have not dug into it much yet. But yeah efi triggering is a nice benefit too. That’s all easy enough stuff to mess with down the road to refine your setup.

Another electric fan convert! Yes! Those look very nice too.
A note on the PWM control. I haven’t heard that PWM specific fan motors are required. I’m using a dual fan PWM controller from AutoCoolGuy. It’s worked well for me and is beefy though large. It adjusts fan speed as dictated by leaving water temp from the radiator. Fans are quiet at less than full speed and system has a 1 minute shut down when power is shut off as well as a soft-start mode. I wired it with a switch that allows full speed function of the fans if ever needed. My fans pull temps down from 205 to 175 in a few minutes at 90f ambient while idling.

I have seen these installed on some transit busses I used to work on, Never paid too much attention but I do recognize it. Will have to look into these, it could be a good way to control the fans more accurately then simply on or off.

Since I had most of the stuff off the front of the engine for the radiator swap I figured I would swap out the dampener since its seen much better days, just my luck the replacement was incorrect. I suspect is a very common issue on stuff like this since there are so many variables. Somewhere along the lines of the aftermarket part description failed to take in account of the pully fitment. So back on the original goes until I can get this one swapped out for the correct one for my pulleys.

Here is how much clearance I have with the radiator and fans installed. I also found I did not have the correct length fine thread bolt for the water pump pulley. I had to use longer ones with some handy spacers I always have laying around from the countless turbo jobs Ive done on diesels over the years. I will swap them out for the correct length bolts. I did not get to hooking up the hoses as Im also debating on using a coolant filter in the upper hose to catch any debris left over from the flush to not get into the new radiator but it would temporary. Fans also need wired as well but I did hook up temporary to see how loud they are going to be and honestly was expecting worse. Side thought is I really do not like the look of the relays and temp sensor hanging off the shroud, more so the temp sensor. This will bug me until I do something different :laughing:

I had the same issue trying to find a damper that worked with my pulleys, the auto parts stores are a mess with this. I ended up sending my original to these guys for a rebuild, price was reasonable and they turned it around quick: https://damperdudes.net/

I have exactly the same issue you have…turns out the balancer with the raised ridge like the top one must be for an early 69 model… the pulley for the 68 has the raised ridge around the hole, so, as you stated, they dont work with one another lol. I’m going to either find a 69 pulley or swap balancers to the stock one I have. The issue, and the WCCC guy hadnt seen one either, is my stock one is a huge, heavy ass, FOUR groove pulley…

I know, super old post im replying to, but ive been catching up on all of these old posts… those holes are like mine- mine had dealer installed AC hanging off the dash and holes like that were for condensate drain from the unit.

Make sure you don’t have an additional pully added on for something like an ac system.

Mine actually had an additional pulley installed for what looked like an maybe an aftermarket ac system. (All other parts where long gone) Originally mine was a 3 grove pulley. Alternator, power steering, and smog pump.

aftermarket pulley


original

I didnt think of that but its possible. I did make the bullet hole conclusion before realizing mine might have had the ac system under the dash which I found when investigating why I had an addition pulley on the crank. I found the holes in the core support and holes under the dash.

Seems like using a drill would have been much easier then jamming whatever they did to make those holes in the floor. :mrgreen:

the dealers were not into precision back then. the holes cut in the fire wall for the AC lines on mine cracked me up… and then i have the strut towers that someone along the way cut access holes into just to grease the uppers… still gotta fix those.

not trying to hijack this post, but here’s this monstrosity of a 4 groove heavy thing I have…


interesting, I bet that pulley was installed for the addition of the ac you mentioned, the spacing looks about right.

So after installing the electric fans I quickly got annoyed with how loud they are, while I expected this to be the case it really not an efficient way to operate the fans. Also with this particular relay setup as soon as the key is on one fan comes on full until coolant temp increases to your determined temp set then the second one comes on full, which in realty would not be often with the larger radiator unless its a warm/hot day.

I was prepared to change the relay controls to something else, mainly wire to the EFI setup down the road but after putting more thought to it and being reminded of a solid state PWM control by wawazat I wanted to go this route. The benefit here is when the fans are engaged they are done gradually like a modern vehicle. There are provisions to control speed when the AC is on and a manual override to 100% of both fans if needed. While the box is a little big and not the easiest to find a home its weather proof and well built. I will probably build a little aluminum shield to hide the wires at the top.

However to to wire in the fan control I wanted to add in the relay box I have planned for the EFI setup. As we all know finding extra circuits under the hood is a challenge so this is a good way to do that. In addition to providing the needed circuits for the fan control I will add the needed provisions for the sniper efi as well such as an ignition relay to power everything and a fuel pump relay. Also Im able to run the fan power fuses here as well.

Relay box location. Since Im not using the voltage regulator any longer I thought this was a good place to put the box and keeps the clutter away from the battery as much as possible. I still have to finish building the terminals and installing. Should still be enough room for AC lines in the future as well.


Since this relay box is empty you need to crimp on your own connections, the right crimper does wonders to properly attach the terminals.