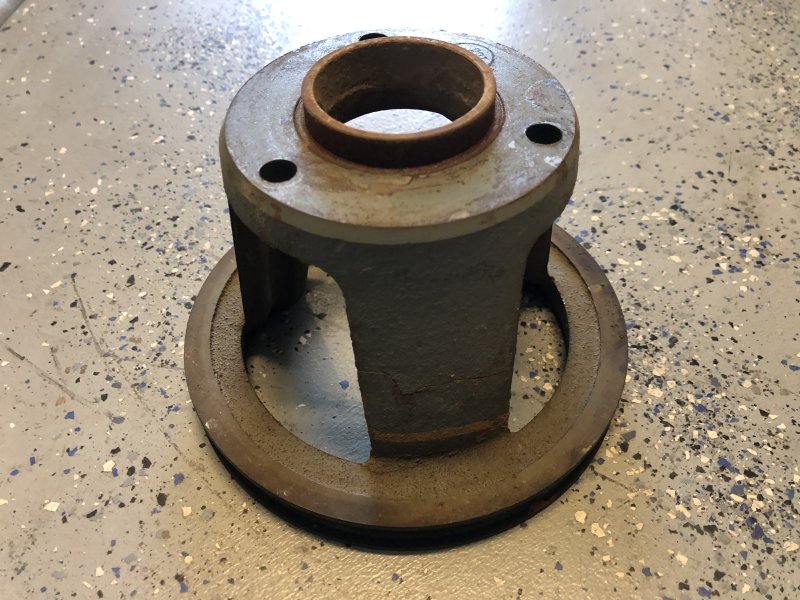
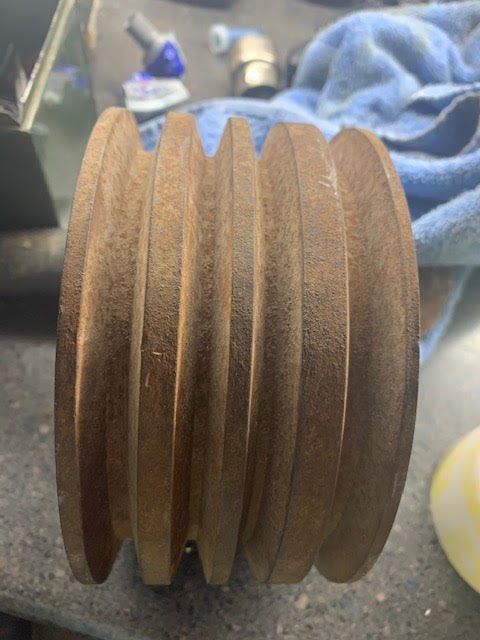
Since I had most of the stuff off the front of the engine for the radiator swap I figured I would swap out the dampener since its seen much better days, just my luck the replacement was incorrect. I suspect is a very common issue on stuff like this since there are so many variables. Somewhere along the lines of the aftermarket part description failed to take in account of the pully fitment. So back on the original goes until I can get this one swapped out for the correct one for my pulleys.
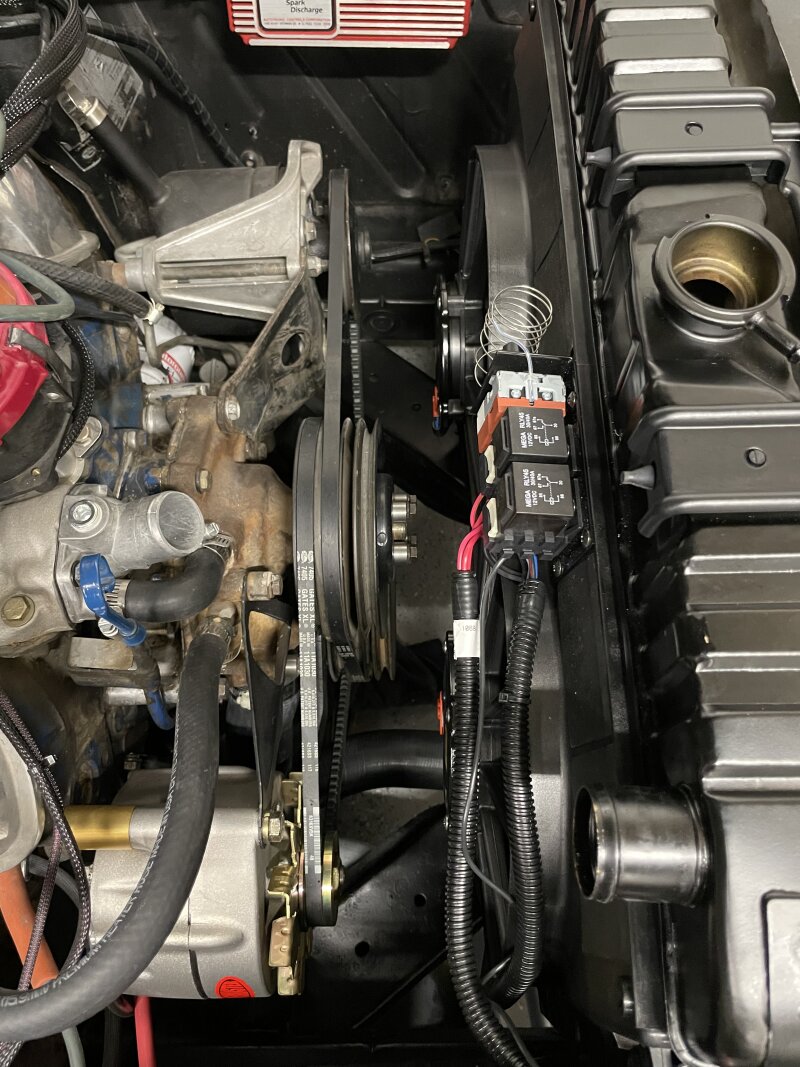
Here is how much clearance I have with the radiator and fans installed. I also found I did not have the correct length fine thread bolt for the water pump pulley. I had to use longer ones with some handy spacers I always have laying around from the countless turbo jobs Ive done on diesels over the years. I will swap them out for the correct length bolts. I did not get to hooking up the hoses as Im also debating on using a coolant filter in the upper hose to catch any debris left over from the flush to not get into the new radiator but it would temporary. Fans also need wired as well but I did hook up temporary to see how loud they are going to be and honestly was expecting worse. Side thought is I really do not like the look of the relays and temp sensor hanging off the shroud, more so the temp sensor. This will bug me until I do something different
I had the same issue trying to find a damper that worked with my pulleys, the auto parts stores are a mess with this. I ended up sending my original to these guys for a rebuild, price was reasonable and they turned it around quick: https://damperdudes.net/
I have exactly the same issue you have…turns out the balancer with the raised ridge like the top one must be for an early 69 model… the pulley for the 68 has the raised ridge around the hole, so, as you stated, they dont work with one another lol. I’m going to either find a 69 pulley or swap balancers to the stock one I have. The issue, and the WCCC guy hadnt seen one either, is my stock one is a huge, heavy ass, FOUR groove pulley…
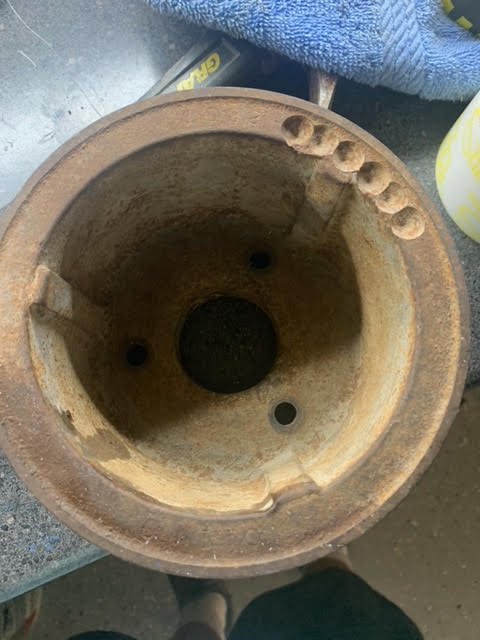
I know, super old post im replying to, but ive been catching up on all of these old posts… those holes are like mine- mine had dealer installed AC hanging off the dash and holes like that were for condensate drain from the unit.
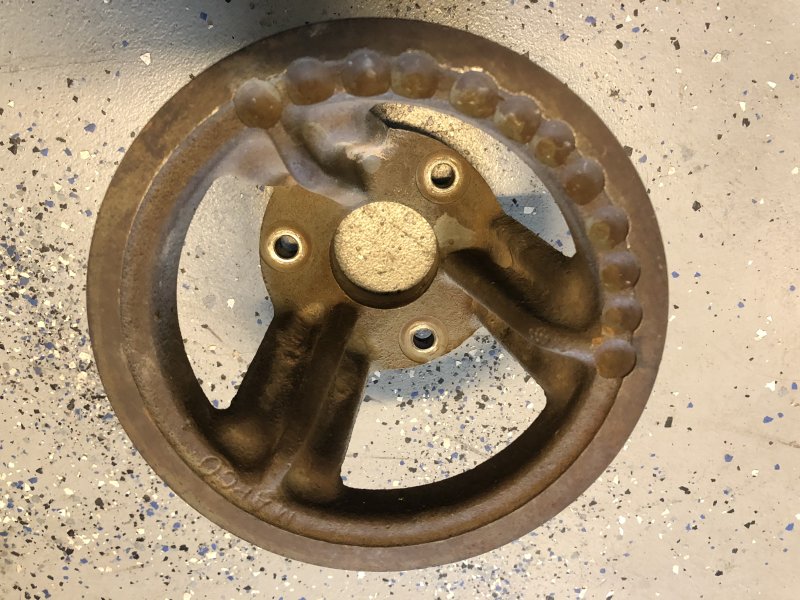
Make sure you don’t have an additional pully added on for something like an ac system.
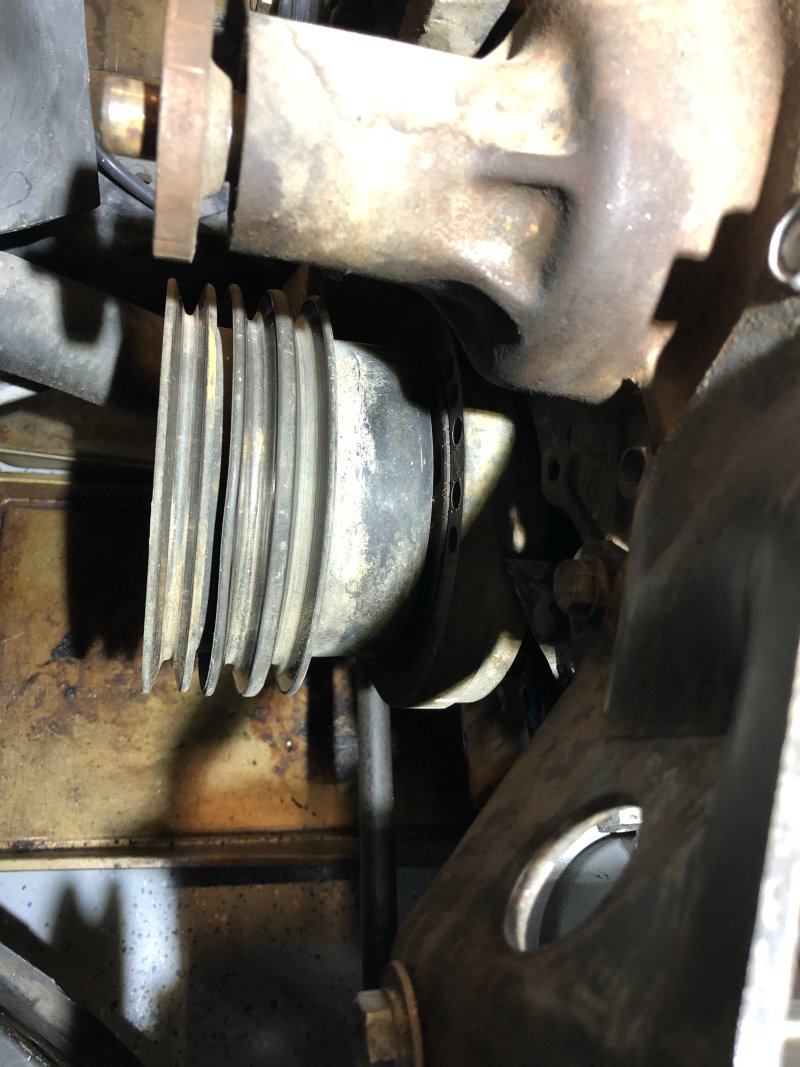
Mine actually had an additional pulley installed for what looked like an maybe an aftermarket ac system. (All other parts where long gone) Originally mine was a 3 grove pulley. Alternator, power steering, and smog pump.
I didnt think of that but its possible. I did make the bullet hole conclusion before realizing mine might have had the ac system under the dash which I found when investigating why I had an addition pulley on the crank. I found the holes in the core support and holes under the dash.
Seems like using a drill would have been much easier then jamming whatever they did to make those holes in the floor.
the dealers were not into precision back then. the holes cut in the fire wall for the AC lines on mine cracked me up… and then i have the strut towers that someone along the way cut access holes into just to grease the uppers… still gotta fix those.
So after installing the electric fans I quickly got annoyed with how loud they are, while I expected this to be the case it really not an efficient way to operate the fans. Also with this particular relay setup as soon as the key is on one fan comes on full until coolant temp increases to your determined temp set then the second one comes on full, which in realty would not be often with the larger radiator unless its a warm/hot day.
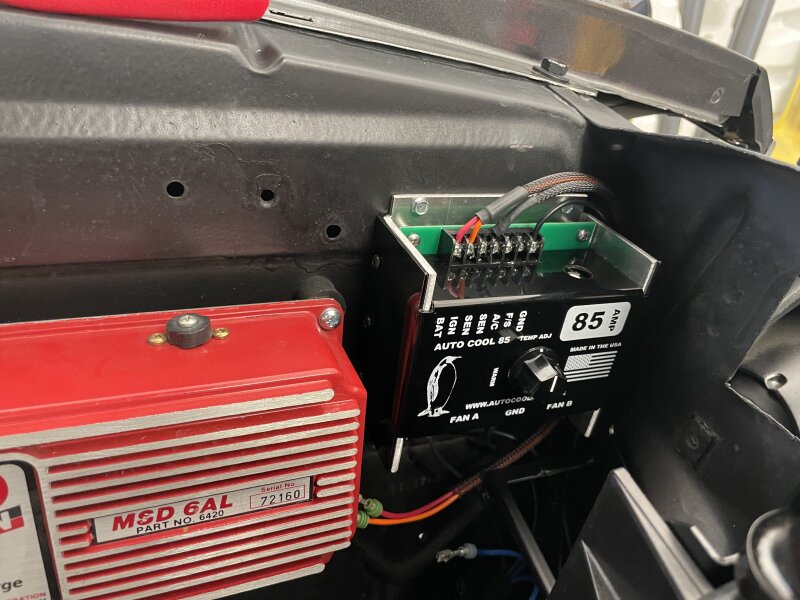
I was prepared to change the relay controls to something else, mainly wire to the EFI setup down the road but after putting more thought to it and being reminded of a solid state PWM control by wawazat I wanted to go this route. The benefit here is when the fans are engaged they are done gradually like a modern vehicle. There are provisions to control speed when the AC is on and a manual override to 100% of both fans if needed. While the box is a little big and not the easiest to find a home its weather proof and well built. I will probably build a little aluminum shield to hide the wires at the top.
However to to wire in the fan control I wanted to add in the relay box I have planned for the EFI setup. As we all know finding extra circuits under the hood is a challenge so this is a good way to do that. In addition to providing the needed circuits for the fan control I will add the needed provisions for the sniper efi as well such as an ignition relay to power everything and a fuel pump relay. Also Im able to run the fan power fuses here as well.
Relay box location. Since Im not using the voltage regulator any longer I thought this was a good place to put the box and keeps the clutter away from the battery as much as possible. I still have to finish building the terminals and installing. Should still be enough room for AC lines in the future as well.
Since this relay box is empty you need to crimp on your own connections, the right crimper does wonders to properly attach the terminals.
That is an awesome relay box, I used the same one but pre-wired (kind of wish I had just gotten the bare kit and wired myself). PWM fan control is definitely the way to go, even though mine are EFI-controlled I’m still thinking about switching to that for the gentle stop-start and less noise. One note if you go with the Sniper EFI, the fuel pump relay is pre-wired into the harness. Unless you’re running a pump that pulls huge amps you should be able to power it directly from the blue wire in the Sniper harness.
Very nice Diesel! I love how my PWM controller works-the soft start and the variable speeds really keep the fan noise down. I hope your have a similar experience with your AutoCoolGuy controller.
I probably spent more on the parts(pretty cheap) and the crimpers(not so cheap) then a preassembled unit but I do like being able to set it up as I want. Im also planning an EFI install for my dads mustang soon to so will be doing two of these so the crimpers will pay for themselves.
If my car was louder I may not notice the fans as much but when sitting at a light or at idle it kinda takes away from the feel of a classic car While I dont mind upgrades and modifications I still enjoy it being an old car if that makes sense. In my case the current relay has one fan on all the time rather then coming on or off as temp dictates, this is the biggest thing I dislike and It could be resolved by using a sensor or using the sniper to control but having PWM control is that much better I think so I wanted to try it.
I have the sniper kit but recently ordered the cdi box and distributor which of course is on backorder so I have not moved on installing anything. I was originally going to just use the distributor and msd box I have but decided the whole package is a better way to go then mixing 90s era “race car” parts(probillet distributor and msd 6al)with the sniper system.
I did see the fuel pump relay as part of the sniper harness but kinda wanted to condense it all into the relay box to keep everything in one place. It may be worse taking apart the sniper harness then just leaving it be so Ill see what I decide. I could always wire one just incase since I should have more then enough space. I plan to also wire an key on relay for the ignition to power the sniper, cdi box, etc too. I just need to grab a ignition wire somewhere. I think I can steal it from the voltage regulator connector which is right by my relay location. Ive been trying not to cut or modify the factory harness in anyway but it might be worth it to grab ignition power here. Also I want to run all the power for the sniper through the relay box itself rather then running all the power to the battery but knowing how picky the sniper can be about RFI interference its probably not worth the risk of trying it. I hate messy wiring and stuff running everywhere so trying to make sure my install is as clean and problem free as possible with also keeping future upgrades in mind.
Another use I can add to the relay box is relays for halogen headlights but that involves cutting the harness again and I would rather not cut it if I don’t have to…decisions…decisions
Thanks! I am looking forward to finishing up the wiring and trying it out. I think it will be worth it!
Got most of this buttoned up this weekend with the exception of cleaning up some wiring.
Ran a 6ga cable and 14ga to the battery along the front crossmember. 6ga powers the fuses for which a jumper is used to power the relays as needed. The smaller 14ga powers the second buss circuit to turn on the relays with switched ignition power I grabbed from the starter solenoid which is powered with the key on and during cranking which is needed for the Holley. I checked at the voltage regulator connector and while it had switched ignition it was only with key on not cranking.
I found a nice compact inline fuse, I’ve never used these before but I like it. Simple and small, does not need to be hard mounted anywhere and is easily accessed if needed.
Most circuits are installed, have provisions for the Holley stuff too so it should be quicker to install. The coiled wiring is to run inside for B+ supply for the radio and the fan override switch.
The fan control works very well. So much better then just being on with the key. No excessive noise due to the fans being on 100%. Fans come on after temp rises to around 140 or so and it’s easy to adjust with the temp knob. Plenty of air flow even at slow fan speed. Just idling in the garage fan speed was low and temps stayed right at 190 or so. I’ll adjust with some driving to get it dialed in. Definitely worth the effort as it’s so much better with less noise!
After what seems like forever I finally got a little wrench therapy to work on some on going upgrades I’ve been wanting to do. While I have yet to get to installing the sniper along with a bunch of other loose ends I jumped ahead and started with the ac install. The last couple of drives I’ve done this spring it really does suck not having AC so I went ahead and pulled the trigger getting a vintage air kit. After much debate and comparing of options I settled on vintage. I liked the way they did the evap box, compressor and condenser mounting. Not to mention they have been in the ac game forever and will be around to support the product in the future.
I only had time to install the evap box so far and It will be a little bit until I can get to finish the ac vents as I have a few things to do with the dash at the same time. I have another upgrade that will hold up mounting the compressor to the engine so I expect this project to drag out like the rest but at least it’s started!
Some things to keep in mind is while these ac kits are marketed towards cougars they are very much mustang. The instructions are 100% mustang and do not call out the difference you may run into with a cougar. Such as the center ac vent they supply, in no way is that going to fit in a cougar but is very much at home in a mustang. I did not plan to use any vents provided as I have converted my dash to xr7 and will be using the factory style vents.
Another issue I ran into was the driver side vent controls. While I got a non ac car kit hindsight shows I should have got the ac car kit. This would have given me the proper controls to convert the factory ac vent over to the vintage controls. The controls in the vintage non ac car kit are meant to work with the heater controls on a non ac car only. I am not sure if they have the proper vent adaptor for the center xr7 vent either so that’s something I’ll need to figure out.
Other than that the evap box installed pretty easy. It mounts to all the OEM holes(gotta drill two on a non ac car) heater hoses use the same holes in the firewall and they give you a plate to bolt in over the blower hole for the ac lines to pass through. Installing by yourself kind sucks so an extra hand would be helpful but I got it done on my own. Once the dash is assembled it would be hard to know its aftermarket under there. Everything in the kit is high quality. The blower motor is a spal fan. The prebent lines are nice and so far have fit well. The kit also came with a cut to fit hose and fittings along with premade ones for under the hood. I’ll install the condenser and drier soon but those should be easy enough. Compressor mounting may have to wait a little bit and maybe I’ll get after doing the efi install too! I just need a couple consecutive days to dedicate to getting that done but time is a hard commodity to come by these days!
Today was dash pad day. Shorty after my initial install of the repro dash pad the corners spit at the mounting bolt. Not really wanting to do it over again I stuck the replacement on the shelf and kinda forgot about it…that was 2019! Damn time flies!
With the dash having to come apart to get the center dash vent installed I figured it’s a good time to replace the pad again. The fit on this one seems better so far but I did end up drilling an additional hole just above the factory ones to not have to force the sides down as much
So as mentioned on the vintage air kit if using the non ac car version and you plan to use the original vents you will need the control lever assembly(474266#) and center vent adaptor(62679#) these would come in the ac car version of the same kit but then your compressor mounting might be different so not sure if it would be better to ac or non ac kit? Either way the non ac car controls are meant to convert the heater controls only, while the manual to electric converters are the same they don’t have the correct bracket to mount on the back of the driver ac vent.
Another confusion was with the center vent, my kit came with generic ac vents which are actually quite nice but not the look Im going after. The center vent is 100% meant for mustang and in no way would fit a cougar dash and remotely look decent. After calling vintage and only getting a sales guy that was not aware of the two different styles and never getting through to the tech department I took the chance. The center vent adaptor shows mustang only but it does actually fit the xr7 center vent just fine I chose to drill a couple holes to us screws to hold it together rather then the clips.
Finally got the dash back together with the ac vents. Very nice quality on these btw. Have not run the vent hoses yet since it will get crowded real quick once those are in. Still need to install the condenser snd compressor. Man I forgot how tedious doing these dashes can be. It’s not hard but tedious to get it all together correctly
While everything was apart I ran a separate detonated battery12v and ignition 12v from the auxiliary fuse box under the hood to inside for the radio/ac and epas so I did not have to add to the factory wiring. Decided I did not need any kind of amp or subwoofer in the truck so changed up the wiring to run the speakers off the deck only. I may run a small line input amp in the future since most modern head units are pretty low wattage but I’ll address that later.
Well it’s been a few months but I have some goals this week. I took a week of vacation and had some high hopes of making a serious dent in finishing up lots of loose ends on my car. So far the family has had other plans like Xmas shopping, taking the kiddos to school, prepping for turkey day etc! I’m probably a little ambitious in hoping I can finish the ac install, power steering and efi installs all this week but I’ll take what I can get this week!
First on the list is the electric power steering conversion, originally had planned to do this later but I think it will be somewhat easier to get done now to free up under hood space for the efi. Also I don’t have the ac vents and hoses installed yet and that takes any under dash space left.
I’m using a kit from EPAS performance rather than building my own. There are several options for building your own kit using junkyard parts but I thought would be more hassle then going with a kit. The biggest issue here is how to control the epas properly with junkyard parts as all the vehicles that come equipped with epas are OBDII vehicles and the epas system communication is done via network so you need to use another aftermarket controller to control the epas independently. I’ve seen mixed results and honestly didn’t have the time to dedicate to getting this right but it certainly is possible and saves some cash with the expense of time. Even with a kit I do not expect a full drop in as with everything aftermarket, there always seem to be nuances during the install.
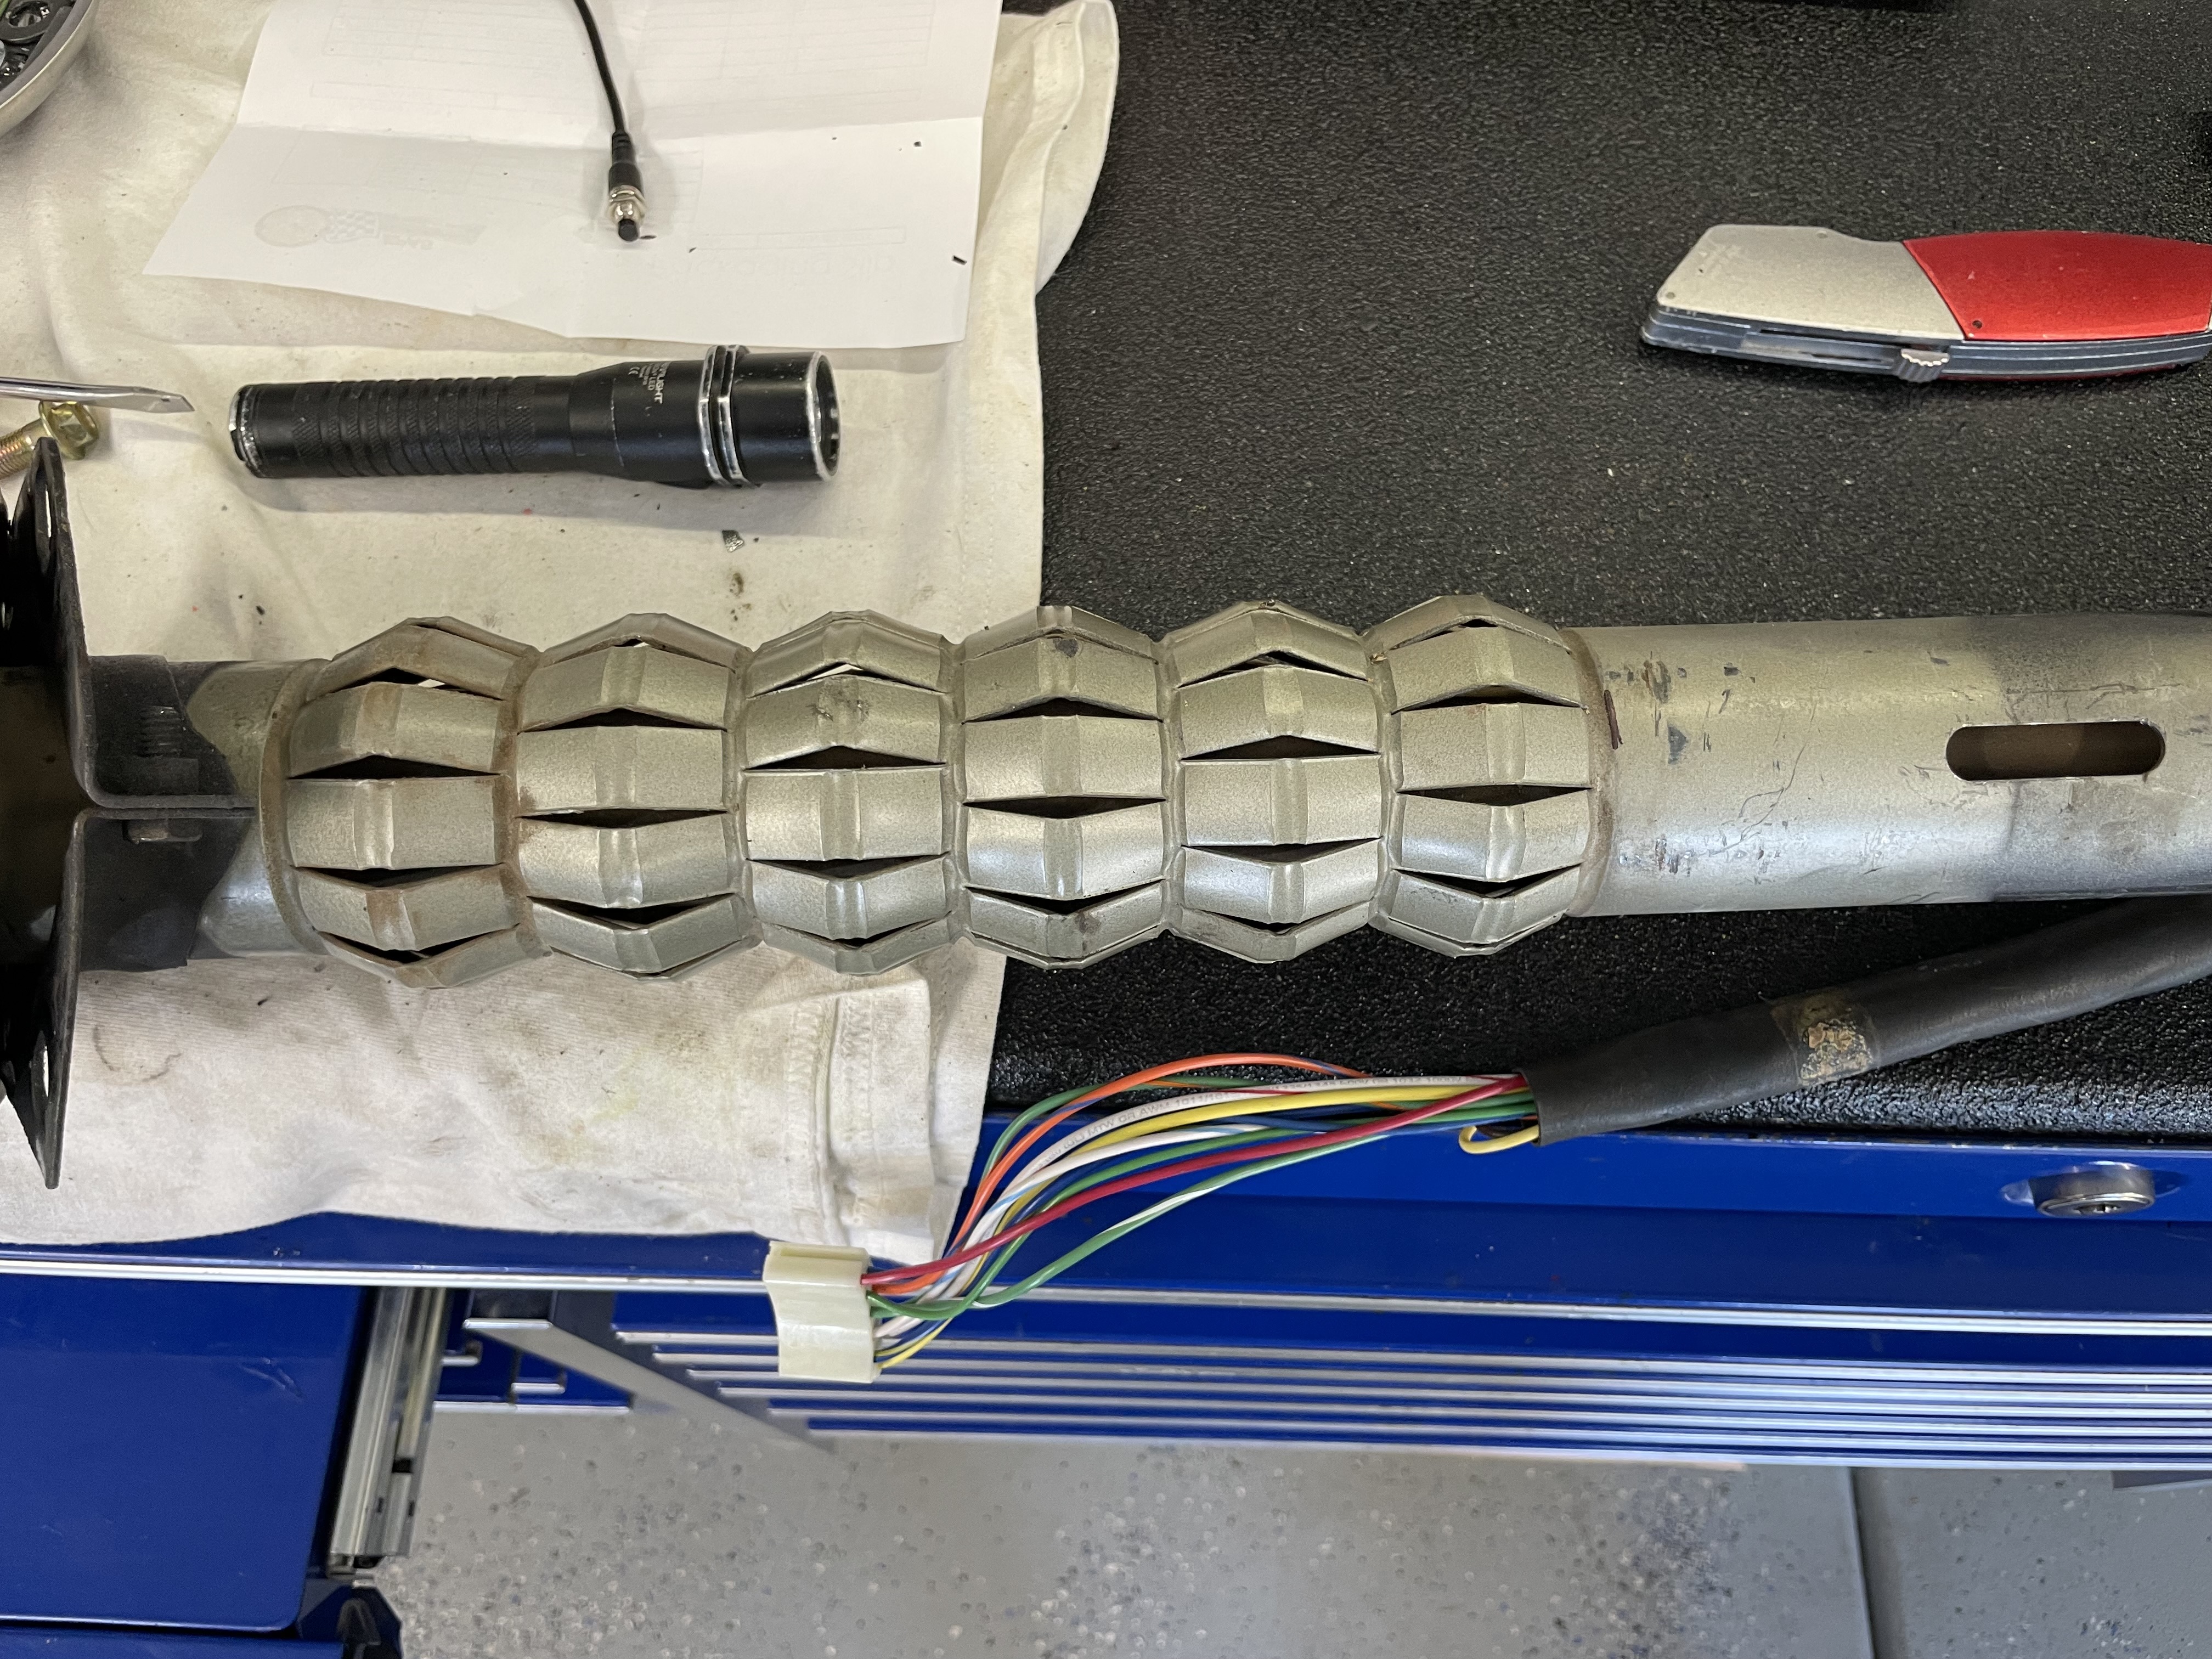
Install is pretty straightforward via the instructions but they do require you to use your brain a bit. Also you modify your column by cutting to fit the electric gear motor into it so if cutting is a hard no for you there is an aftermarket column available but will add 800-1k to the price tag. Here is all the parts that come in the kit except for the manual steering link I needed to add separate of the kit. . Not pictured is the control module that’s already installed in the car.
What gets cut off ends up being just above the bellows. It’s suggested to cut through the column and steering shaft then you remove the shaft and cut an additional 4” off of the shaft. This is dependent on the column you have in your car.
The biggest challenge here is how to get everything under the dash. Everything is fighting for space and since I have a manual car that makes everything that much harder. While the motor is clock able 360 degrees it’s recommended between 9-11oclock.Mine ended up around 10oclock since that is the only way it fits and even then it’s a compromise. It clears the clutch pedal but hits the headlight switch and fresh air vent, get it to clear those and it runs into the clutch pedal. The headlight switch would probably be ok as it just barely contacts the motor but since I’m not using the vacuum headlight actuators I simply switched to a non vacuum switch instead to free up space. The fresh air vent on the other hand I’m still working on. I fear I’ll may need to delete it but I have a couple ideas. Oh and the parking brake handle needs to move over by mounting hole which works but I’m not too thrilled it’s not straight. I may do something else with it later
What you see from the driver seat. No issues with my feet and pedal actuation
Overall not bad, just need to remove all the factory stuff and hook up the electrical. excited to see how it drives as I have never like the ford system all that much. Extra bonus is less stuff under the hood and under the car.