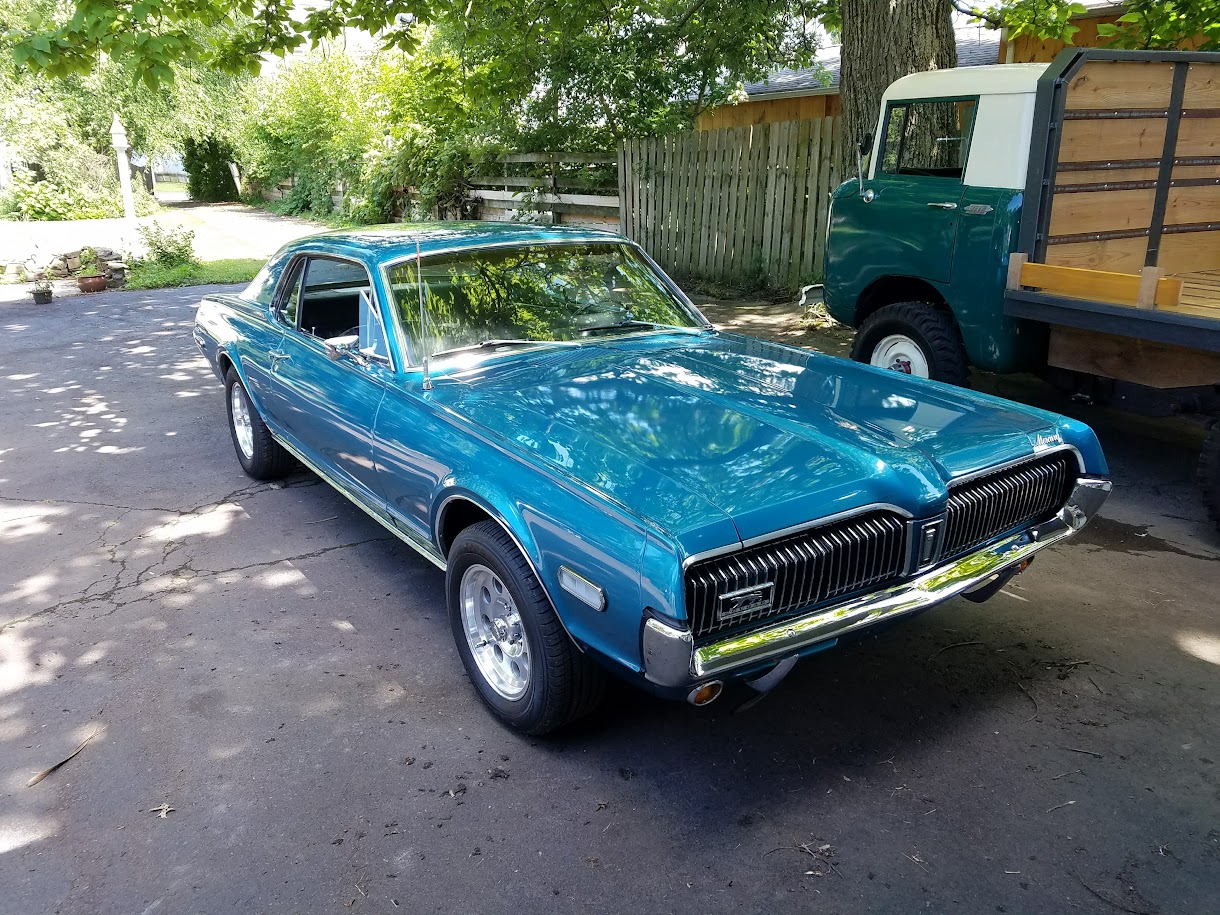
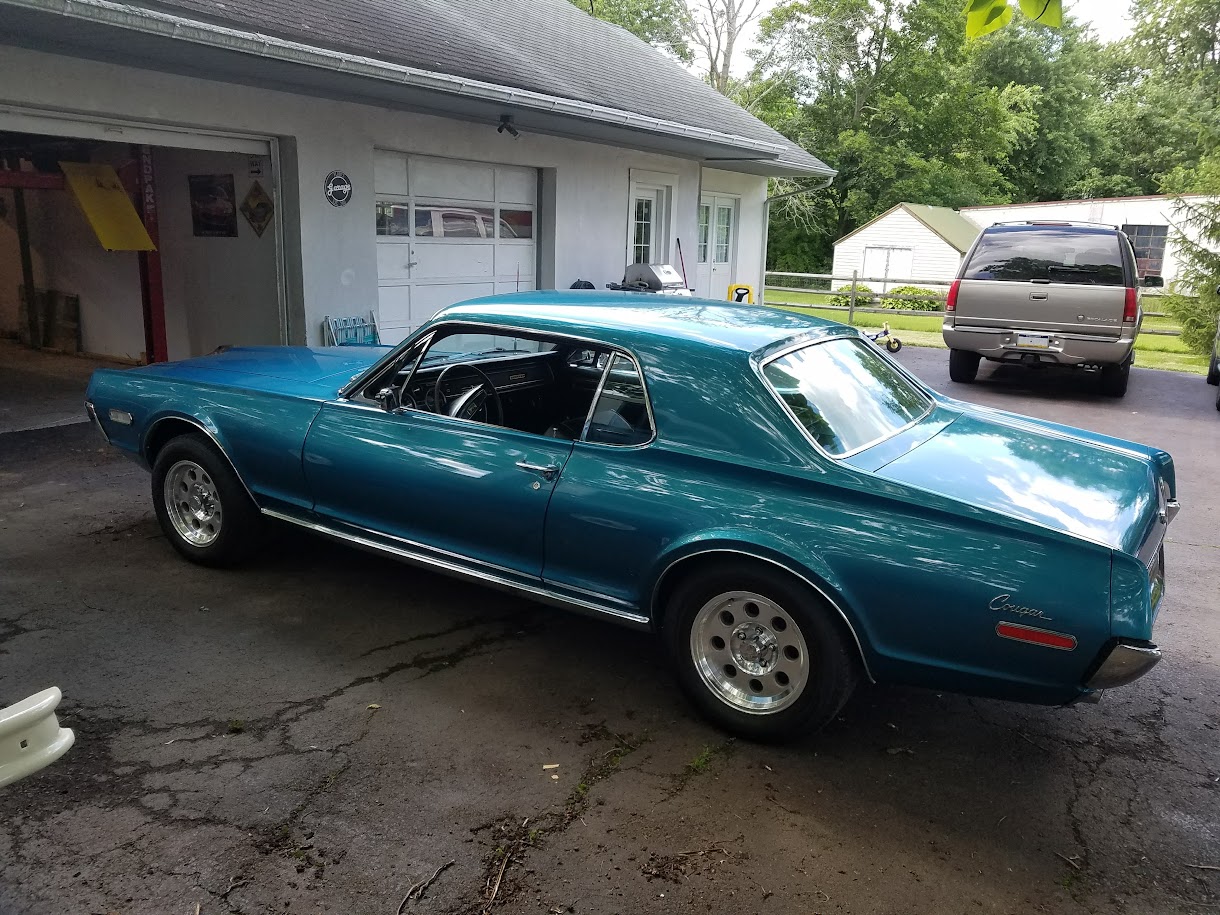
I just brought home my first classic Cougar about 3 weeks ago, a Madras Blue 1968 standard J-code 302 auto w/factory air. As I mentioned in my first thread I sold my 2013 Mustang GT to buy this car. The Mustang had great power and was fun to drive, but aftermarket parts are so expensive for them. I wanted something that I could tinker with and slowly improve without breaking the bank, and I’ve always loved the 67-68 Cougars. So I went to the Carlisle Ford Nationals this year, put the Mustang in the car corral hoping to sell it and possibly find a nice Cougar for sale.
It was cool to see all the 50th anniversary stuff going on at the show, but there weren’t too many Cougars actually for sale. There was a nice '69 convertible, but it was a little pricey for me and I really wanted a 67-68 anyway. I did notice that a '68 had popped up on craigslist in the Carlisle area.
The Mustang got a lot of activity, but it was mostly tire kickers. I did eventually meet a couple that were seriously interested in the car. We didn’t settle on a price until Sunday when the banks and notary were closed, so I agreed to meet them in Carlisle the following weekend to complete the sale.
Afterwards, since I was already in Carlisle I took a drive to look at this '68. It was pretty much exactly what I was looking for. Something that was partially restored but still had room for improvement, and the paint/body were nice. I’m not afraid of tackling anything mechanical, but I wasn’t looking to get into a full restoration involving bodywork and paint. I agreed to buy the car, my friend and I came back the next weekend with a Uhaul to trailer it home. I briefly considered driving it home (2.5 hrs mostly highway), but between the sloppy steering and manual drums it would have been a white knuckle ride for sure.
So my plans for the car for this summer are just fixing up a bunch of minor things that need attention, keeping her drivable so I can enjoy the car and take her to some local car shows. I already got a few things done I’ll post shortly. This winter I’m looking at replacing the front suspension and converting to power disc brakes, maybe wheels/tires if I can fit them in the budget (what’s on there now has to go ). More long term I’d like to do an overdrive trans conversion, whether that’s a 5-speed or AOD haven’t decided yet.
First order of business, engine is tough to start and keep running until warmed up. I find that there’s vacuum leaks everywhere, and the choke/fast idle is siezed up on the carb. Some new vacuum plugs, a little carb cleaner and futzing with the carb and it’s running a little better. PCV valve has failed which is probably causing a vacuum leak, replaced the valve and hose.
Checked the base timing with vacuum advance off, looks to be set to TDC! I later see that someone marked the balancer at 6* BTDC, I make a new mark at 0* and set timing to 10* BTDC. Vacuum advance seems to work, and with it connected motor is actually idling pretty good now. I’m getting about 18-19" vacuum at idle, I still need to check the headlight door actuators to see if they’ve got any leaks. They do work, but they’re a bit lazy so I’m sure they leak slightly.
Thanks! The pictures are at my friends garage, the FC belongs to his father-in-law. It’s a neat truck for sure, he built that custom bed for it and swapped out the original motor for a Ford 302.
She looks to be in pretty good shape already! Amazing the things you find from the previous owners that make up scratch your head wondering wtf they where thinking!
Glad you’re enjoying the Cougar and getting things sorted out. Vacuum leaks can give Classic Cougar headlights a fit but at least yours are working.
Steven
Maybe you already know this, but with the little info in the thread figured I’d mention it … the carb needs to be pumped once to set the choke. Also you’ll need to loosen the screws holding the cover to rotate it if it’s too tight or loose when cold. But of course before all of that, check that the wire on the choke cap is going to a SWITCHED power source and isn’t constantly heating the choke making it stay off all of the time.
Those FCs are neat trucks, in-laws family has one that is very early (they claim number 7 off of the line) that they ended up with I think a 283. The 4cyl just wouldn’t pull through the mountains without overheating. They did a custom camper on theirs for bed modifications.
The choke linkage was actually physically jammed, I think from sitting too long in the previous owners garage. Once I broke it free and sprayed some carb cleaner around I got it moving freely like it should. I do need to move the electric choke wire, it’s currently hooked up to the coil. I’m gonna rewire it to the STA port on the alternator.
I think FCs just have a chronic overheating problem. You just can’t fit that large of a radiator in the space under the cab. That one has a new aluminum radiator with an electric fan and it still has trouble on hot days.
After playing around with the carb I found that using the original linkage rod on an Edelbrock carb doesn’t work too well. Between that and the kickdown cable being installed wrong, flooring the gas pedal only gave about 25% throttle. I got an adjustable linkage rod made for Edelbrock and Holley carbs, and installed new dual throttle return springs. Throttle action feels smoother and allows the full travel to WOT. The sending unit/ignition harness that runs over the top of the motor basically disintegrated when I touched it, so I replaced that too.
I think because of where the fuel line connects on an Edelbrock the previous owner ran a hose the long way to the fuel pump, all the way across the firewall and down. Then into a cut end of a hard line, which was leaking. I ordered a metal line for an Autolite 4300, wasn’t a perfect fit at the top but I was able to bend it slightly to work. I found a 90 degree banjo fitting for the carb so the hose could come straight down, into a filter then to the hard line. Not the prettiest setup, but it’s functional for now and hidden under the air cleaner. I wanted to use this, but the coil is in the way.
OLD:
NEW:
Also discovered I’ve got air shocks in the back. The leaf springs are sagging badly, but for now I pumped up the shocks to at least get the car sitting level.
The driver’s side fender extension was badly misaligned, to the point that it was contacting the hood and wearing off the paint:
It took some creative usage of ratchets and extensions, but I was able to loosen up the top two bolts of the fender extension and muscle it back into place. Luckily the fit was good on the lower part of the extension so I didn’t have to worry about loosening that bolt. After getting it lined up, I can tell the extension doesn’t exactly follow the contour of the fender like it should, but it’ll have to do for now. Overall it looks much better, just gotta throw some touch-up paint on that corner:
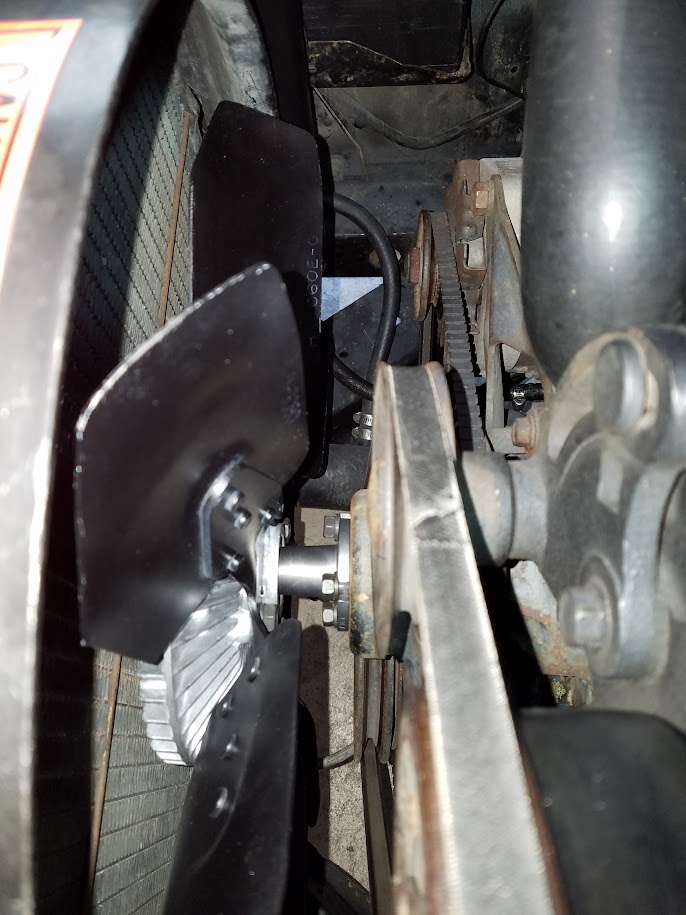
So after driving around for a while the temperature would creep up fairly high on the gauge. The car does have the 24" 3 row radiator with the 7-blade fan, so it really shouldn’t be overheating if everything is working correctly. Decided to start with a new fan clutch, if I still had issues I’d move onto thermostat, water pump, etc. The resistance readings on the old sender didn’t look right, so I decided to replace that as well. I also put new battery cables on. The previous owner had the battery flipped so that (+) was right under the radiator support. I learned the hard way when I clamped my timing light on that this isn’t a very good arrangement . The old neg cable didn’t reach, so I put a new set on and flipped the battery to the correct orientation.
I shot the fan with some semi-gloss black engine paint while it was off:
The top of the radiator was looking kind of ugly, so I figured I’d hit that with some paint to pretty it up for now:
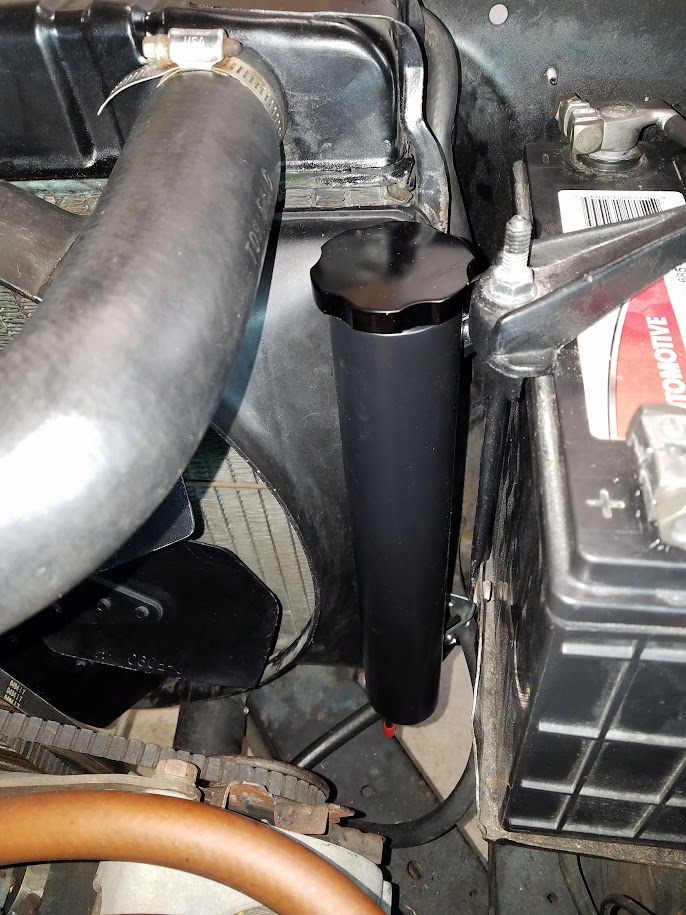
Even though it wasn’t OEM equipment, I really wanted to have an overflow tank on the car. I found this universal one that really hides away pretty well since it’s black. I had to bend a couple brackets up, but the mounting tabs on the tank do line up with the screws for the radiator shroud. I mounted mine on the passenger side because the A/C hardware interfered on the driver side. For non-A/C cars the driver side is probably the better choice. It’s barely noticeable which is exactly what I was going for.
Once I got everything buttoned up and topped off the coolant, the temperature stayed low (never went past the T in TEMP). I checked it with an infrared thermometer and got 190 going into the radiator, so I think I’m good now.
Nice work, and very well done. I admire your patience and ingenuity. I did much the same as you and picked up a '67 GT last fall which had the body work and interior nearly complete. Been working on the engine and tranny all summer. Almost ready to go now…
Just realized it’s been awhile since I posted an update so here’s what I’ve been up to:
Replaced the coil and wires with new Pertronix Flamethrower “stock look” 7mm wires and black coil. Looks much better than those ugly yellow wires!
Once I put the new coil on I decided to bypass the resistor to run 12V to the coil and Pertronix. In the process I found the ignition switch pigtail had been replaced. Unfortunately none of the connections were crimped properly, wires just pulled out with almost no effort! I’m lucky I found this, could have left me stranded somewhere.
Rewired the electric choke to the STA post on the alternator with an inline 10A fuse. Because of the limited space around that post on the alternator, I used one of these 90 degree pigtails so I didn’t have to mess with threading and tightening a nut: https://www.rockauto.com/en/moreinfo.php?pk=50285&jsn=16
This made the choke open much slower (STA only delivers 6-8V), so I had to adjust the choke housing lean a couple notches to make up for that.
I had to finally disconnect the headlight vacuum setup. It technically worked (slowly) but the vacuum leaks were so bad it really made the car idle poorly. I think an electric conversion is in my future. I’m getting ready to start my winter project of redoing the front suspension/steering/brakes. Weather has been nice so I didn’t want to take the car off the road just yet, but the steering gets more floaty by the day so I think it’s time.
Finally I’ll leave you with a couple shots of the Cougar at the Perkasie, PA car show:
You may wish to monitor your coil temperature if you are going to run a full 12v to it. I did that on my old XR7 and it was too much for the unit. It never blew, but it almost glowed sometimes it got so hot. Bought a Pedapter unit for it from RCCI and ran a full 12v to the module and 9V to the coil. Car ran like a dream and i could even (briefly) hold the coil in my hand after a long ride on a hot day. Just ordered another unit for my GT.
Yes the old coil I believe had a marking saying it was only meant for 6V, but the instructions for the Pertronix coil I installed specifically say that it wants to see 12V.
Many people on this forum would advise you otherwise…but I wont. I opted out of the Pertronix debate sometime ago. I do what works for me and my car, and so should you. I would however, strongly suggest that you do monitor the coil temperature on a regular basis until you are satisfied that the unit won’t boil over. That is the best thing about the Pedapter unit…you get two separate voltage sources. One is constant 12v and the other can be manually switched between 9v and 12v. Run this lead to the coil and you can determine your best scenario at the flick of a switch.
Nice cat! I have a 68 myself. Fell in love at 10 when they first came out. Is that the original color? I like it! Would look great with 15" styled steel repro wheels from WCCC.
Ray.