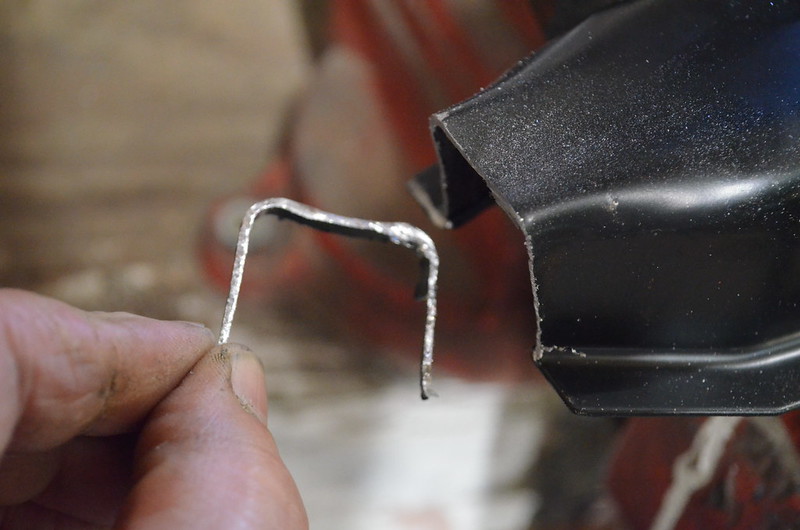
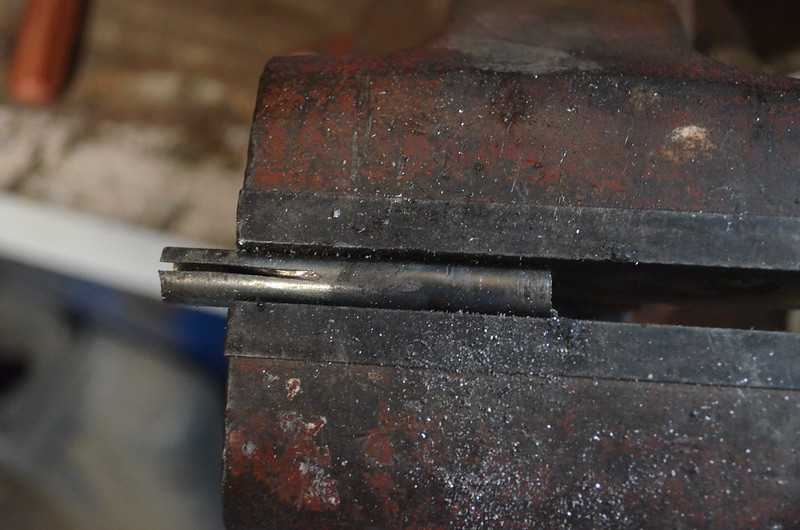
Bingo. Aftermarket replacement yokes do not have the “hood” on the front like the OEM’s (wonder what is that for anyway?). Same exact experience I had with an OEM FMX yoke (same as C6, 31 spline) using it with my TKO 600. I cut the thing myself and carefully finished the end. Worked perfectly after that.
The yoke came with the kit. It is shorter then the FMX/C6 one. I’ll post a picture of both side by side later this evening.
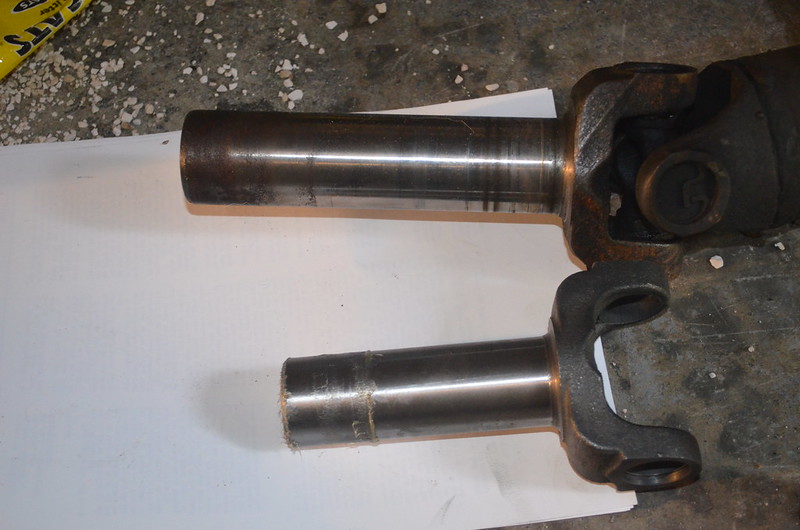
This yoke came with the kit. It is a 28 spline same count as a C-4 or top loader. Not sure about the length yet. This is how it compares to the one from the FMX.
[/url]
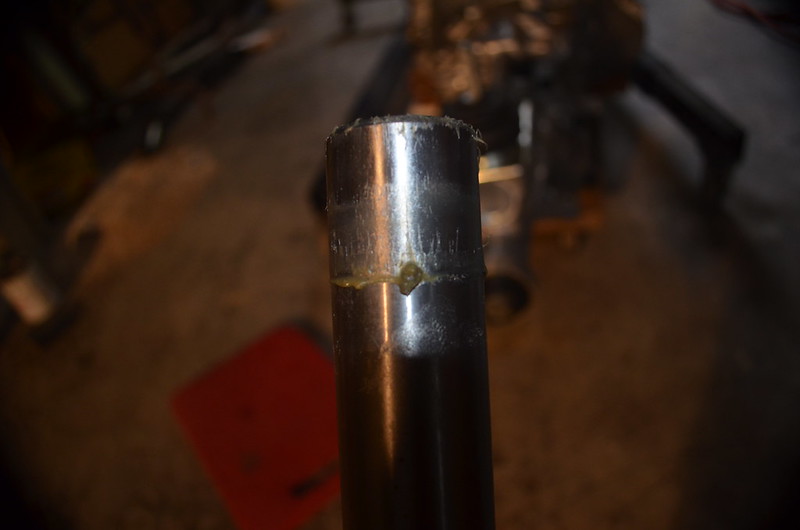
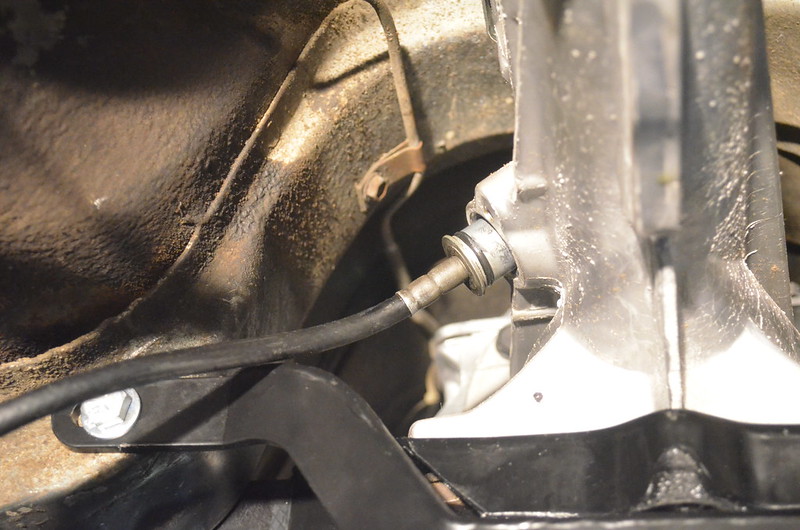
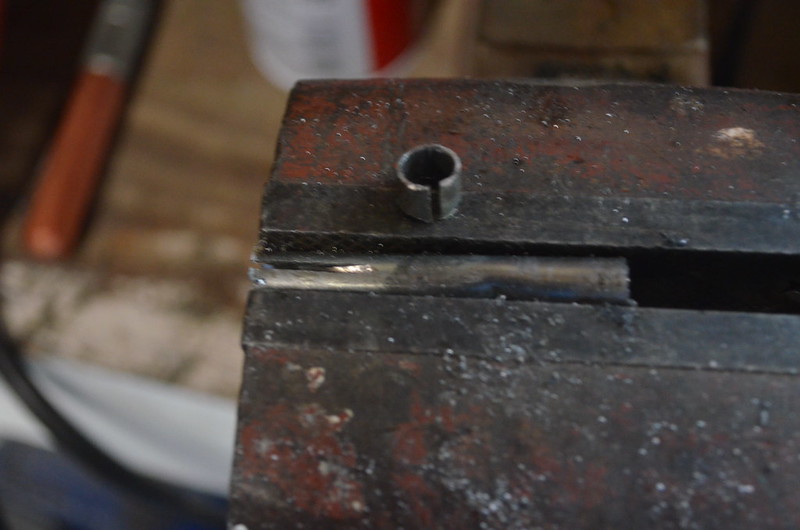
Here you see the grease line where it stops going in,
[/url]
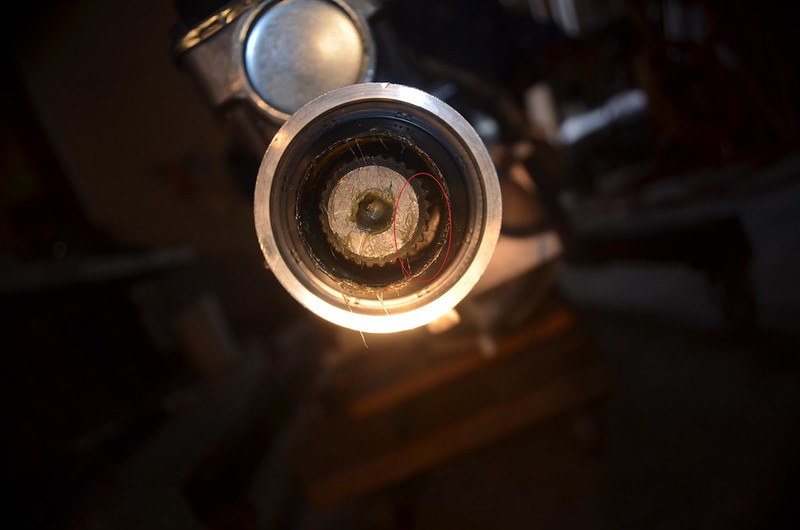
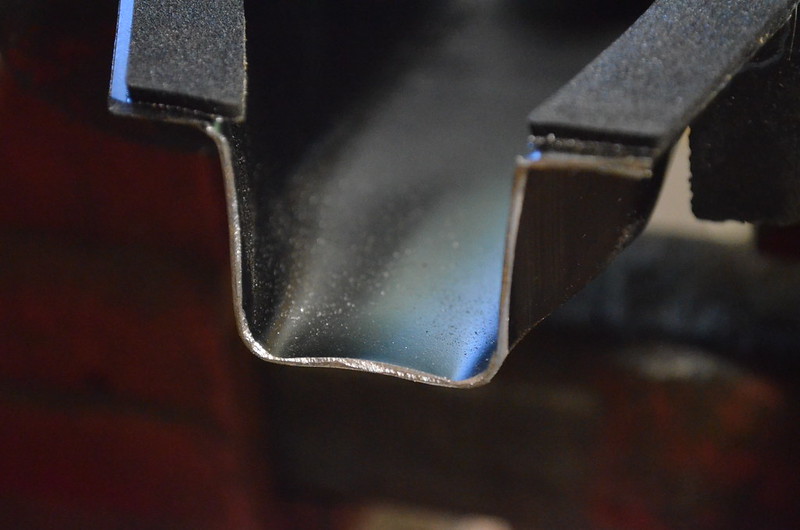
If you look in to the tail shaft here you can see the obstruction.
If any one has thoughts or ideas I would appreciate hearing them. I’m not moving on until I have this taken care of.
I think I’m going to make some phone calls, but as I had to play ditch digger this evening for a County mandated Septic inspection happening tomorrow and needing to install covers so I don’t need to do this tomorrow it will be later this week.
I hope to have some time to document more of this work in the mean time. I have a lot of pictures to up load still.
Next I’ll be installing the cable. For that I’ll have to pull off the master cylinder and booster. I’ll be detailing them before they go back on. So it may be a couple days before the next update.
I would say that something is amiss in the transmission. My modified toploader yoke slipped into the T5 easily.
I think I found what I need to know,
https://www.youtube.com/watch?v=3te_HgQ8JF4
At about 1.44 this video stated it has a rubber plug installed to keep out debris and it will move when you install the drive shaft. I would think the manufacture would have a notice about it included for idiots like me.
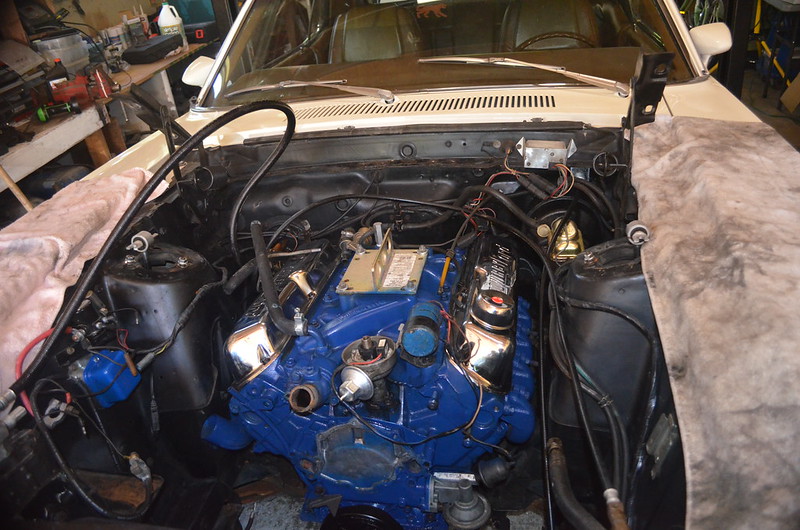
I made some progress today. The engine and transmission are back in the car.
and the Under side,
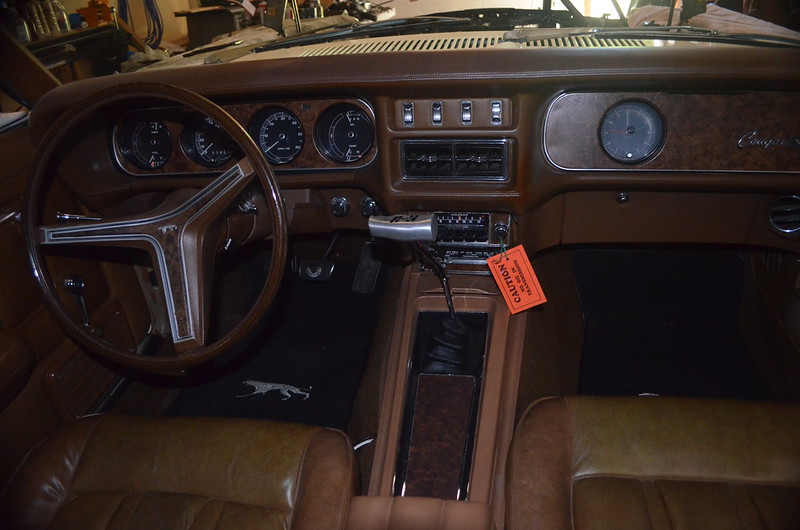
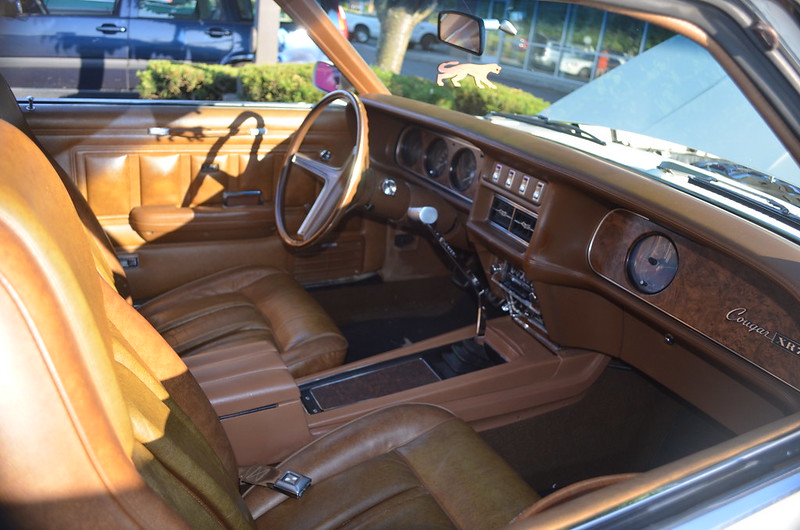
I started hooking things back up. I put on the shifter, shifter boot and put the console back in the car. Here is what it looks like inside.
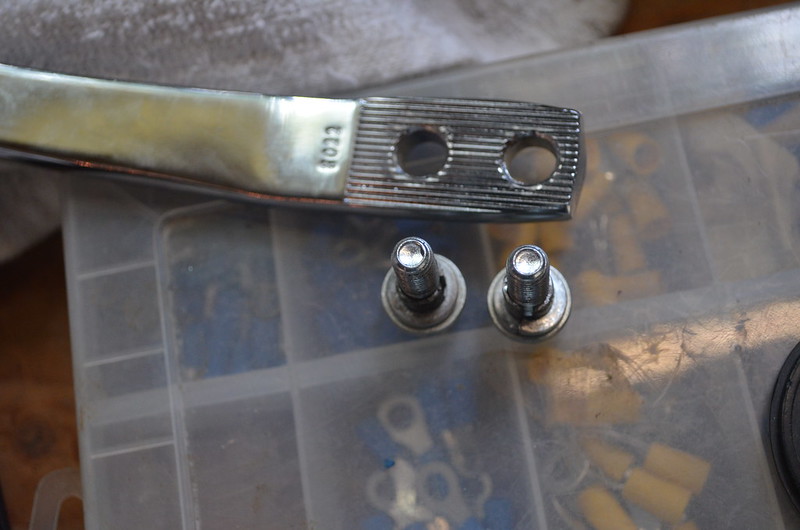
Under the car I got the rear cross member installed, The clutch cable routed and adjusted. Then I found a few things that seam to be problems. First is the speedometer cable, It will not go all the way in. I put on one of the new driven gears that came with the kit. Here is a picture of how far it went in.
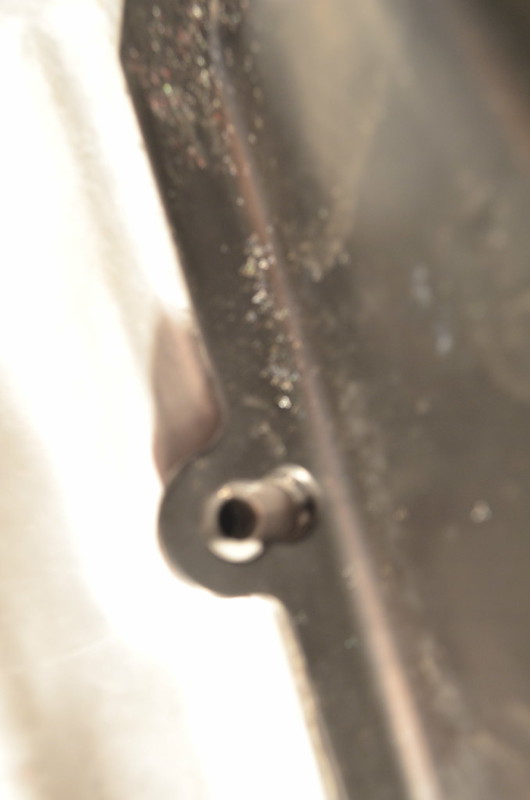
Then the kit comes with this nice dust cover for the clutch cable. But it did not come with a fastener…
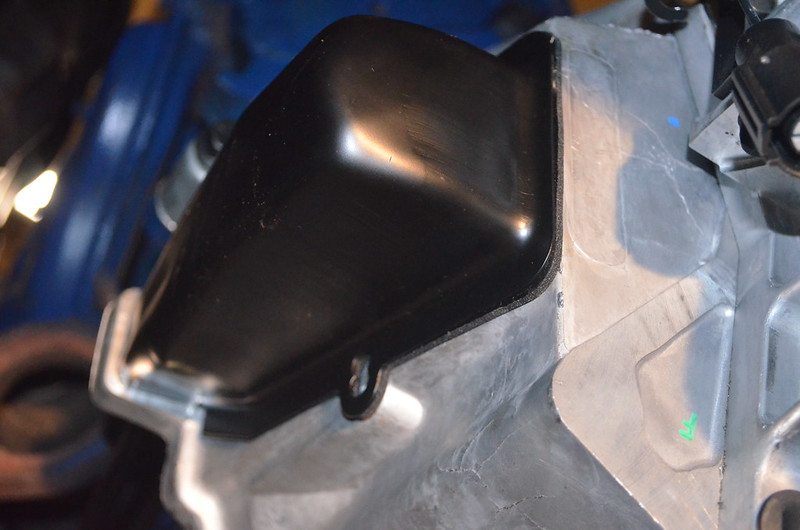
But that’s not a big deal as it doesn’t line up with the hold in the bell housing any way.

I don’t think that will be a big deal to fix. I need to find out what kind of fastener it uses, The hole in the bell house does not look to be threaded, so it may be a push in thingie.
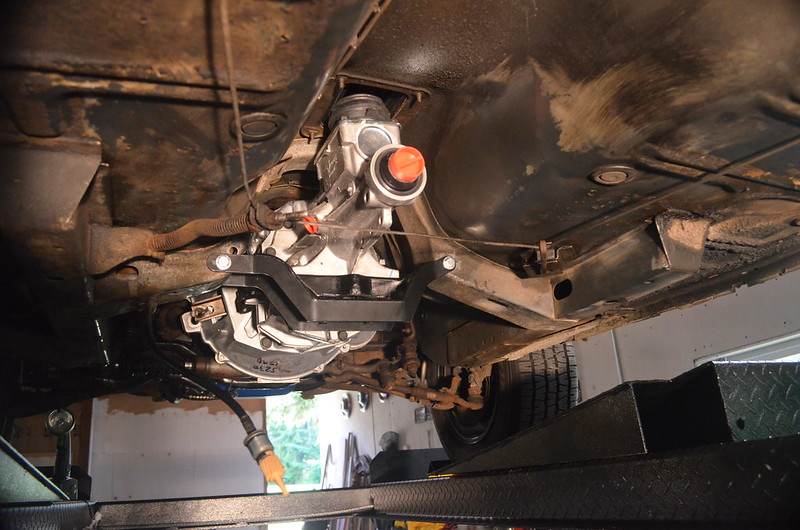
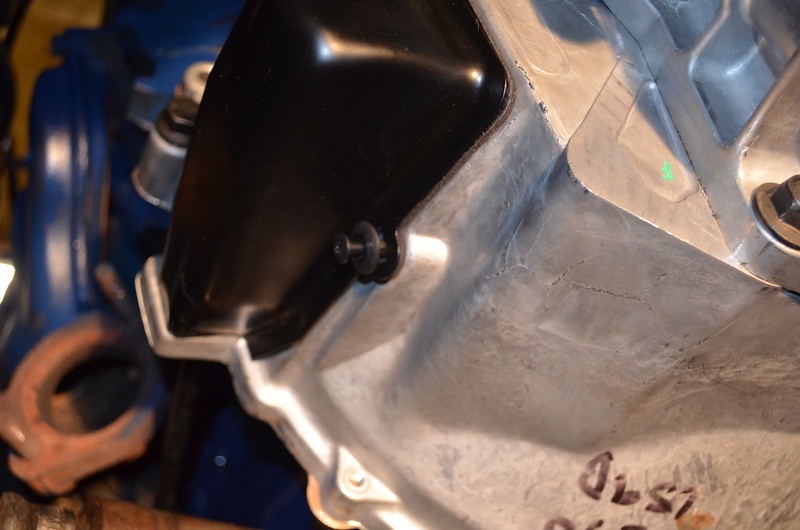
I then moved on to one of the M.A.Ws. I replaced the power steering hoses. Well most of them. Still waiting for the ones for from the control valve to the ram.
Well, I got a late start today. Before I started I went to the local hard ware store and got new nuts for the exhaust and a fastener I thought would work on the little clutch cover.
So the first thing I did was modify the cover by trimming about 3/16" off the front edge.
Then filled the cut edge for a nicer finish.
Then test fit it in place.
It aligns with the hole nicle now. So I tried the fastener, too big…
Oh well, I can get another fastener later. So I moved on to installing the new H pipe and intermediate pipes.
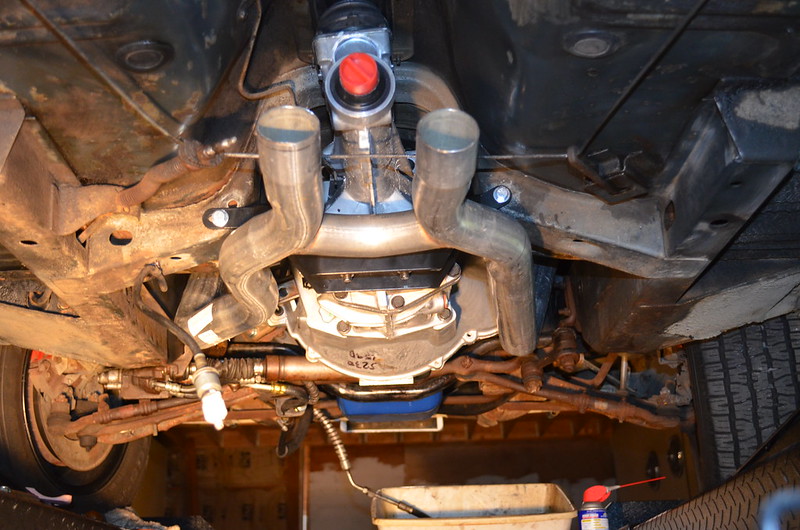
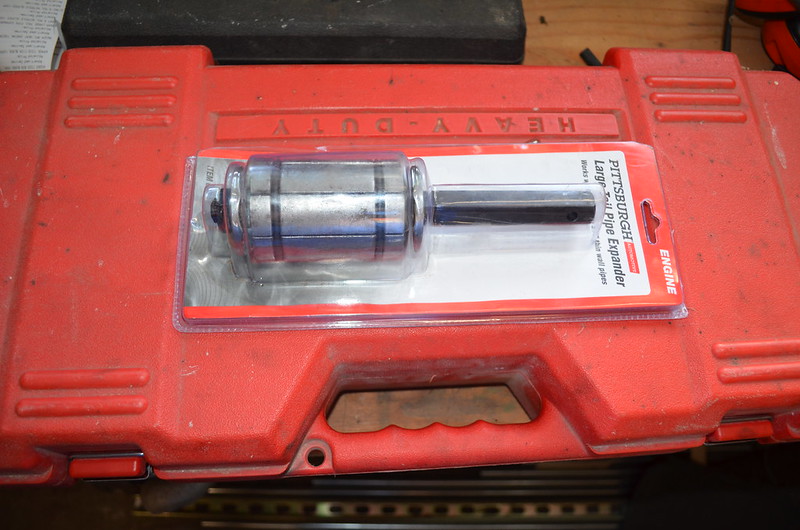
H pipe went on with no problems. It is from the parts lot I bought last summer. I moved to the intermediate pipes and found they are notexpanded wide enough to fit over the H pipe. So a road trip to the big city to visit Harbor Freight and get one of these.
It was a great day to take Mary Ann out for a drive any way.
So when I got home I worked on the pipes,
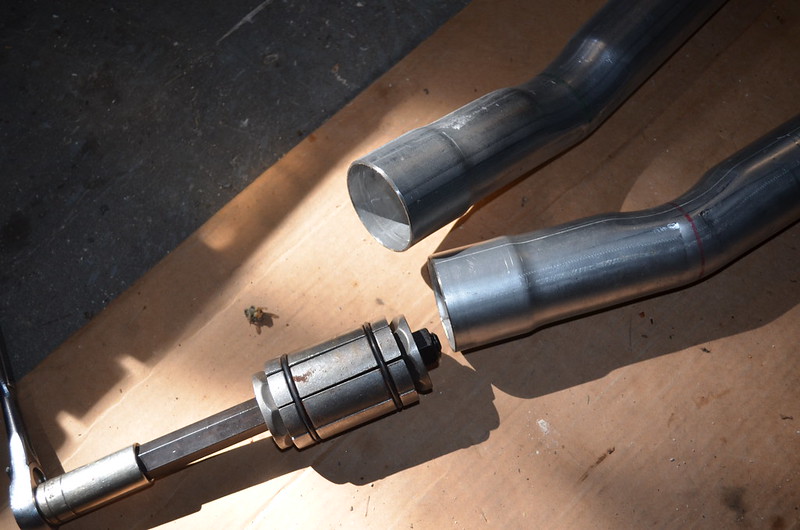
Only took about another half hour each pipe and I have this,
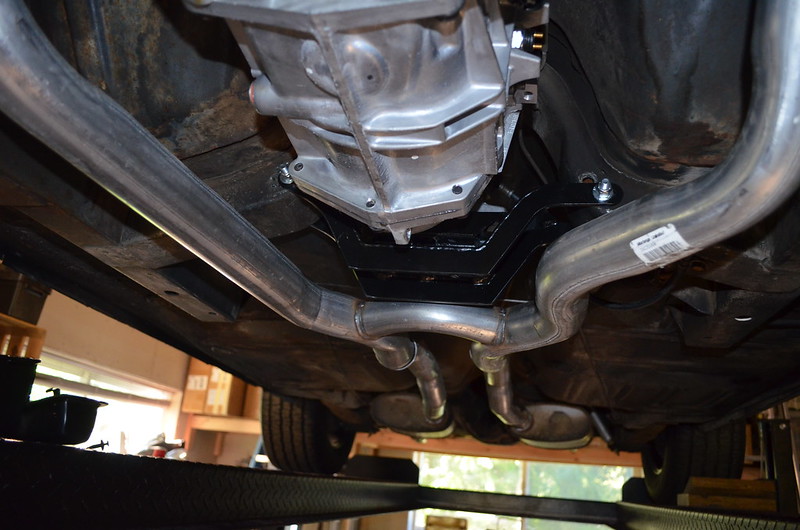
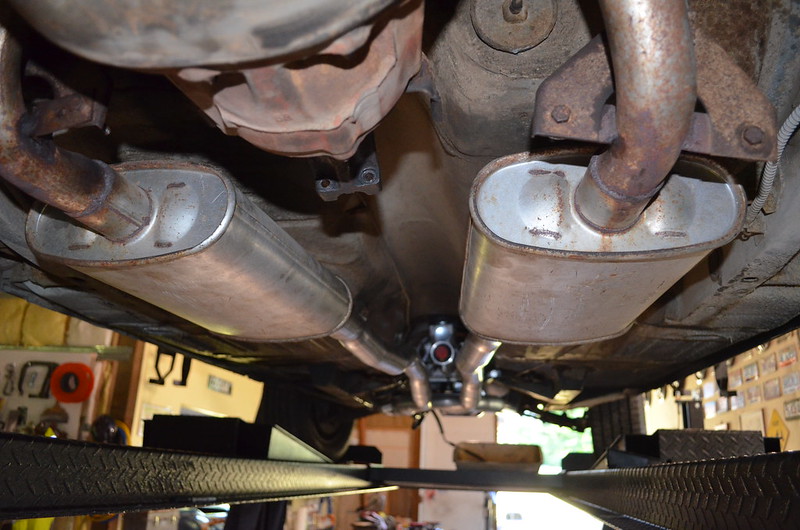
I reused the Dynomax mufflers and tail pipes that were on the car.
This should be a nice improvement over the old set of pipes. They did not have a cross over and hung lower them I like. I never had them scrape, but were still 2.5 inch lower then this set. I have new clamps some where here and will find them tomorrow and install them and do a tack welt to each joint for security. I hate having exhaust come apart.
Stoped at Harbor Fraght again today. I needed a 6 inch caliper as the 12 inch was to big to get in and measure the opening for the spedo cable in the side of the trans.
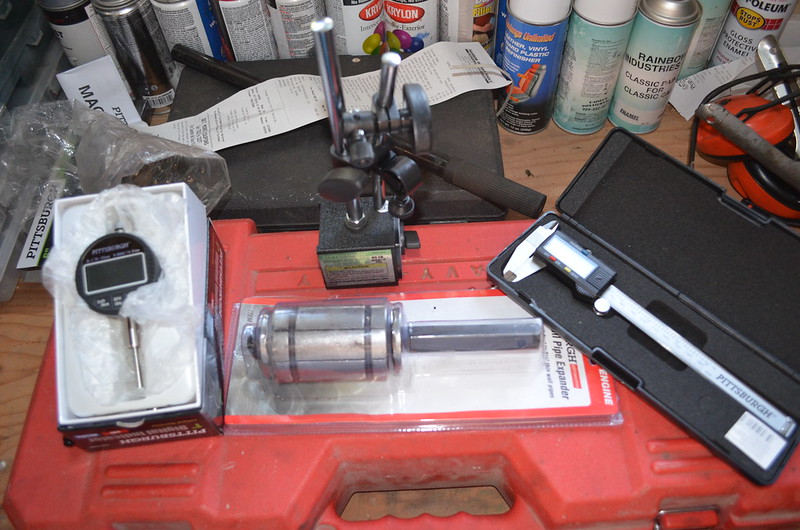
So far I have has to buy a dial indicator and magnetic base, A tail pipe spreader and now the 6 inch caliper. I love tools though.
So I have the drive shaft out for rebuilding, shortening it and installing new U joints as well as the new yoke. It should be done tomorrow or Thursday. I plan to pick it up Thursday any way. I have a monthly meeting tomorrow in South Seattle. I hate driving to Seattle. It is just the typical large city. A PARKING LOT! I have a lot to get done and will be hitting it hard Thursday and over the weekend. I have a date to baby sit the granddaughter on Friday so nothing will get done then. I maybe able to get her wrenching later though. She does want to help.
Could your speedometer cable driven gear have too much material on the end? Looks extremely long, like maybe that is stopping it from sliding home? I’ll have a look at mine this evening, as it’s still out, too, but it shouldn’t be a hole diameter issue.
I would hope not. I did try with no gear on the cable. No-Go…
LOL, my daughter loved getting under the car when she was 3-5 y/o. Now, not as much. ![]()
Well, crapola. That is odd.
Is the automatic speedo cable different than a manual? Looked at my driven gear last night, and it has the same(or looks to be) length nipple on the end of it as does yours. Only thing I can think of is maybe the cable for a former automatic isn’t compatible?
Mo,
They are be the same…
I didn’t make much progress this week. I worked yesterday(Saturday) and baby sat my granddaughter Friday evening. So for those of you who are wondering about the slip yoke and spedo problems, I received the new spedo cable in Saturdays mail, and it works. So another project to install it. I have no idea why it is about 0.003 inch smaller then the one in the car. For the slip yoke, today I went to the local pull a part and got a used one from a 95 Mustang V6 with a T5. It works. So I will be using that one and the brand new one will probably go back to CJ Pony parts.
I started putting parts on the engine after getting that done. I didn’t have the camera with me, I lent it to my son for a hike he and his family went on today. I can’t wait to see the pictures. I will update with pictures soon.
Well I have finished this swap now and have about 100 miles on her with the 5 speed installed. Over the last week this is
what happened.
I went to put the used slip yoke on to the drive shaft, AND found it used a bigger U joint. So I sourced a new one from a
local Mustang shop. I went over with the 2 I has and made measurements and the new one looked good. It is now in the car
and fits. Note, CJ Pony parts has agreed to take back there bad slip yoke and refund me the cost of it.
I got the speedo cable replaced with the new one. Fit fine. Looks good. I has no unexpected troubles installing it.
(outside of the fact it requires a lot of dis-assembly)
I put the rest of the engine back together, filled with fluids, I found no leaks. So I started it up, the starter was
hanging up. It was the old one that was in the car. I had a newer one from a parts car. I put it in and had the same thing.
So I went and bought a new hi torque one for a 1990 Mustang. It works fine.
I spent a a while getting the clutch cable adjusted. It is a little different then a Z-bar set up. I took it around the (2
mile) block a couple time as I was adjusting it. (side bar, the granddaughter went on the last one) I flat it was good.SO I
cleaned my self up and took her out for a drive. Wow, what a deference. She responds much better. Sounds a lot better with
the new H pipe.
We have one of those speed limet signs that have a “this is your speed” things on it, so I went through it to see how far
off my speedo was. I was reading 50, it said I was doing 58.(50 is the limit) I do plan to get the gears changed. I found
that at about 50 if I out it in to 5th the engine is only turning about 1200 RPMs. At about 70 it is about 1700.
I think it will be 3.500.
I put about 100 miles on her today. I think I’m going to enjoy this little project.
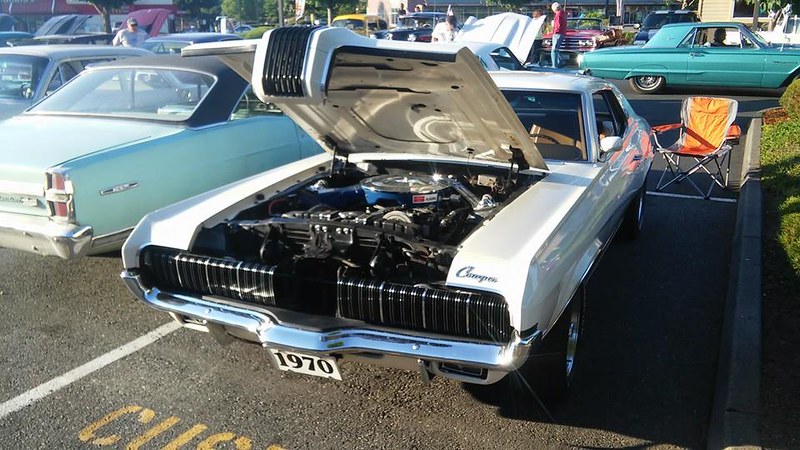
This is Ginger at the Burger King in Arlington Wa today,
Things done doing this swap,
New trans,
New clutch
New timing chain set
New starter,
New P/S hoses,
New plugs,
Oil change,
Exhaust reworked.(new H-pipe & intermediate pipes)
New starter,
New engine mounts,
Drive shaft shortened,
New speedo cable,
New U-joints,
Engine freshly detailed,
Sterio speakers rewired,
Moved the coil from the apron to the engine.
I still need to do a good cleaning and detailing to her.
I’l be doing a little more work next week. Today I raised her up on the lift to double check things and found the power steering pressure line is leaking at the pump and it looks like the front seal is leaking too. Both are new. The kit I got front main seal in didn’t come with the sleeve for the damper, The guy at NAPA asked me about that, he would have had to order it. So tomorrow he gets to place the order. For the most part today was a no work on car kind of day.
I hope all you father’s out there had a nice day. I did.
Glad all got sorted out!
This evening I’m going to document one of the things that I had to do with this swap I didn’t think I should have had to. The Hurst shifter has bigger hols then the bolts needed to hold it to the shifter ear on the T-5.

As you can see here. So I made a couple bushings out of the old P/S pressure hose.
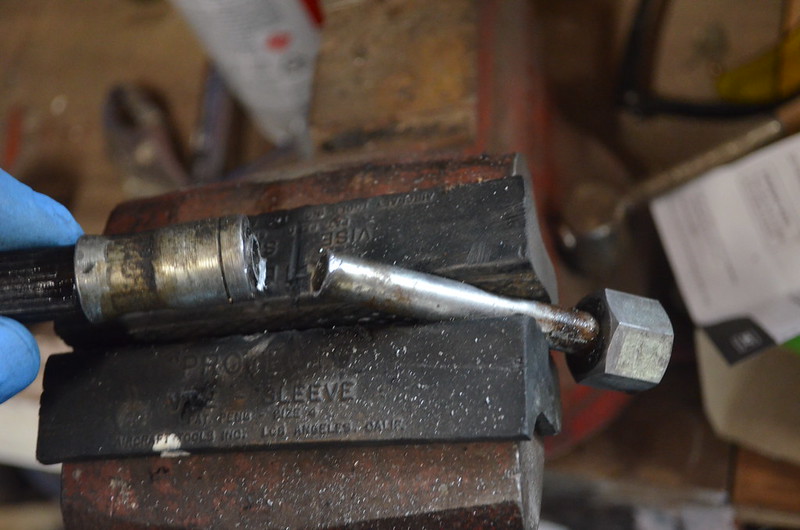

I started by cutting the end off. Then doing a side cut. I was a little unhappy with my self. It has been a few years sense I last used my tubing cutter. And of coarse, I couldn’t find it. I used my saws-all. Made a little more clean up and not quite as nice of cuts.
I then marked the tube and cut it to the thickness I needed with the saws-all. I clamped it in the vice at the mark and used the vice as a saw guide. Worked fairly well.
I then cut the second one and went about deburing and filing the edges and cross cut to clean them up and put them on the bolts.
and checked fit,

Then installed it.
I think the finished product looks good.
I have a few other little things I did that I hope to document soon.
I took Ginger to work yesterday. Then went to a curse in. She ran great, shifted fine and all went well until time to go. She did not crank at all. Like the neutral safety switch was not in start mode. I fiddled around with the connector and she started. I used an Old 4 speed pigtail that shorts the circuit. I at that point thought the plug may not have been set tight. I had a fun drive home. Shut it off and went in to the shop to open the bay door up. Then she would mot crank no mater what I did. So the old short across the solenoid and in to the shop she went.
So this morning I went about trouble shooting it. No power to the solenoid, as expected. Unplugged the safety switch/backup light connector. I had continuity over the 2 pins. But got no power from the switch. I have a tilt column I’m going to restore for this car. So I plugged in the ignition switch. Bingo! Starts up fine. So I installed it.
So the question I have is do any of you 70 owners know who has reproduction 70 ignition switches?