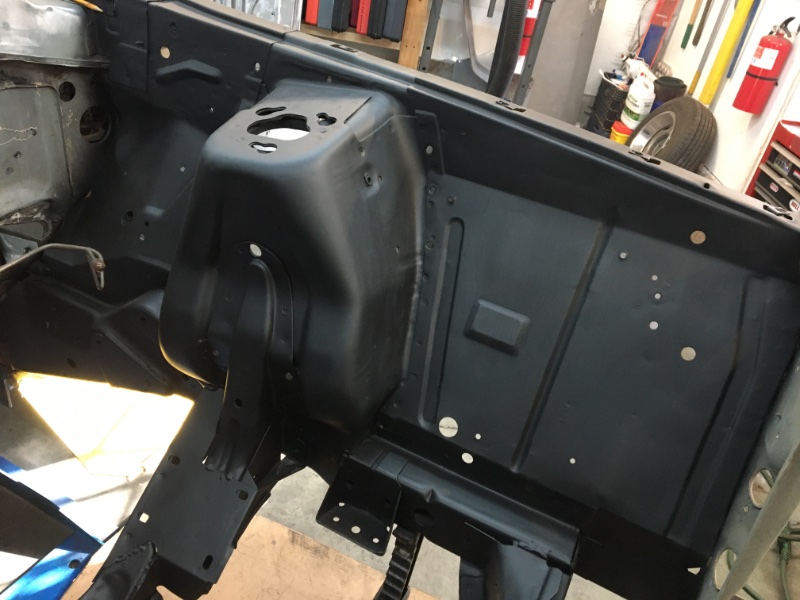
Not 100% complete, but here’s where we are after 2 coats of PPG DPLF74 red oxide. The LED work lights make it look a LOT brighter than the color really is.
A few spots I missed, and still need to address the front leaf spring area and the outside of the frame rails.
Compared to the greasy, sooty, fire extinguisher residue covered, flaking undercoat MESS that was there a week ago, I’m pleased.
NOT going for concours correct - just trying to make it presentable and showcase the solid condition of the unibody.
It’ll be SO MUCH nicer to work under the car now with the grime gone…
Above the gas tank you can see the floor color and the body color overspray from painting the bottom of the quarter panels, the pinch weld behind the wheel opening and some from the rear valance painting. Sure was a nicely preserved rear floor in that car
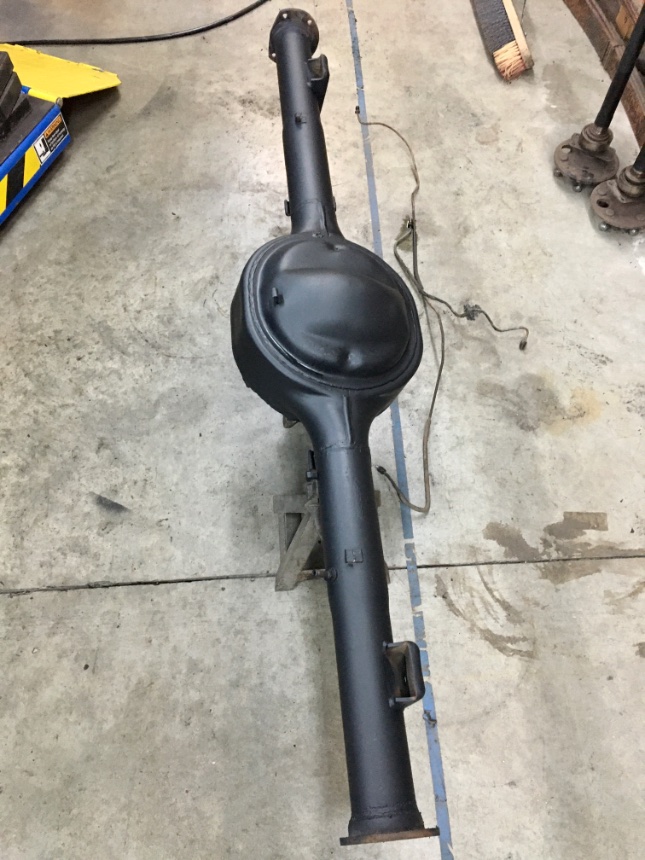
Will repaint the center section in red-oxide, and re-create the factory paint codes/marks I found during cleaning. Reproduced the paper axle tag using the code on my build sheet.
Axle bearings, wheel cylinders, shoes, hardware kit, rear brake lines are on order.
Used to be that many of the small parts (gaskets, water pumps, wheel cylinders, brake hardware kits, etc) were in stock locally. Now, it seems like EVERYTHING is a special order. Even simple stuff like axle flange gaskets for a 9" and rear bearings are 2-3 days wait.
I’d be a lot farther along if not for the wait times on parts.
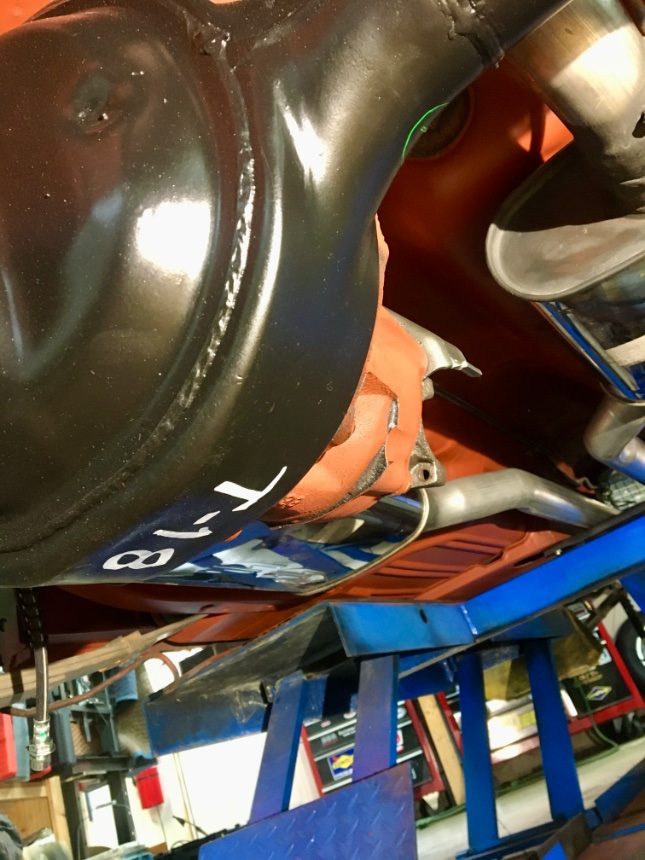
Was able to recreate some of the paint marks and assembly line codes that I found when cleaning the differential housing. The T-18 code on the bottom was a bit of a swag. I could clearly read T-1*, but not sure if the last digit was a 6 or an 8. Flipped a coin, T-18 it is.
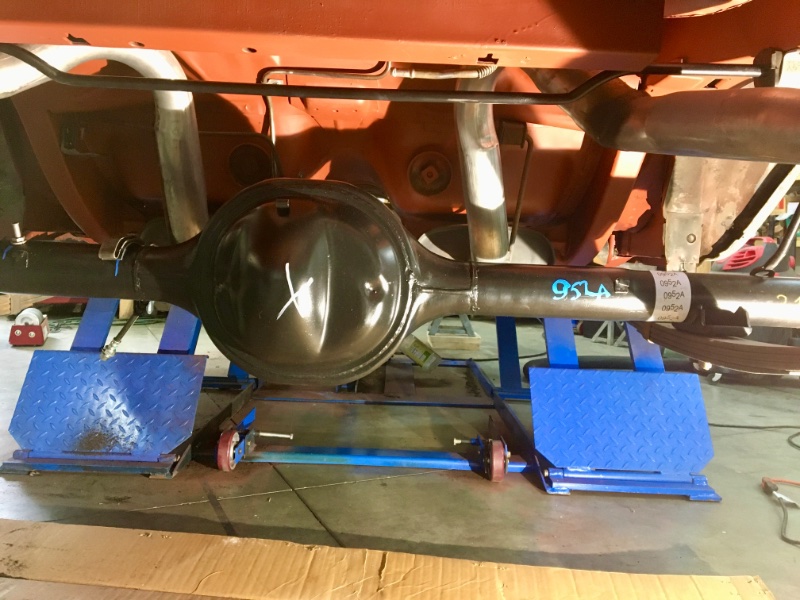
The axle tag is my own recreation, based on a VERY worn original that was found on my `70 Cobra. The 952A axle code is what’s on my Cougar’s build sheet.
Brakes, rear bearings are next. Was going to re-install the axle U-bolts and shock/sway bar plates, but the aftermarket U-bolts (Eaton Spring) are an inch too short.
Who sells a quality rear brake hose (frame to axle) that has the right 7/16" flare threads on the frame side? I’ve bought 2 thus far, and all of them are 3/8" fittings, not the 7/16" as original.
I’ll be dammed if I need to remove/cut/reflare or replace the long brake line just to change the fitting from 7/16 to 3/8"
How does the aftermarket get away with making such crap?
Turns out the rear brake hose for 71-73 Mustangs and Cougars are different. Mustang uses a 3/8" fitting on the frame side, Cougar uses a 7/16" fitting. Strange.
Anyway, found the right Cougar only hose. 3-4 days away.
Installing the axles with new bearings into the 9" differential. Passenger side (longer) axle slid in just fine and the bearing retainer plate seated fully against the backing plate. So far, this is good.
Driver axle won’t seat all the way. Bearing and retainer plate is stopping short of seated by about 1/4" and the axle won’t seat. I refuse to try to draw the axle in using the flange bolts.
Is there a trick to getting the axle properly seated? Differential is a traction-lock 28 spline, not a Detroit Locker.
I figured this out. Splines on the T-Lok side gears weren’t lined up. Installed the drum/wheel on the passenger side, lowered the lift so the tire was touching the floor and holding the wheel from turning. Then used the brake drum (upside down) on the driver’s side axle to twist and push inward on the axle flange. A few wiggles / twists of the drum and the axle slid right into place.
It occurred to me that the same thing has happened on my traction-lok axle jobs in the past. I guess it’s an infrequent enough task that I forgot the solution.
Outer fender aprons cleaned and black epoxy primed. Engine bay sanded, cleaned and partially epoxy primed.
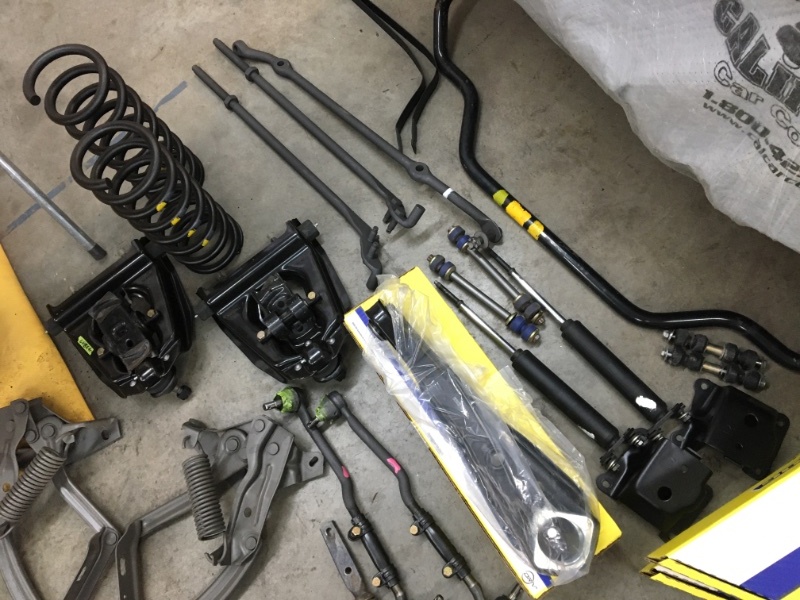
Front suspension components bead blasted, painted, and staged for re-assembly. Some of the grease boots on the driver’s side lower ball joint, tie rods were damaged by the fire. These components replaced to be on the safe side.
Factory paint marks recreated where observed, or as specified on the build sheet / Mercury MPC.
The dirtiest, greasiest, nastiest work is now complete - next step is body work and paint. This is a different kind of dirty-work. I’ll need to mask off the suspension and engine bay to keep it reasonably clean.
Gorgeous day for painting. 52 degrees, no humidity.
A few runs and some dust is inevitable. I doubt the Dearborn plant gave a crap about this, so maybe I shouldn’t worry too much either. Most of this will be invisible when the car is complete…
I always paint the radiator support last. From time to time I need to climb into the engine compartment when installing the suspension and steering, and the paint can get scuffed/scratched in the process. I also need to finish up the top of the cowl.
Pretty satisfied with this result.
From this point, the socket wrenches get flipped to “tighten” and that’s a huge motivational pickup…