I just rebuilt the power steering cylinder with new gaskets, bearings and rubber boots, and repaired my leaking power steering reservoir. I figured what the heck I’ll replace the lines while I am at it and ordered a replacement set from WCCC. They did not have the same bends as the hoses I took off so I tried bending them to match and wound up kinking one and shearing the other. Afterwards I found out they are designed to be routed differently.
That was a $140 lesson.
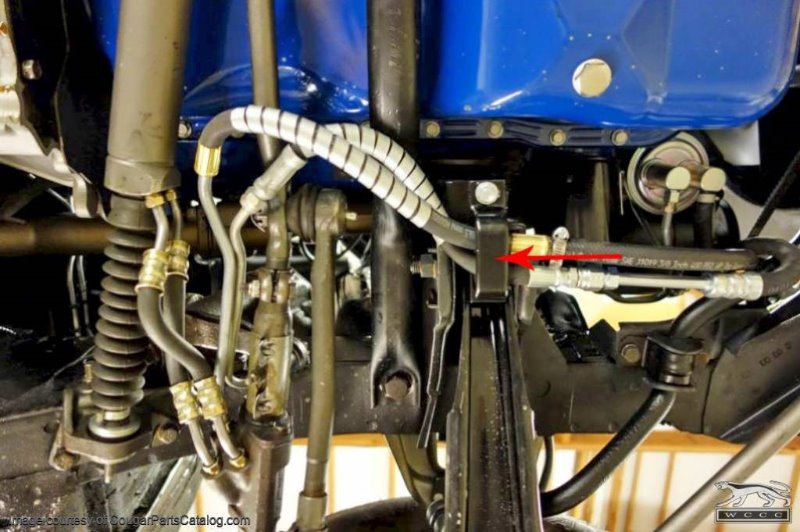
So I ordered another replacement and found these photos on WCCC showing the routing:
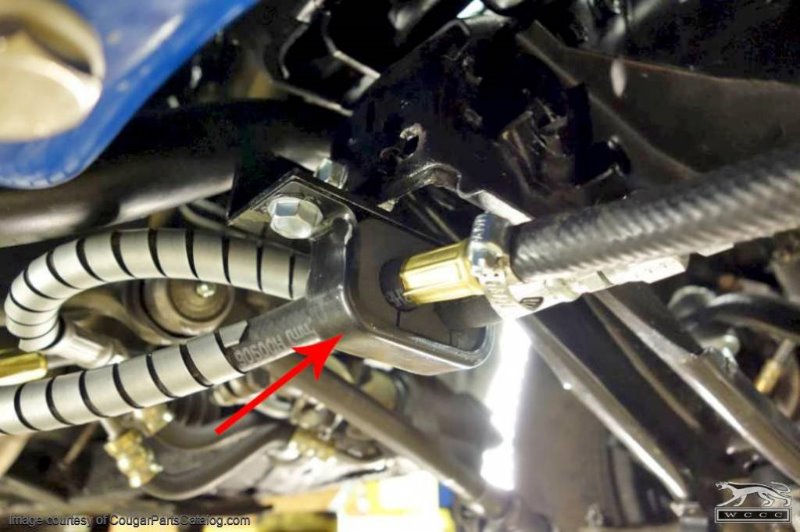
These pictures are very helpful, but they do not show which hole to mount the bracket in.
While trying to find that out I discovered that you actually have to drill a hole first. WCCC item #11651 is supposed to have 3 pictures showing which hole to drill out to use the big block bracket or which already drilled hole to use for the small block bracket, but those pictures are not showing (it says “image can not be retrieved at this time” instead of showing the picture.)
I am waiting to hear back from WCCC, but in the meantime can anyone here show me where these holes are?
And if you drilled it out, did you need a special bit?
I have installed this kit in my 68. The bolt that needs the hole you can see in 2nd photo. The location of hole is adjacent to the hole in 2nd pic above brass connector. You should see where the metal is a single thickness vs double from factory for that hole. You will need a right angle drill as it is tight. I did it with it with pan on but it took some tinkering. Hope my description makes sense. The good news is this routing ended the problems of burning/blowing ps hoses with manifold interference.
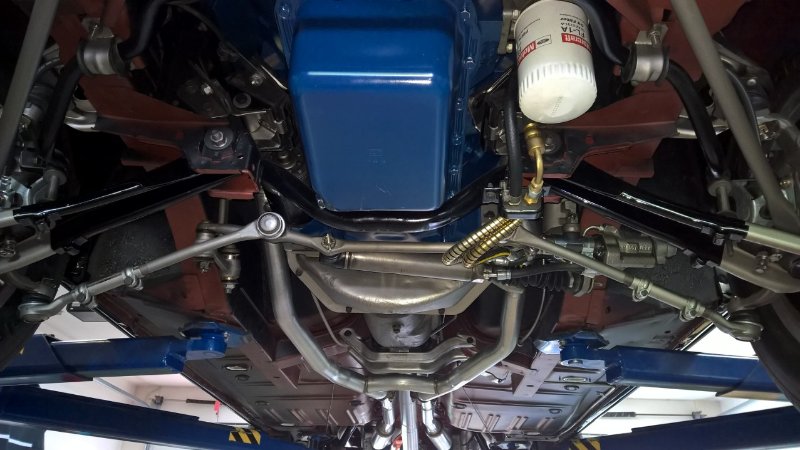
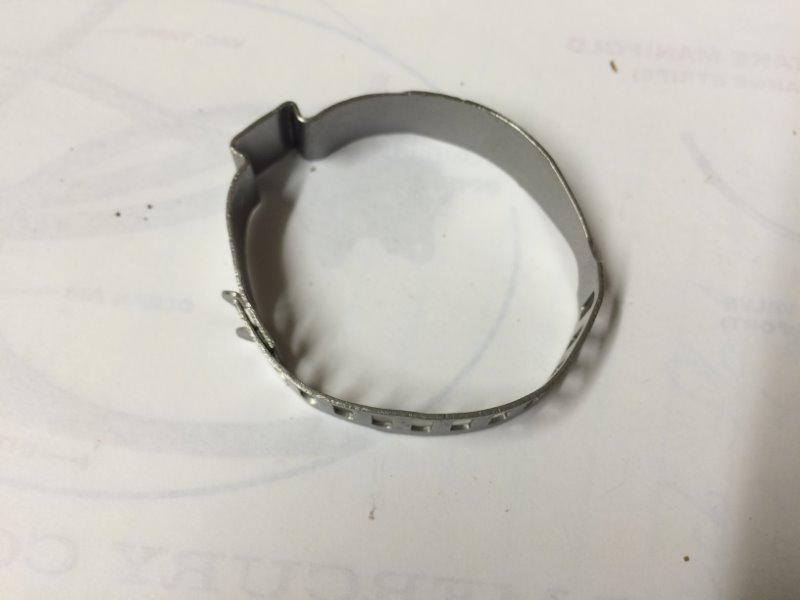
Don needs to update those pictures. Not having the hoses lay alongside the control valve with a special clamp for keeping them pulled down will cause the hoses to eventually break. In addition the rubber insulator was designed to hold the hoses from moving back and forth. The hoses Don has in those pictures are the inexpensive replacements. Go with his concours hoses and you definitely notice a difference. Here is the best picture I have of some concours level hoses.
If you’re going with the big block routing on a small block car, you’ll want this bracket. The two holes you’ll need to drill out are outlined on the inside of the lower control arm mount. I’ll attach a picture. The left hole needs to be the proper size for the self-tapping bolt that comes with the bracket, and the right is just for an indexing tab to go into.
One optional thing I also suggest is to change to the 1969 power steering pump reservoir, which points the return line down instead of straight back. This allows to you route it more cleanly, away from the exhaust manifold. See my post on the subject here.
Hi John, can you elaborate on this special clamp? Not sure if I’ve seen such a thing I have a vested interest in this because those pictures are of my car Ever since doing this I was questioning the fitment of those hoses.
Thank you everyone. Some great info here. Really helpful.
Mike - I’d like to get that shorter bolt from NPD too, but the link in your post does not take me to it. I tried searching with no luck. ANy ideas on what I should search for?
First of all I’d like to thank everyone who chimed in to help me. I just got the big block mounting bracket installed. I did this with the car on jacks.
Here’s how:
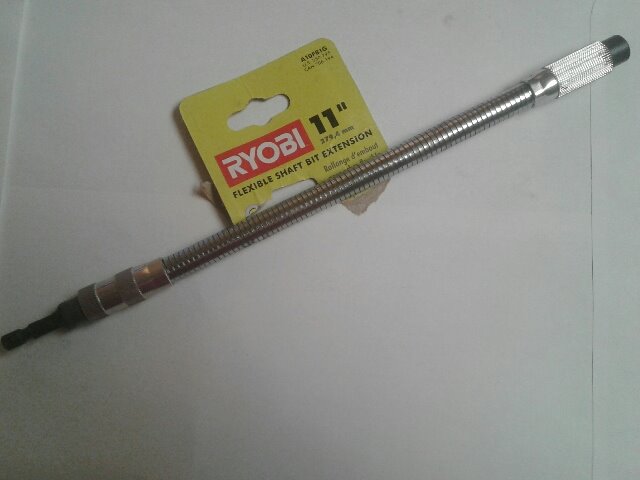
I picked up a Neiko 11402A Stubby Drill Bit Set (Amazon) and a Ryobi 11" Flexible Shaft Bit Extension (Home Depot) seen here.
Even with these I was not able to get a 9 degree angle to the holes, but it was close enough. Especially for the bolt hole. Since it is further back there was less of the oil pan in the way. If you can find shorter bits, that would be even better.
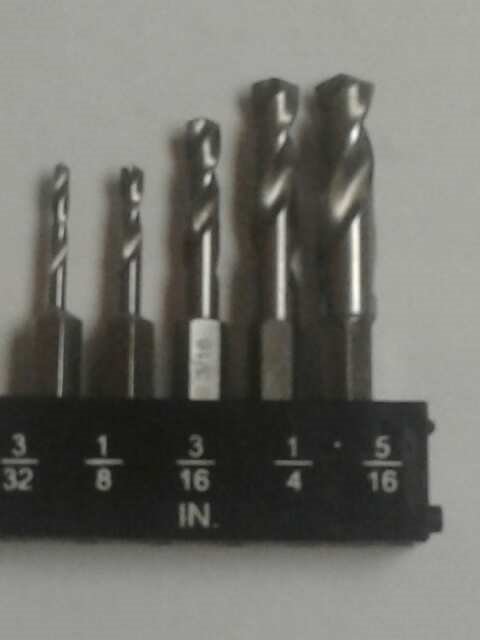
The drill bit wants to walk, so I first used a short sledgehammer and a nail punch to make an indentation in the middle of the opening. From there I had to walk up the bits, meaning I first drilled a 3/32" hole then a 1/8", then a 3/16" and finally a 1/4". Once I got to the 1/4" I was able to use a socket wrench to get the self tapping screw started. If you try skipping bit sizes the bit walks.
In order to make the second hole big enough for the tab on the bracket, I stayed with the 1/4" bit and just ground up and down until it fit.
As others have said, this is no the ideal way to do it, but it can be done. I did it after I got home from work today the whole thing took less than 1/2 hour. I think with this information you can do it quicker.
Hopefully tomorrow I can attach and route the houses and fill the pump back up!
Andrew, I have another pic of it but its 1.1mp and wouldn’t post because of size and I couldn’t resize it, the ID is about 2 1/4 to 2 1/2". This clamp would use the same crimper that’s used on the fuel line type clamps.