Martel, I have a 1969 Cougar convertible rear seat surround section if you are interested. Don’t want much for it, but unfortunately I don’t think it can be shipped. Maybe make a trip to Arizona? Regards, Scott - Taylor Restorations
Scott,
Thanks for the offer but I recently bought a Dynacorn 67 Mustang section. It will take some “manipulation” to make work but this is minor compared to the rest of the metal work.
I used to live in Tempe 20 years ago and still get out to AZ periodically.
Mark
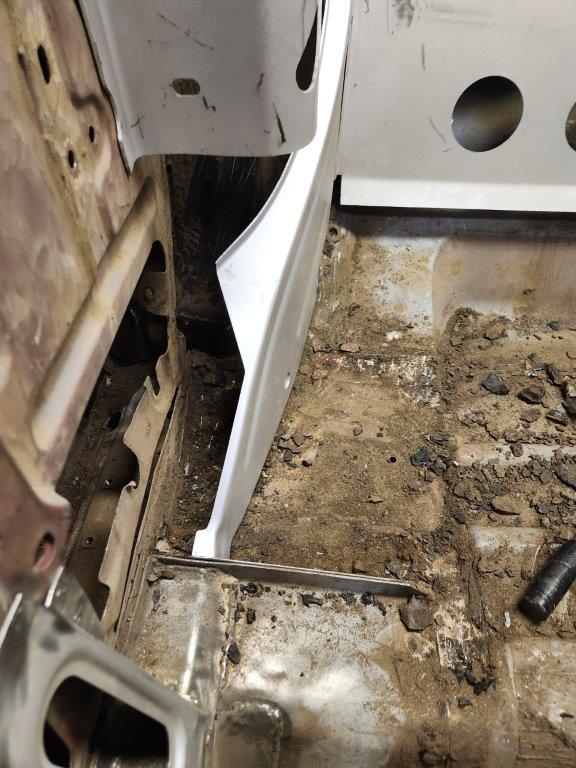
Getting the inner rocker panels ready for welding and I noticed an issue that appears pretty common. That being the if you align the top of the inner rocker with the door jamb, the rocker sits 1/2" to 1" low where it connects with the torque box.

Just wondering if leaving it “low” causes issues with toque box installation.
It appears that it would be easier to deal with the torque box mods rather than trim the inner rocker for 3 feet along the door jamb.
Experiences? Comments?
On my 69’ convertible, the inner rockers were taller than the outer rocker flange from the factory. They were cut to match the opening to the passenger compartment. I’m replacing my inner rockers now, and I’m installing the same way they came out. Once I get them welded, I’ll take the plasma cutter and trim them down.
Good Luck!
On my 68 conversion the inner rockers are cut to fit. My torque boxes were in great shape so when the conversion was started, it was easier to cut and fit the inner rockers. When doing the inner rockers make sure that you account for other parts such as the seat riser, doorsill plates, and carpet. If your inner rockers are currently flush with the doorsills you might have clearance issues further down the road with the interior trim components. My inner rockers sit slightly lower than the doorsill to accommodate the fore mentioned. I hope this information helps.
Steven
Been a slow year for the '67 but things just got serious.
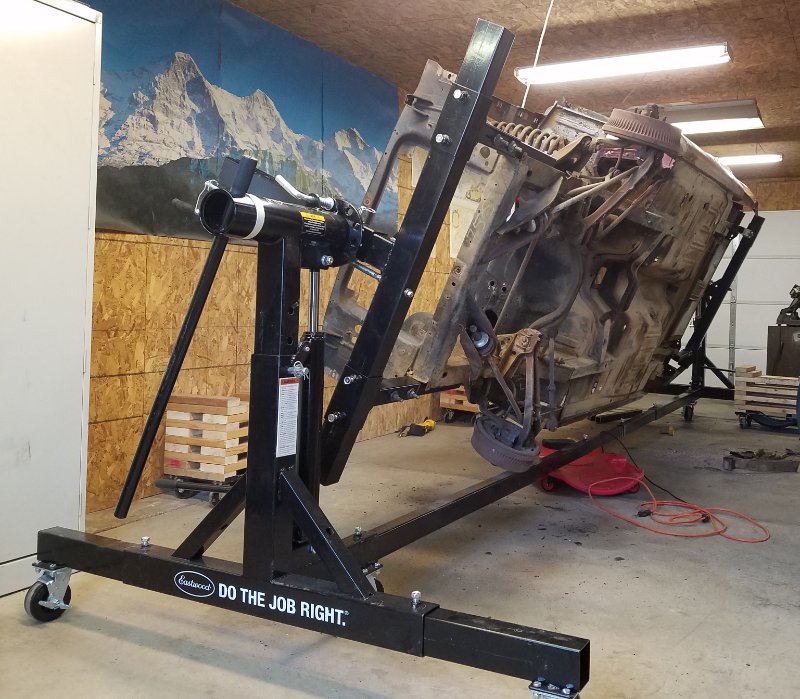
I would probably not recommend the Eastwood rotisserie but with a few hours of “repairs” it is not too bad. Easy mounting of the '67 with 4x 24" pieces of 2x2 tube and a few holes. Mounted to bumper holes in front and tie-down frame location in the rear. Very stable and almost immediately balanced.
Next will be replacing jack-damaged floor supports.
Been moving forward this year. Lots of body work.
New trunk drop offs. Patched holes in wheel tubs. Torque boxes full in. Inner rockers fully installed. Convertible seat base and underfloor pans installed. TinMan subframe connectors installed.
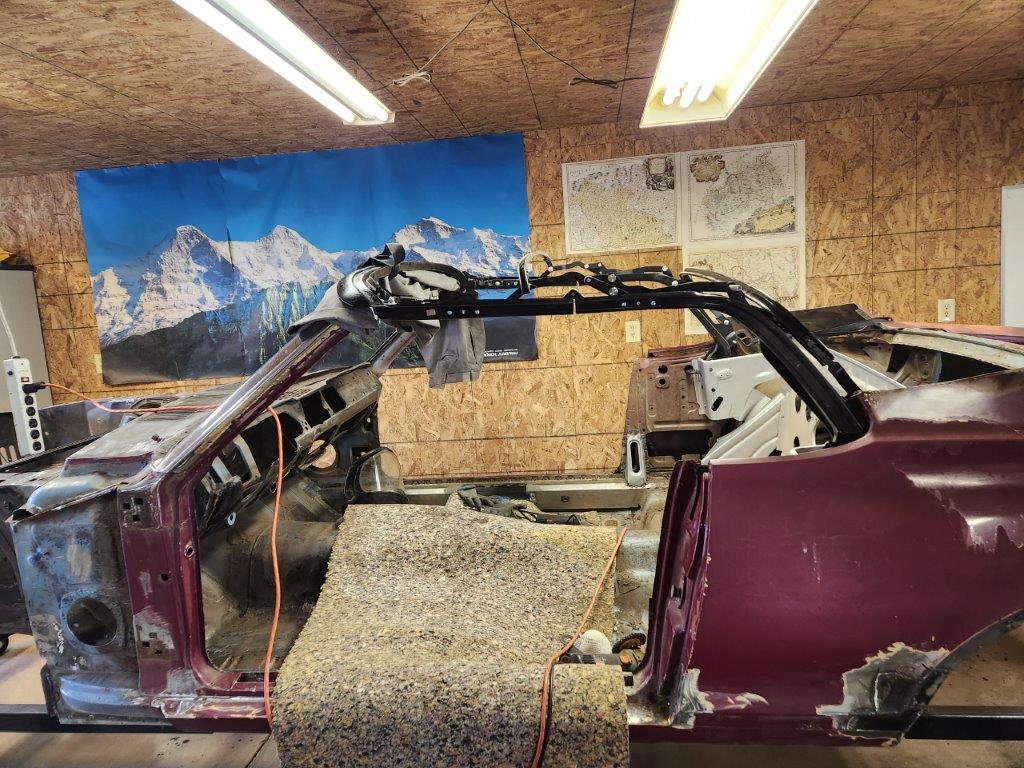
Everything is very solid. Just removed roof. Absolutely no body flex even when upside-down on the rotisserie.
No turning back now.

2 Likes
Working on some small tedious items while carefully studying and fitting the top.
Splash shields.
Surprising how many variations of Cougar and Mustang parts used here by the factory. Some upside down and backwards. Hopefully, these are right but this car is not going to be concours-correct. The major trick is to use lots of spring clamps and work one staple at a time from the “center” out.
If only a T-50 was powerful enough to punch through this sheet metal.

A little before/after on some headlight buckets. I few hours a piece and good as new.
Drill out whatever spotwelds remain.
Three straight bends done in 6" vise (no break required)
Cut-n-Butt MIG weld (tip to Fitzee’s Fabrications on YouTube https://www.youtube.com/@fitzeesfabrications A real master)
Plug weld the two pieces together
Hammer-form the final flanges and trim to size


Rear axle decision finally finished and moving forward!
Going with a 1986 Mustang 5.0 8.8 rear housing that is 59.25" axle flange to flange (~59 5/8" outside of drum to drum) which is right on for the '67 at 59 3/4" - 60" drum to drum. The pinion offset for the factory 8" is < 1/4" and the 8.8 has an offset ~9/16" toward the passenger side which is less than 0.5 deg. over the u-joint-to-u-joint distance.
Swapping in 31 spline 3.73 POSI center section from a Ford Explorer with new bearings, clutches, seals, etc. and adding 31 spline axles from Summit.
Center section is rebuilt with carbon fiber clutches and 3.73 ring gear and pinion bearing replaced. Shims not perfect yet so more work required. This is challenging to get right but there is a very good video from LMR on this topic: Mustang Gear Install: Ford Racing 8.8 Ring & Pinion | 1986-2009 - YouTube

This will be hanging from a set of ESPO matched springs: big block competition versions with 1" drop. Removing the isolators and wedges and using Mustang shock plates. I listed the extra parts for sale in the Marketplace 67 Cougar Rear Suspension Parts
Will weld on extended length spring perches (Barnes B4W25028BP 7.75"x2.5"). Spec’ed for a Dana 44 but are for 2.5" springs and with very little modification they fit the '86 tubes very well.The longer length will limit some of the roll/wrap. They are also adjustable +/-1" if needed. Just going to tack in for now until I get enough weigh in the car to set the proper pinion angle. BTW: Barnes sells a Ford 8.8 perch but these fit larger diameter truck tubes.

The details on the windshield cutting and trimming are now documented for posterity. This will apply to both Cougar and Mustang coupe to convertible conversions.
Very few details in the original Marti doc and elsewhere. From Marti doc:
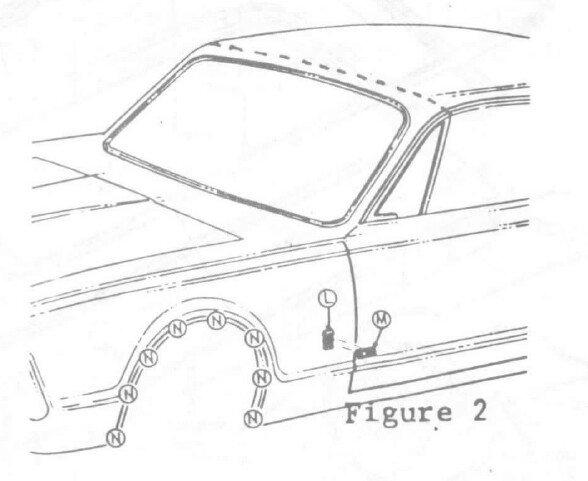
Remove most of roof and leave lots of extra metal (I left ~ 8")
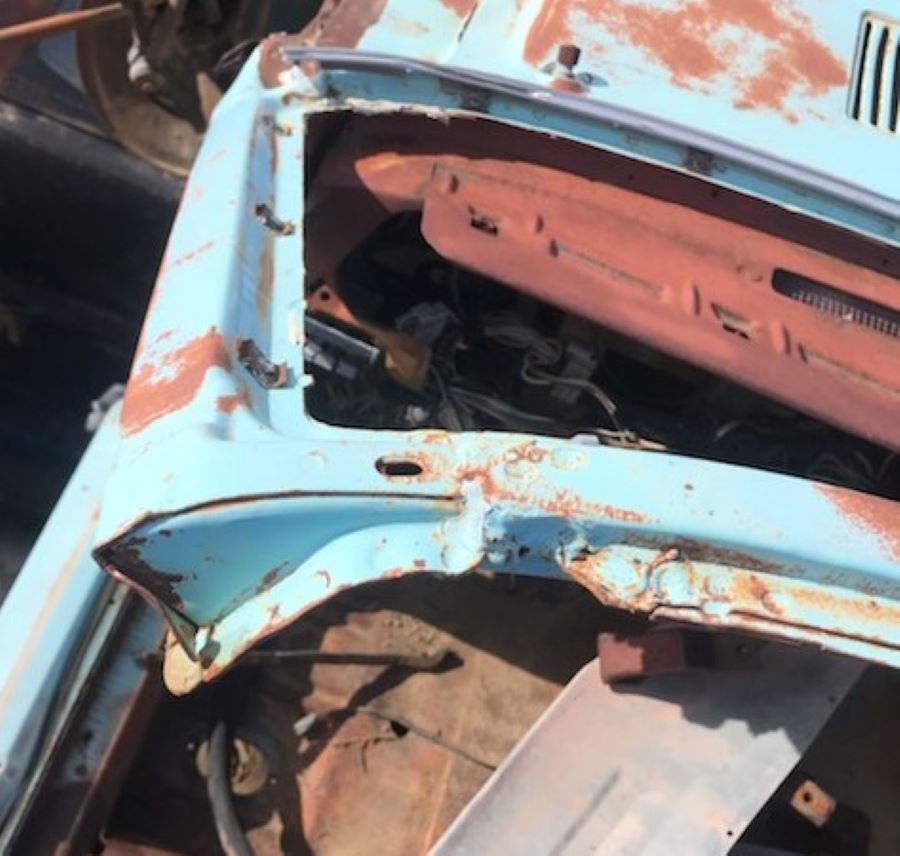
Remove drip edge. Grind mostly through the locations of the spot welds and then chisel-off and regrind. Image prior to grinding and removal. Nylon wheel nicely highlight the spot welds.

Keep trimming off the roof sheetmetal.
You must have the windowshield trim and visor brackets in hand while cutting to track fitment.

Keep cutting roof metal away from the top of the windshield.
A zip wheel at 45 degrees gets right into the bend where the roof skin rises above the roof support bracket. One could remove the 50 spot welds but why.

A small zip disc or die grinder lets you get into the corners.

There is a small section of roof left on the A pillar that is leaded on. Easy to remove by warming with MAPP gas and scraping off.

MORE LATER.
1 Like
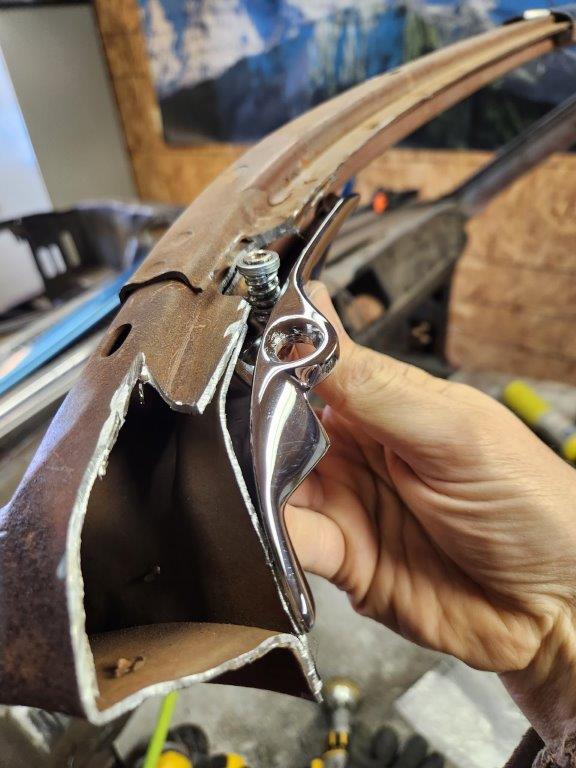
Final steps
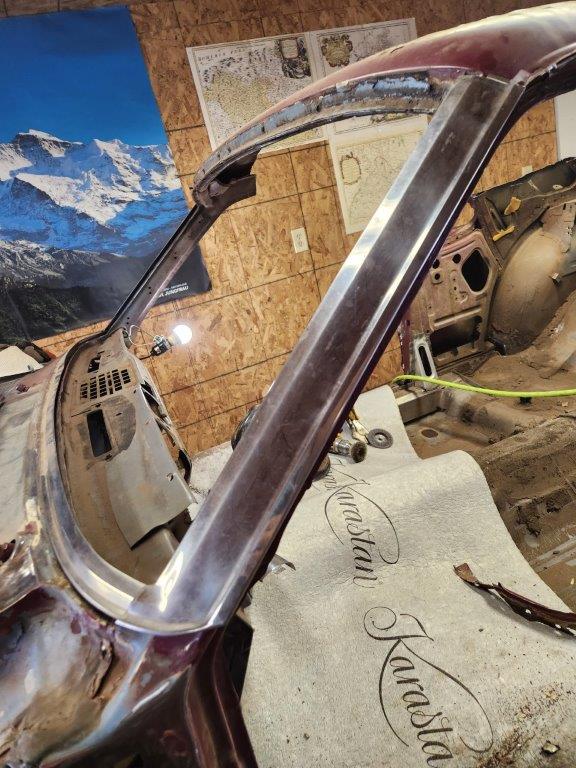
Measure approx 1-12/ - 1-5/8" from the recess where the lead was toward the top/back of the roof. Mark and cut. you can check this with all the window trim in place and observing that the side molding fit under the top moldings and the top moldings do not rock/pivot about the top corner of the A pillar.
The inside of the corner/edge needs considerable trimming to permit the visor bracket spring to clear and for the bracket itself to rest firmly against the A pillar and the underside of the top portion of the windshield frame. You also need to remove the top part of the channel to let the top trim fit properly. Compare the result with photos from a 67 Mustang (thanks to Colorado Mustang specialists)
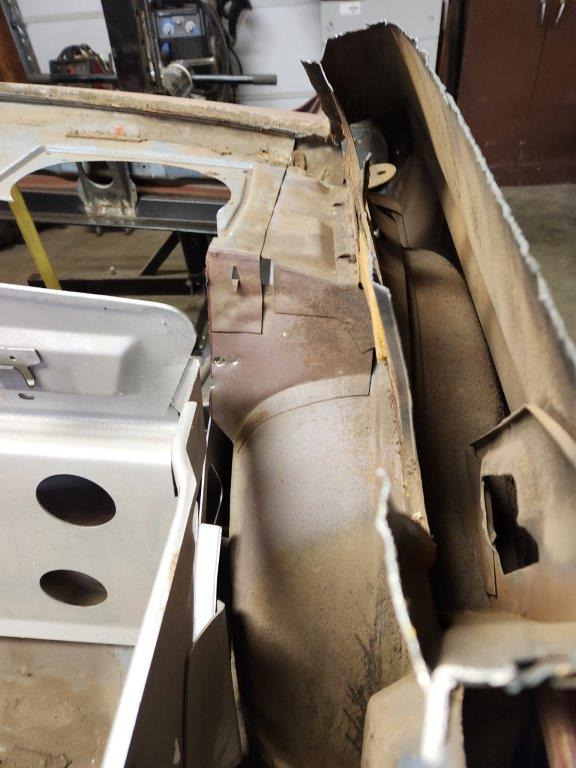
Cougar
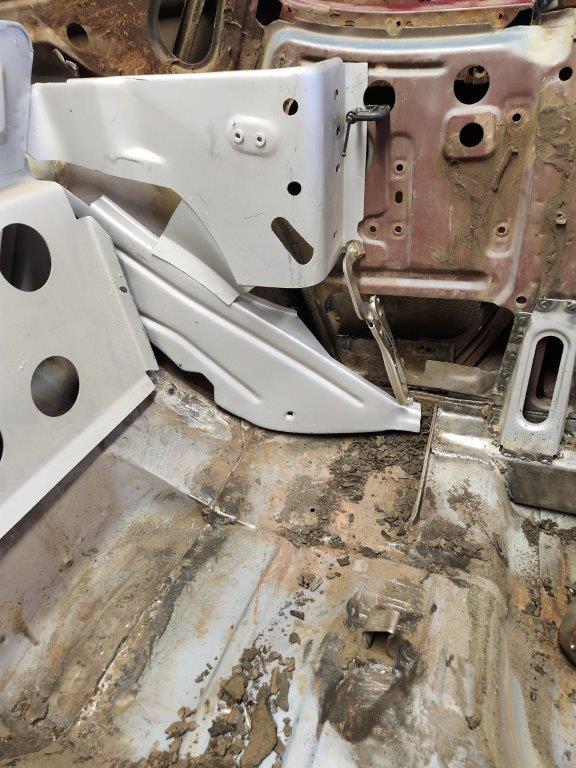
Mustang factory vert

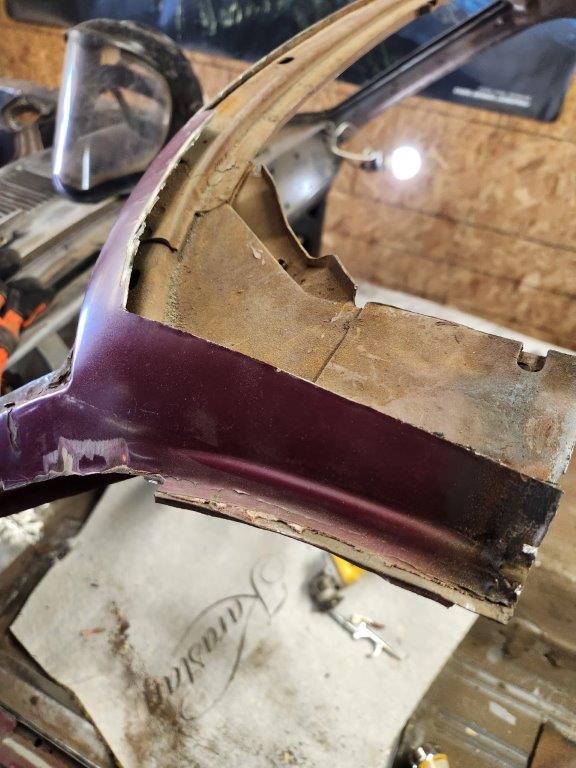
Additional shaping is required and the hole in the A pillar will be plated over later once I confirm that the top aligns well to the bracket locations. But everything looks very good.


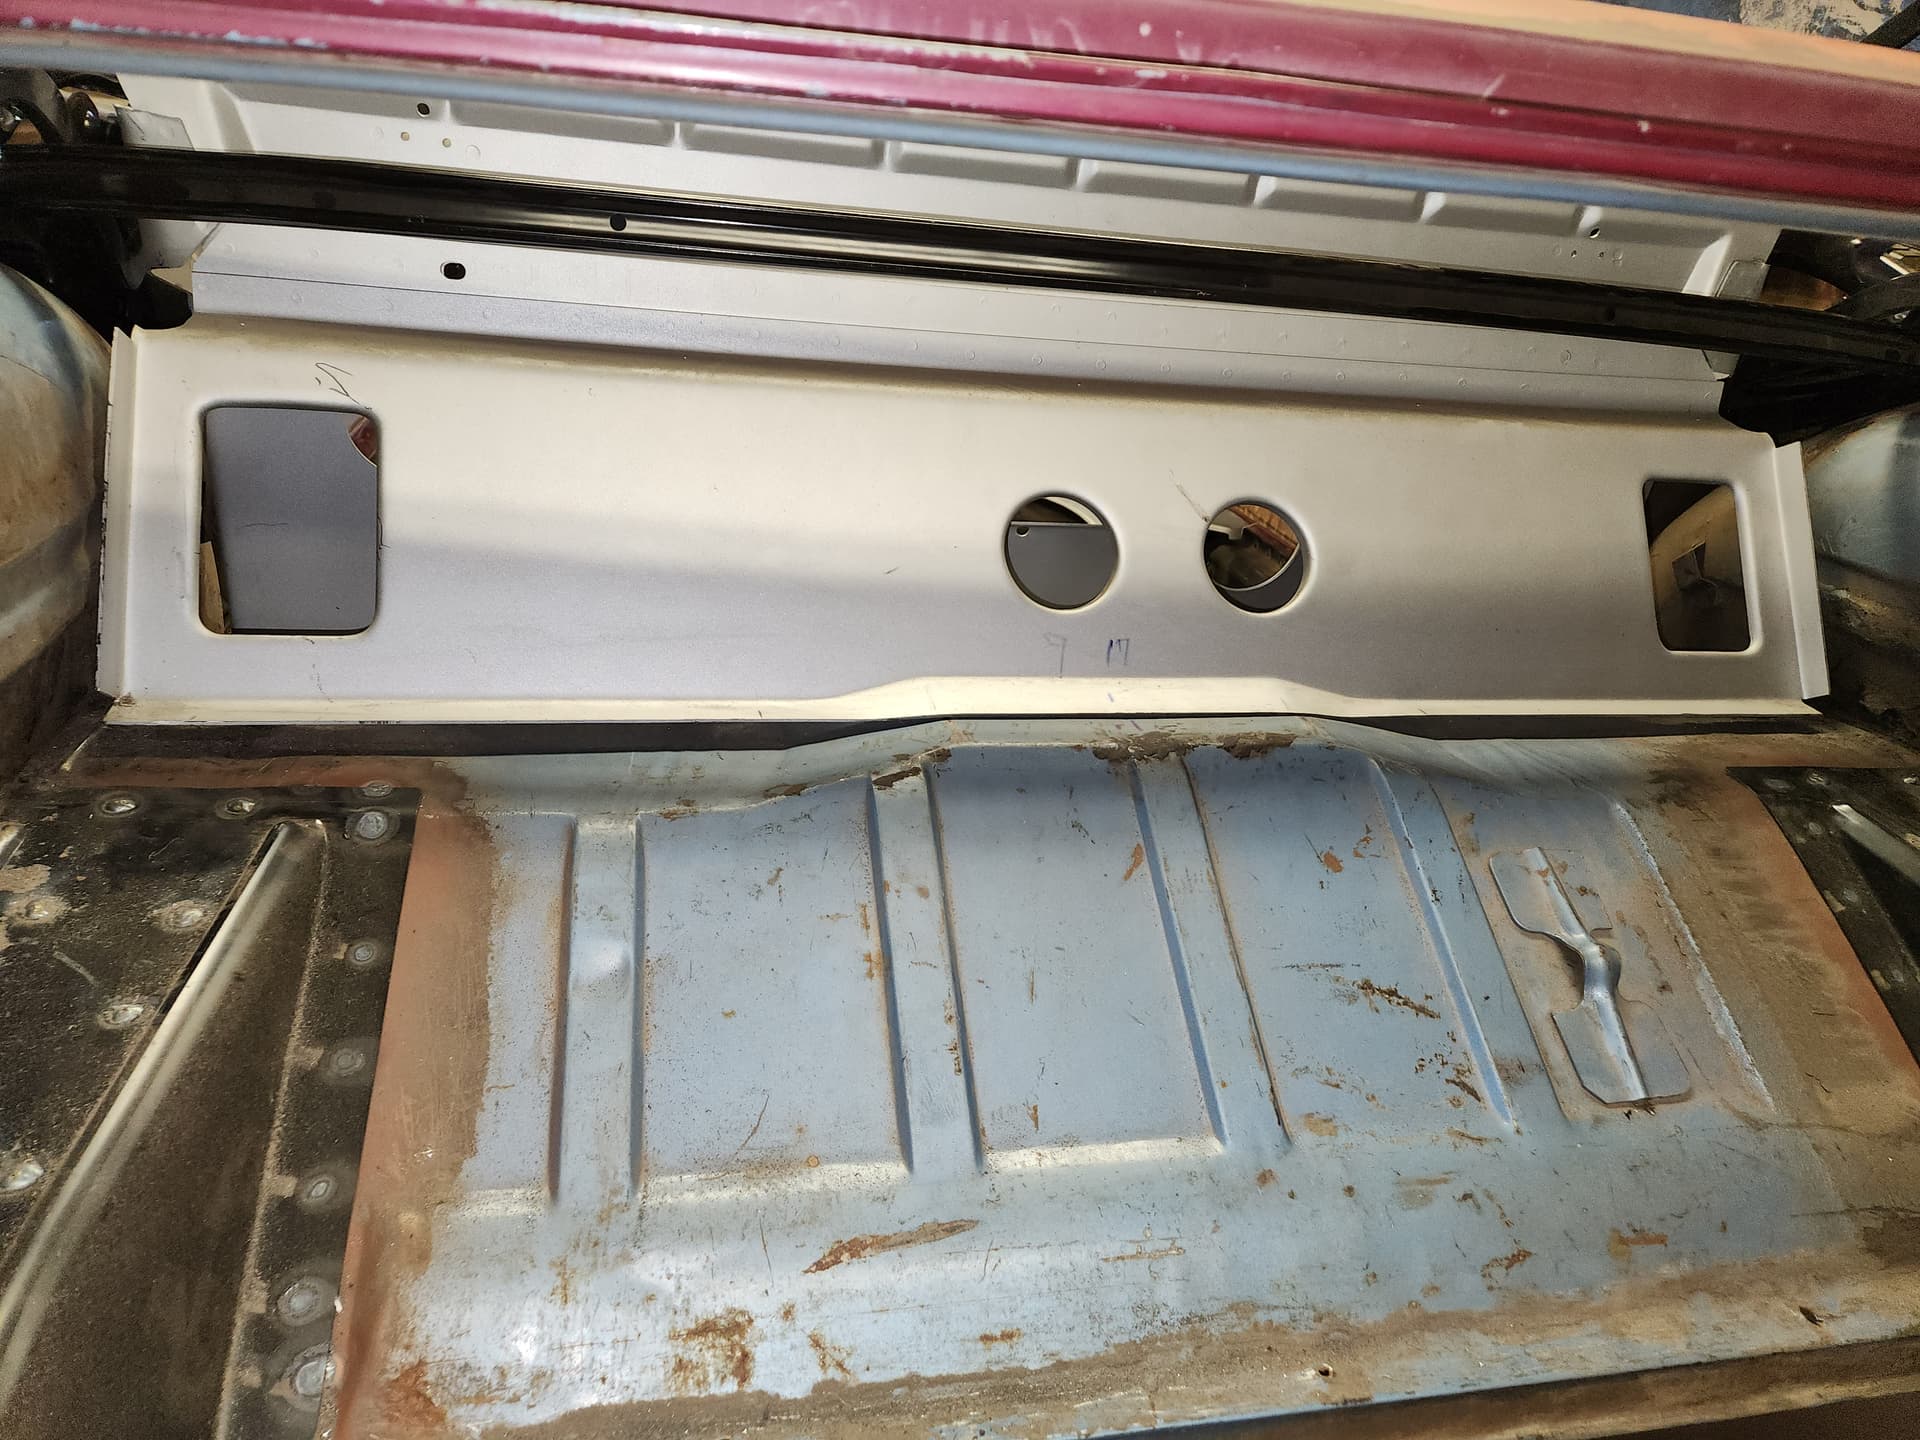
Rear seat divider and wheelhouse supports are now roughly installed.
Prior to removal of all of the rear deck and everything attached to top/inside of the wheelhouses.
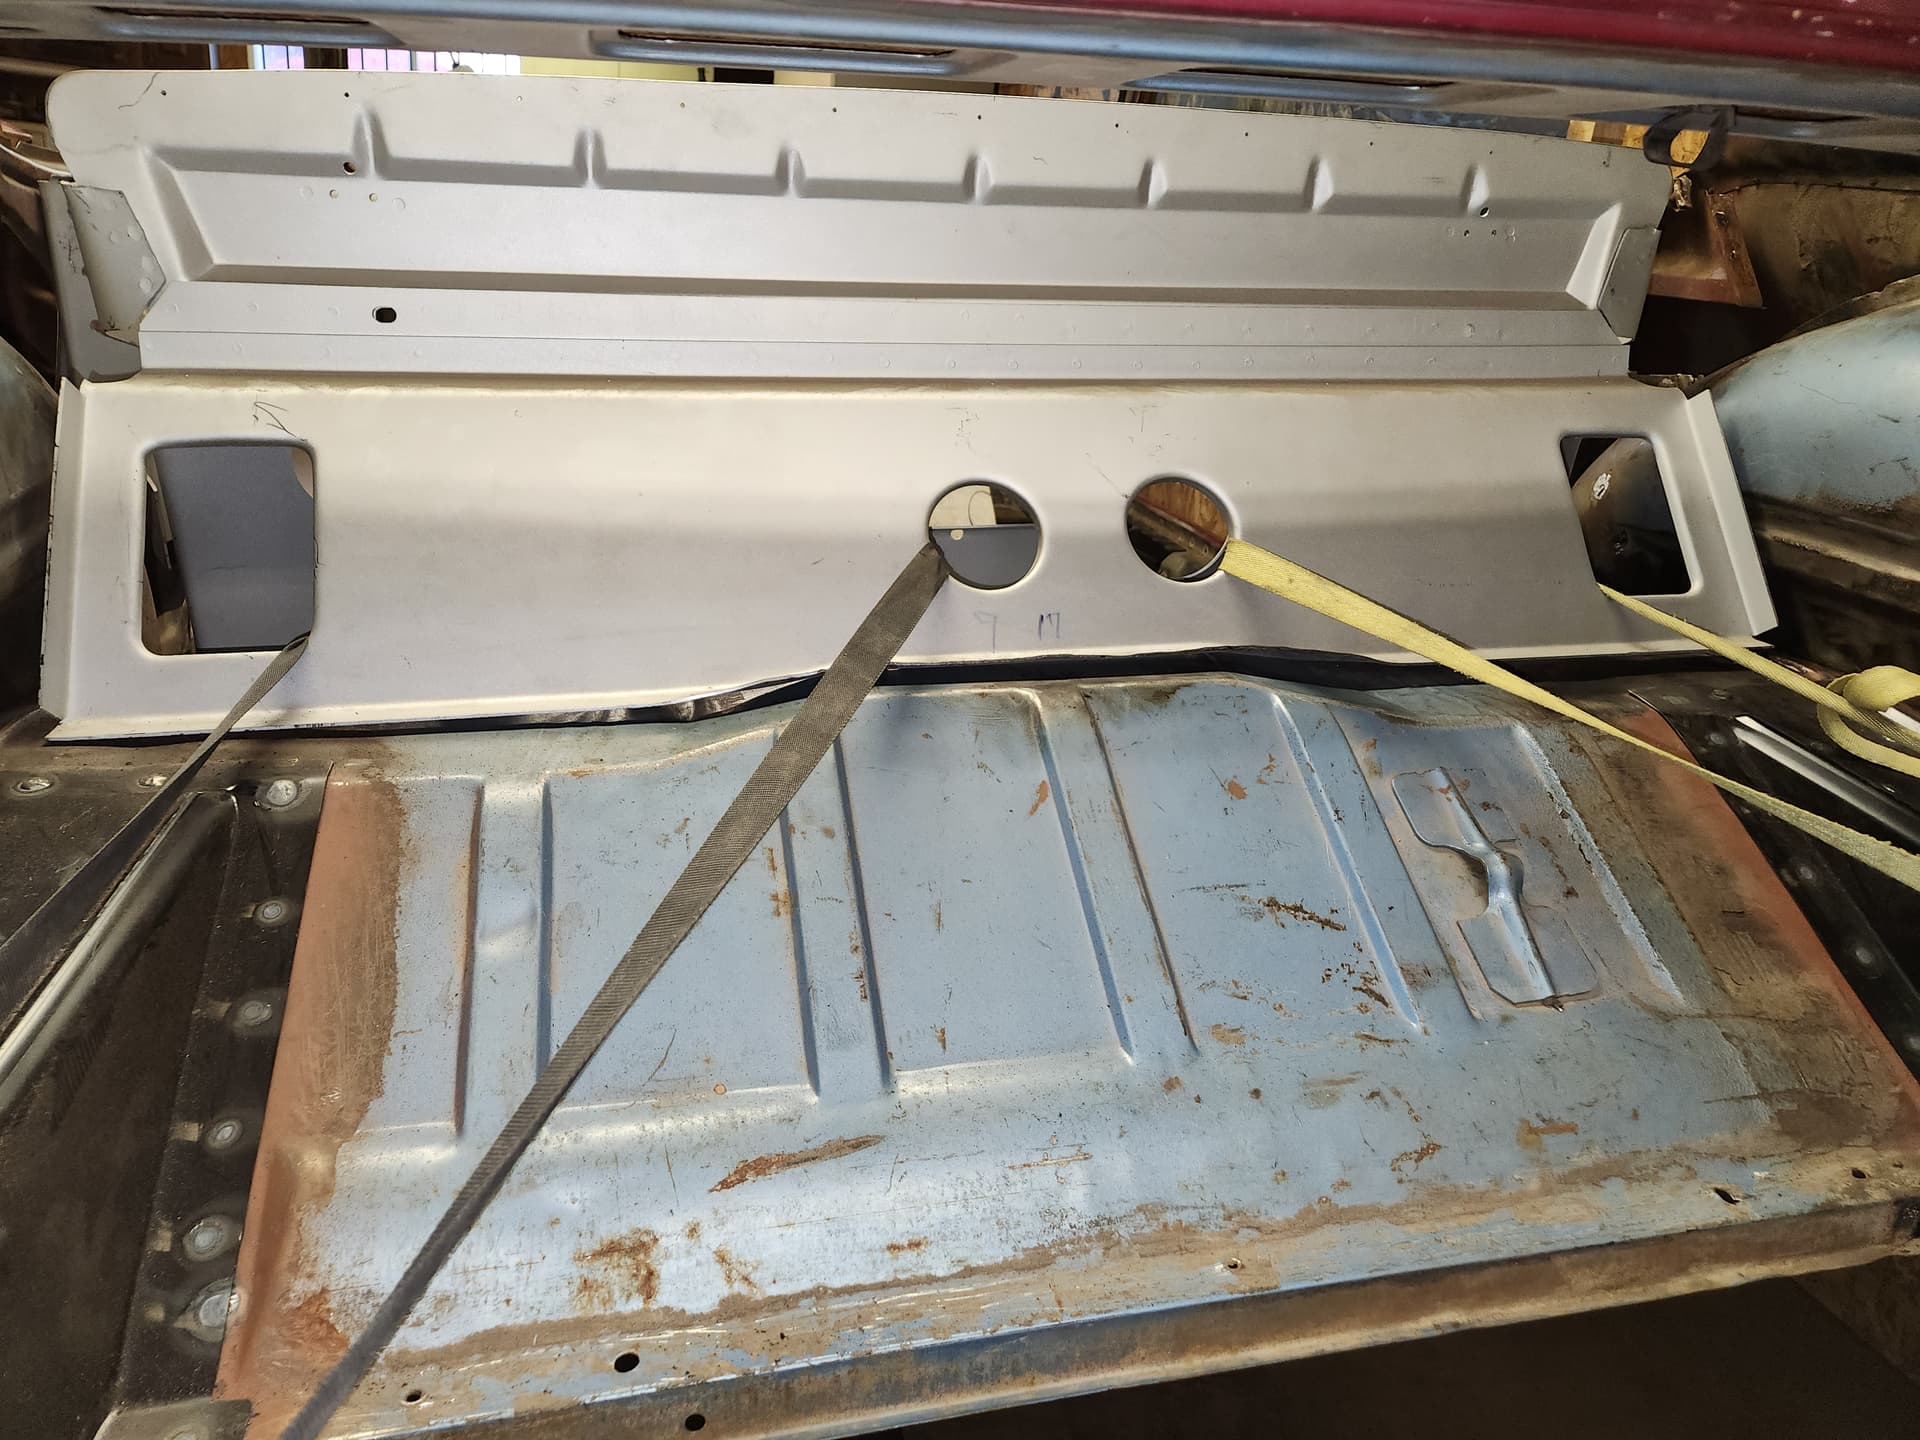
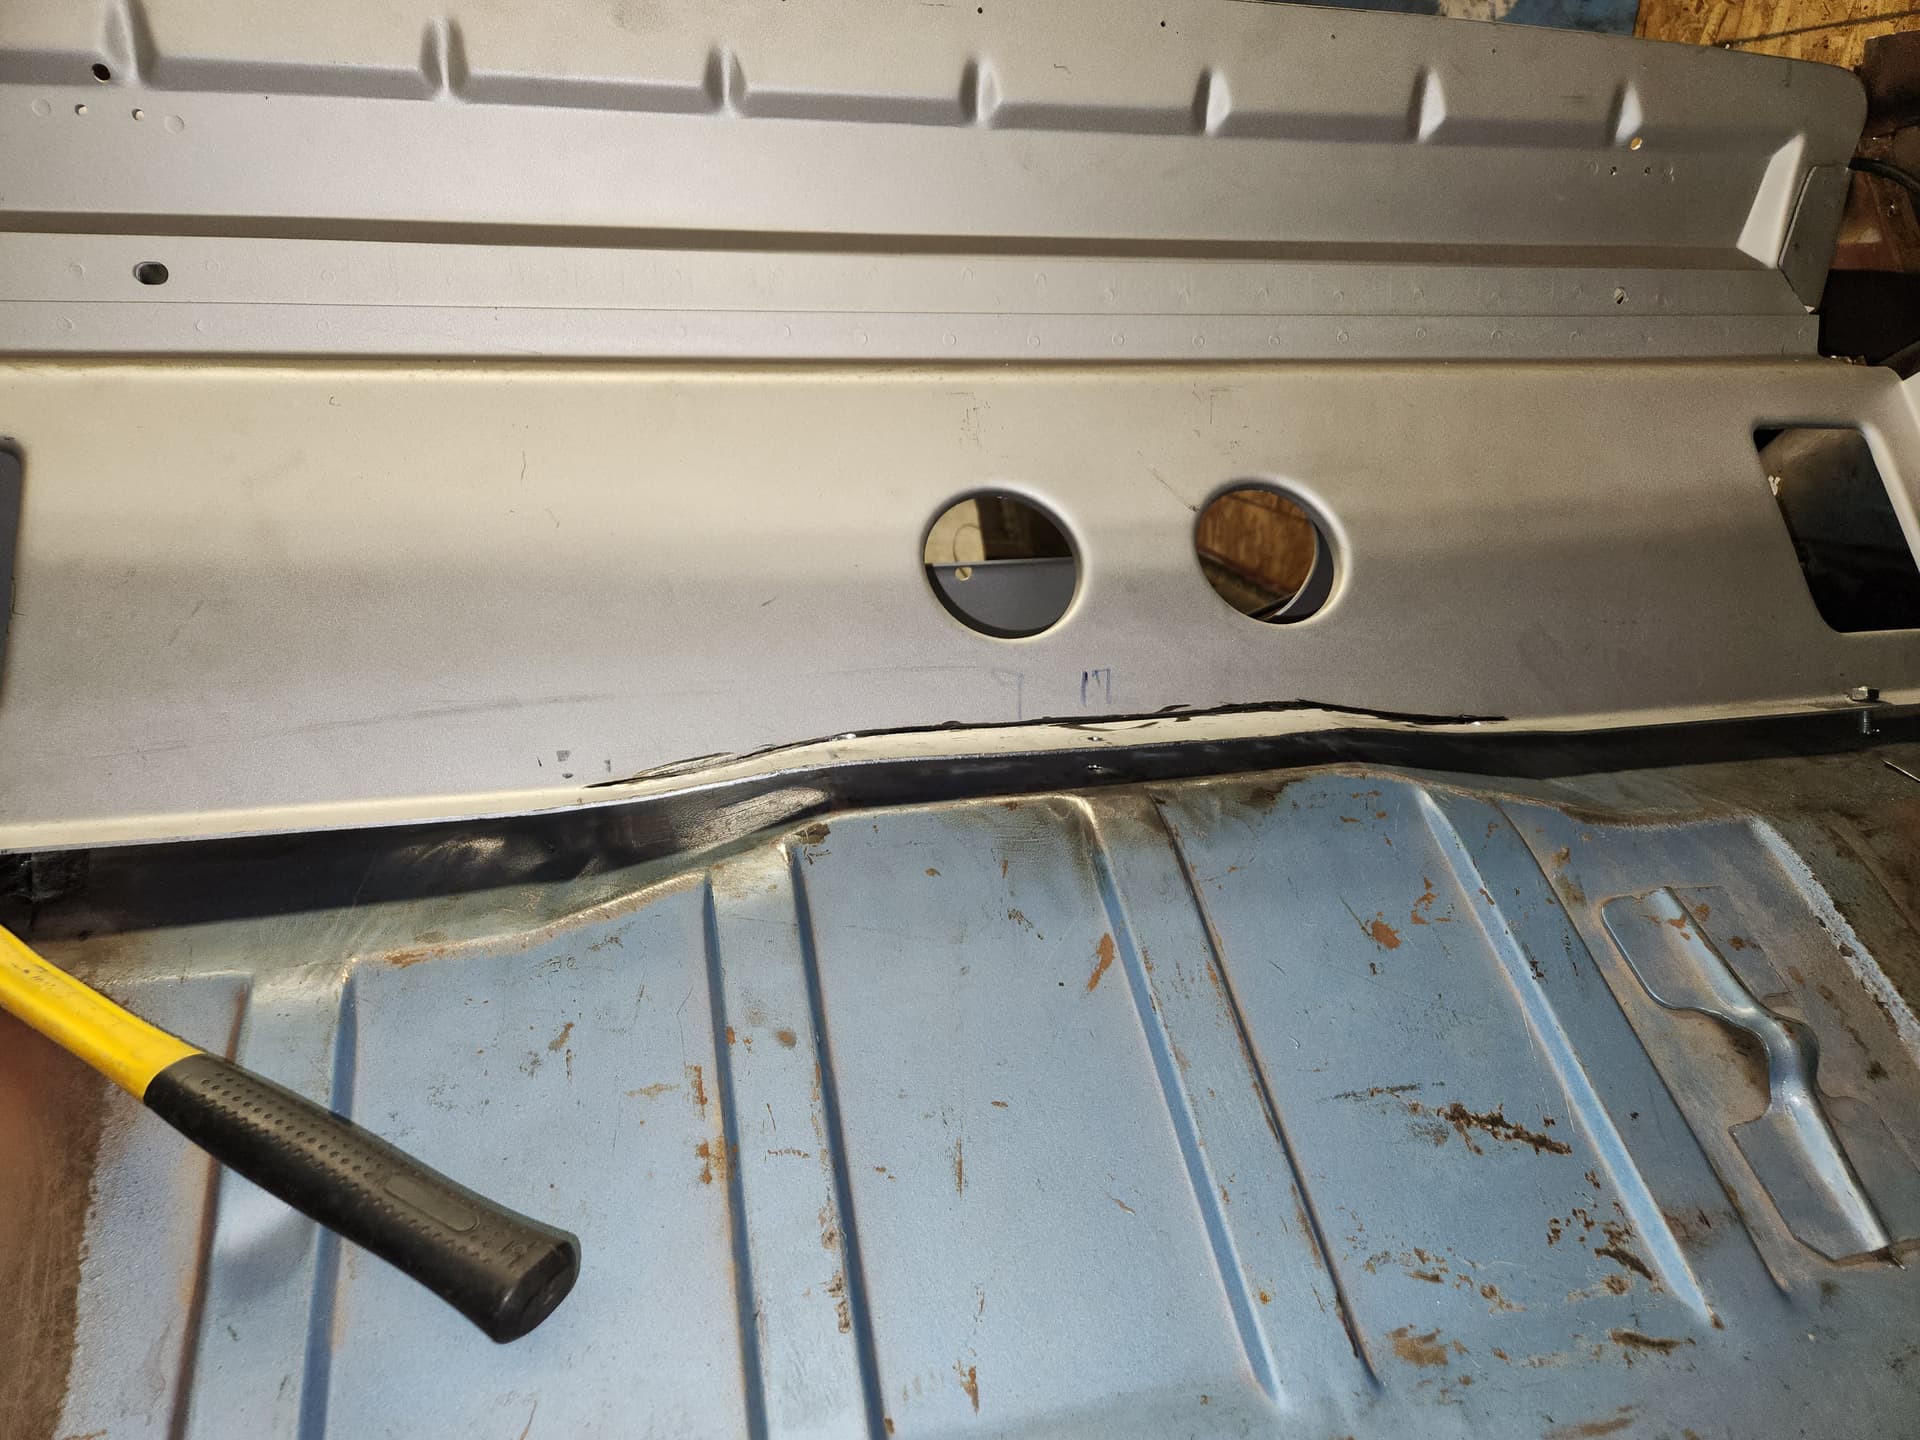
Divider clamped in place w.r.t factory cutouts/holes
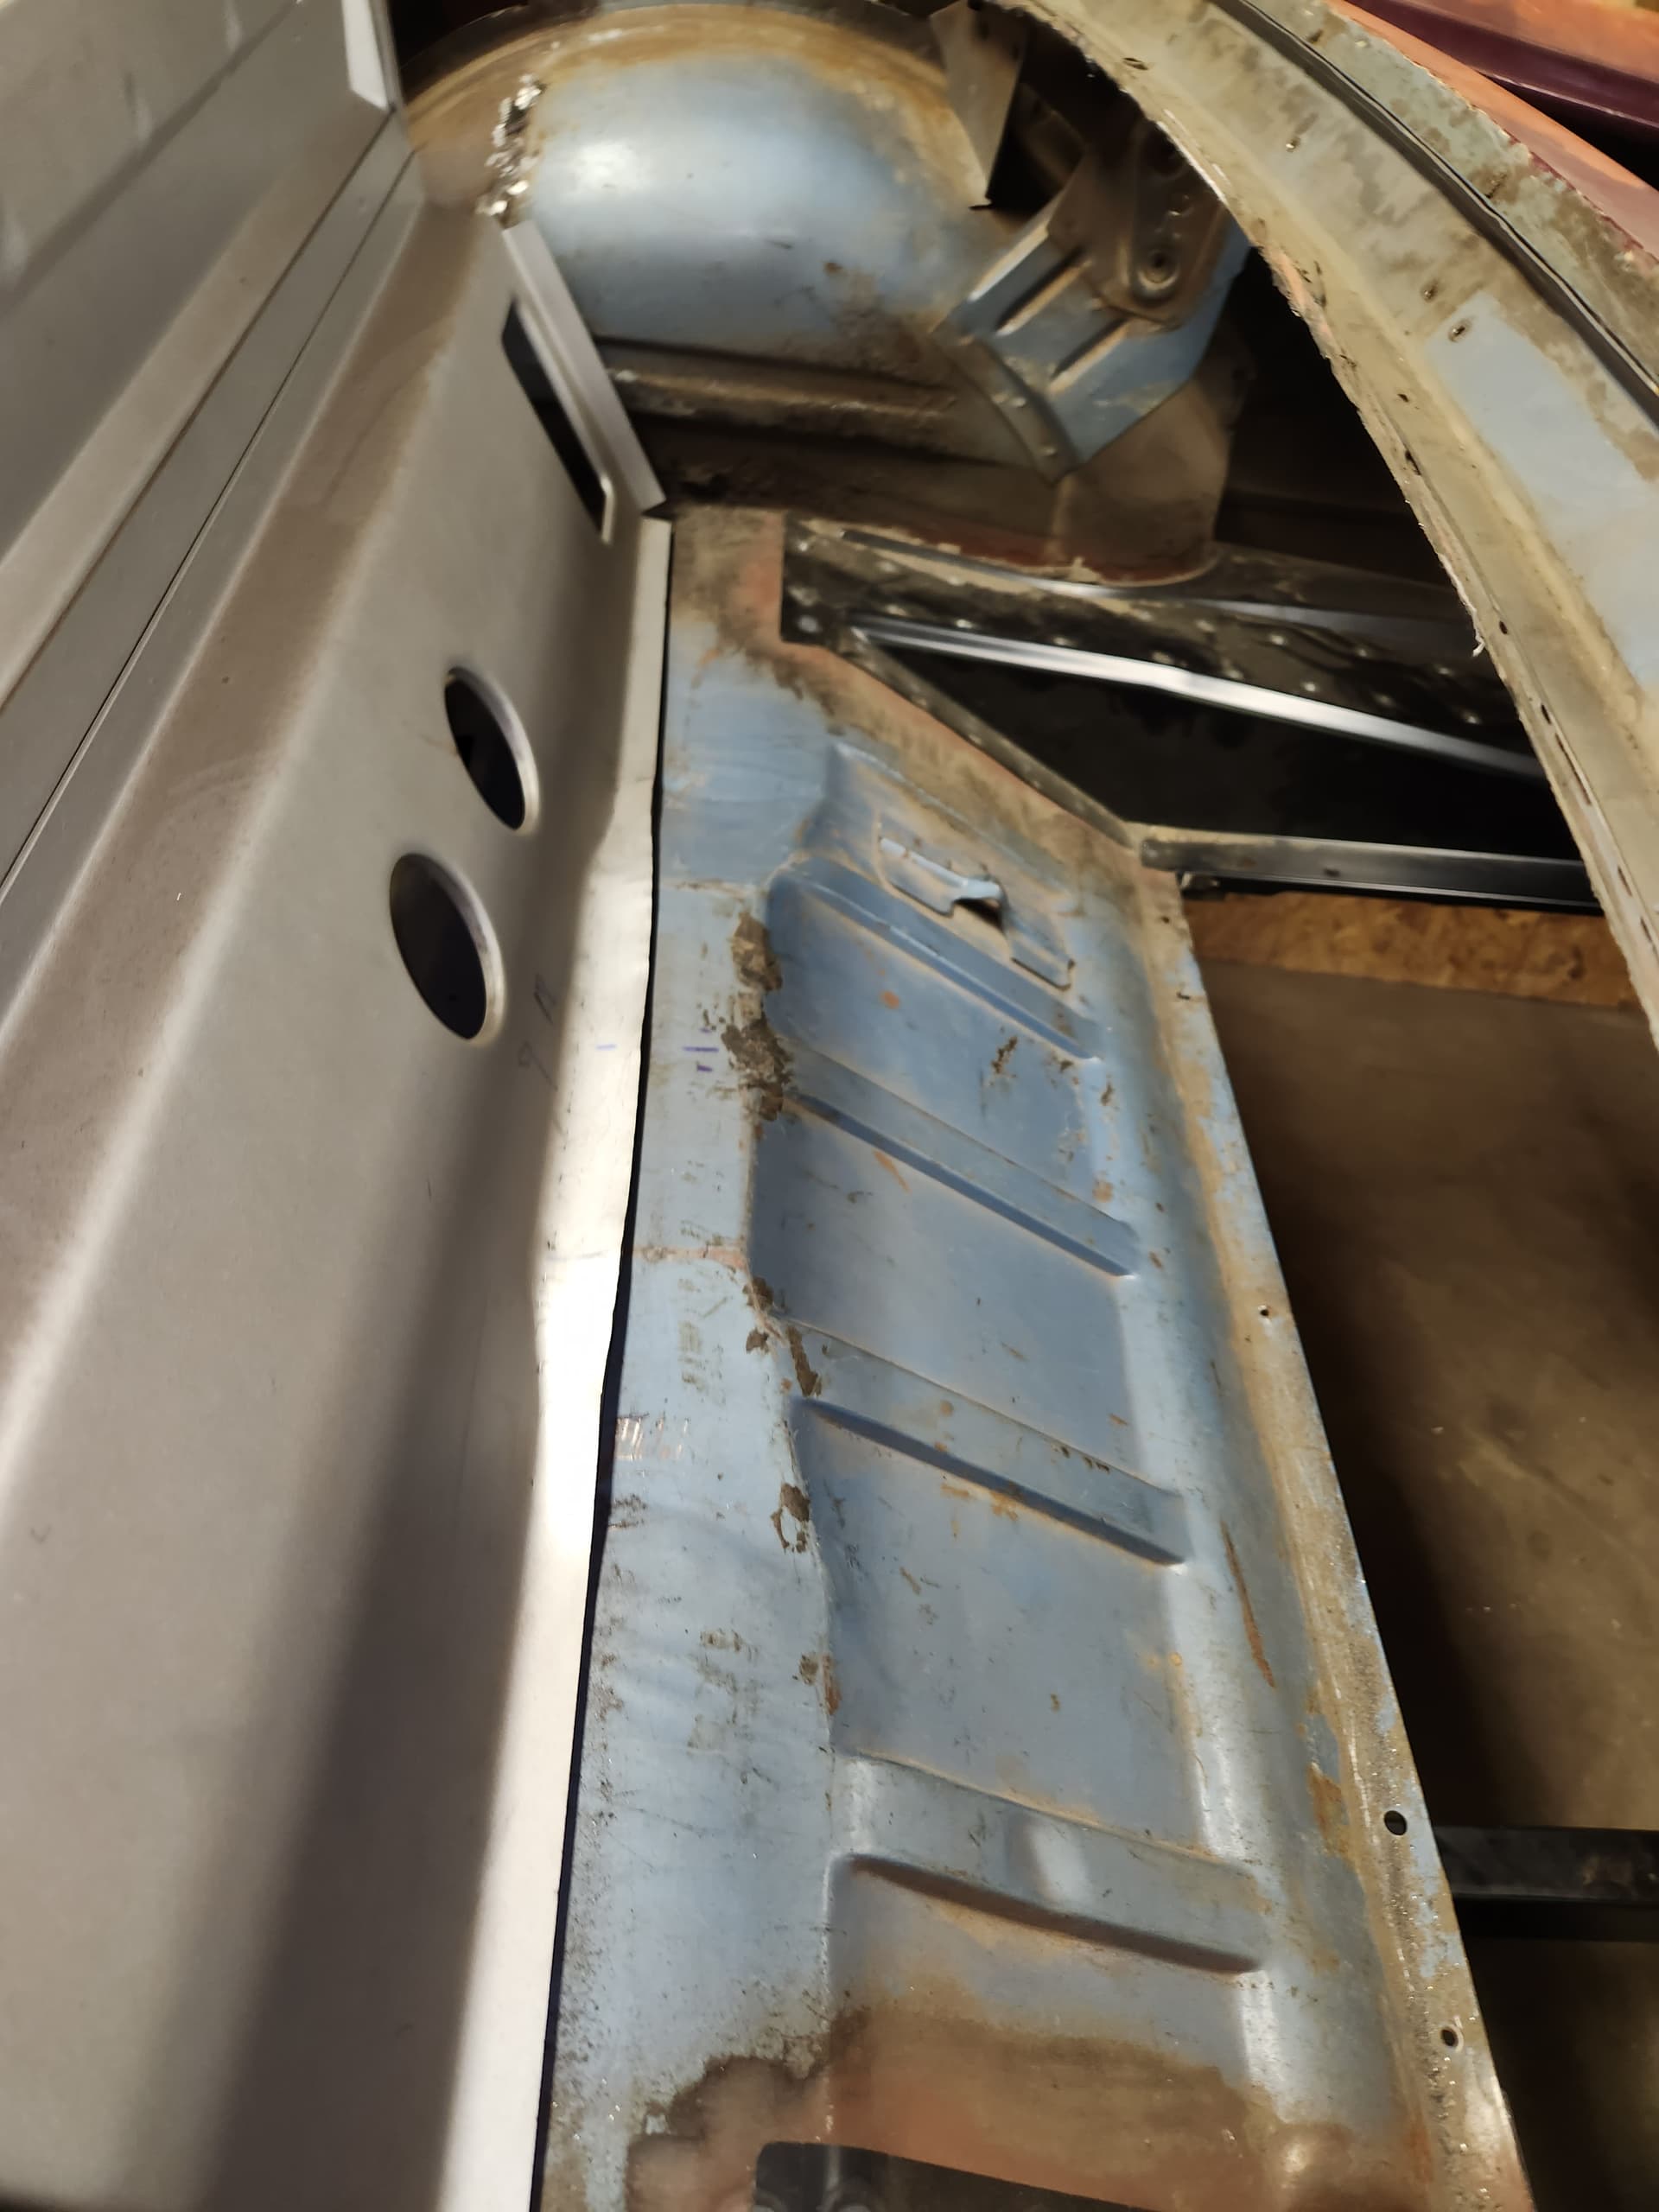
Rough placement of the wheelhouse supports. Lots of 55-year old seam sealer to still remove.
Continued delicate hacking…
Top roughly in place and the difference in length of the Cougar and Mustang now very evident.
Obvious clearance issues
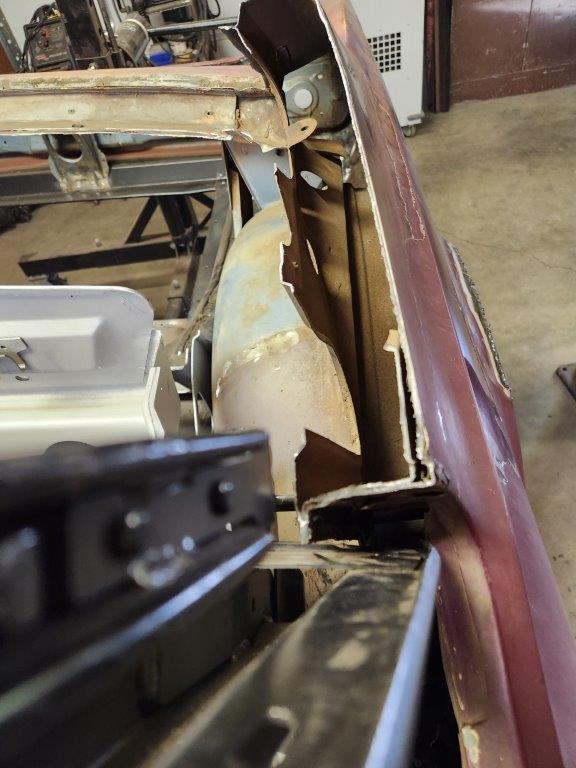
After trimming material from above the inner/outer wheelhouse flange region. Still a lot to do in the c-pillar region.
Both wheelhouse regions trimmed but c-pillar regions not finished.
An update. Real life got in the way again and had to wait for parts.
Now the truly complex fitment of multiple pieces and compromises.Nothing welded in place just bolted/screwed.
Line up the Rear Seat Divider Assembly Dynacorn 3647YDWT (mustang part) to the existing holes in the rear side sheet metal. Bolt in place on both sides.

Test fitment of divider with metal and plastic repo trim panels.
The metal panels are Dynacorn 3645 spec’ed for 65-66 but close enough. I cannot find 67-68 panels anywhere. The plastic panels are from CJ’s spec’ed 65-68 C5ZZ-7631486/7A. Reasonable fit. I will remove the ashtray holes and ultimately cover them. The top contour of the metal trim panel and the exterior body are different but this will be corrected later. I also confirmed that the dog leg supports clear both the trim panels. Some reshaping of the dogleg is required but nothing major.


With the front of the divider placed correctly, lets work on the back. Due to year and Mustang vs Cougar tunnel differences, this takes some work but easy enough.
Tunnel hump differences are obvious.
Universal flange adjustment tool.

The divider is like a huge spring. Needed some extra “hands” to align. Center side-to-side and front-to-back location can be set by setting the edge of the divider flange relative to the edge of the replacement trunk panels.
Bolt the rear of the divider in place on the ends.

Cut the flange, massage with universal flange tool and hammer and then reweld.
Now the front lower edge of the divider. Again tunnel clearance issues. Width is good but you need to remove about 1" more height. And notch the outside lower corners to clear a step in the floor near the seam with the inner wheelhouses. Bolt into place.

Done

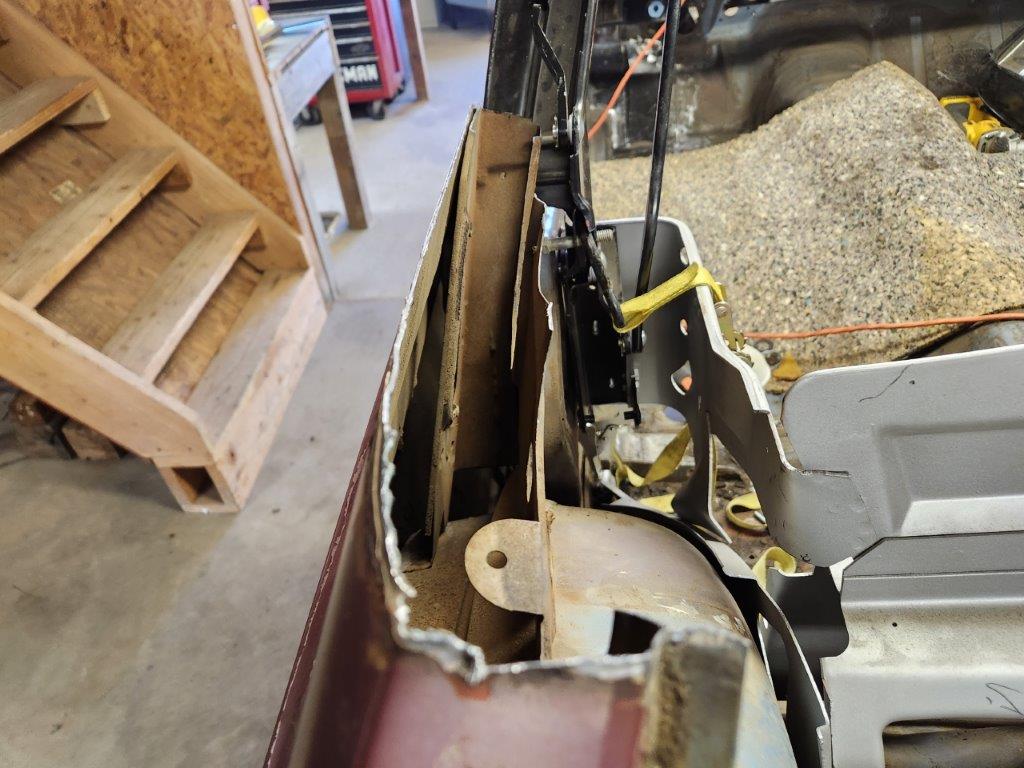
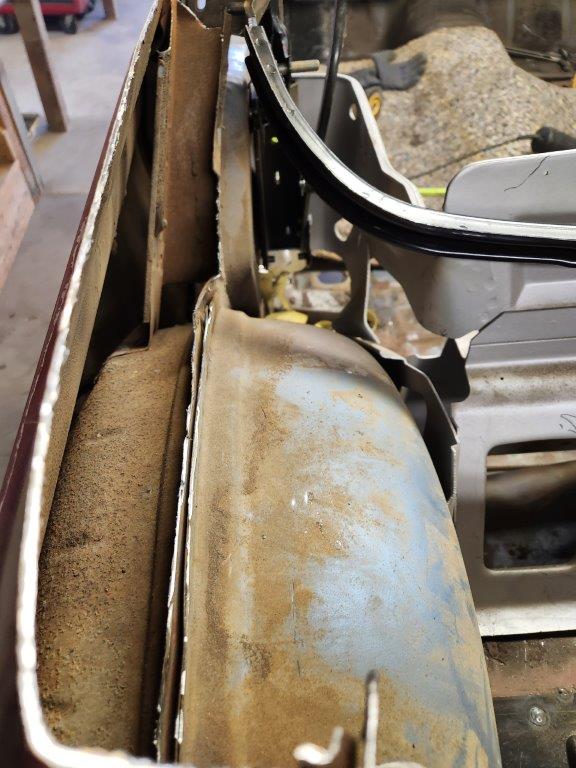
Well the top has to fold down into somewhere right! Bad pun intended.
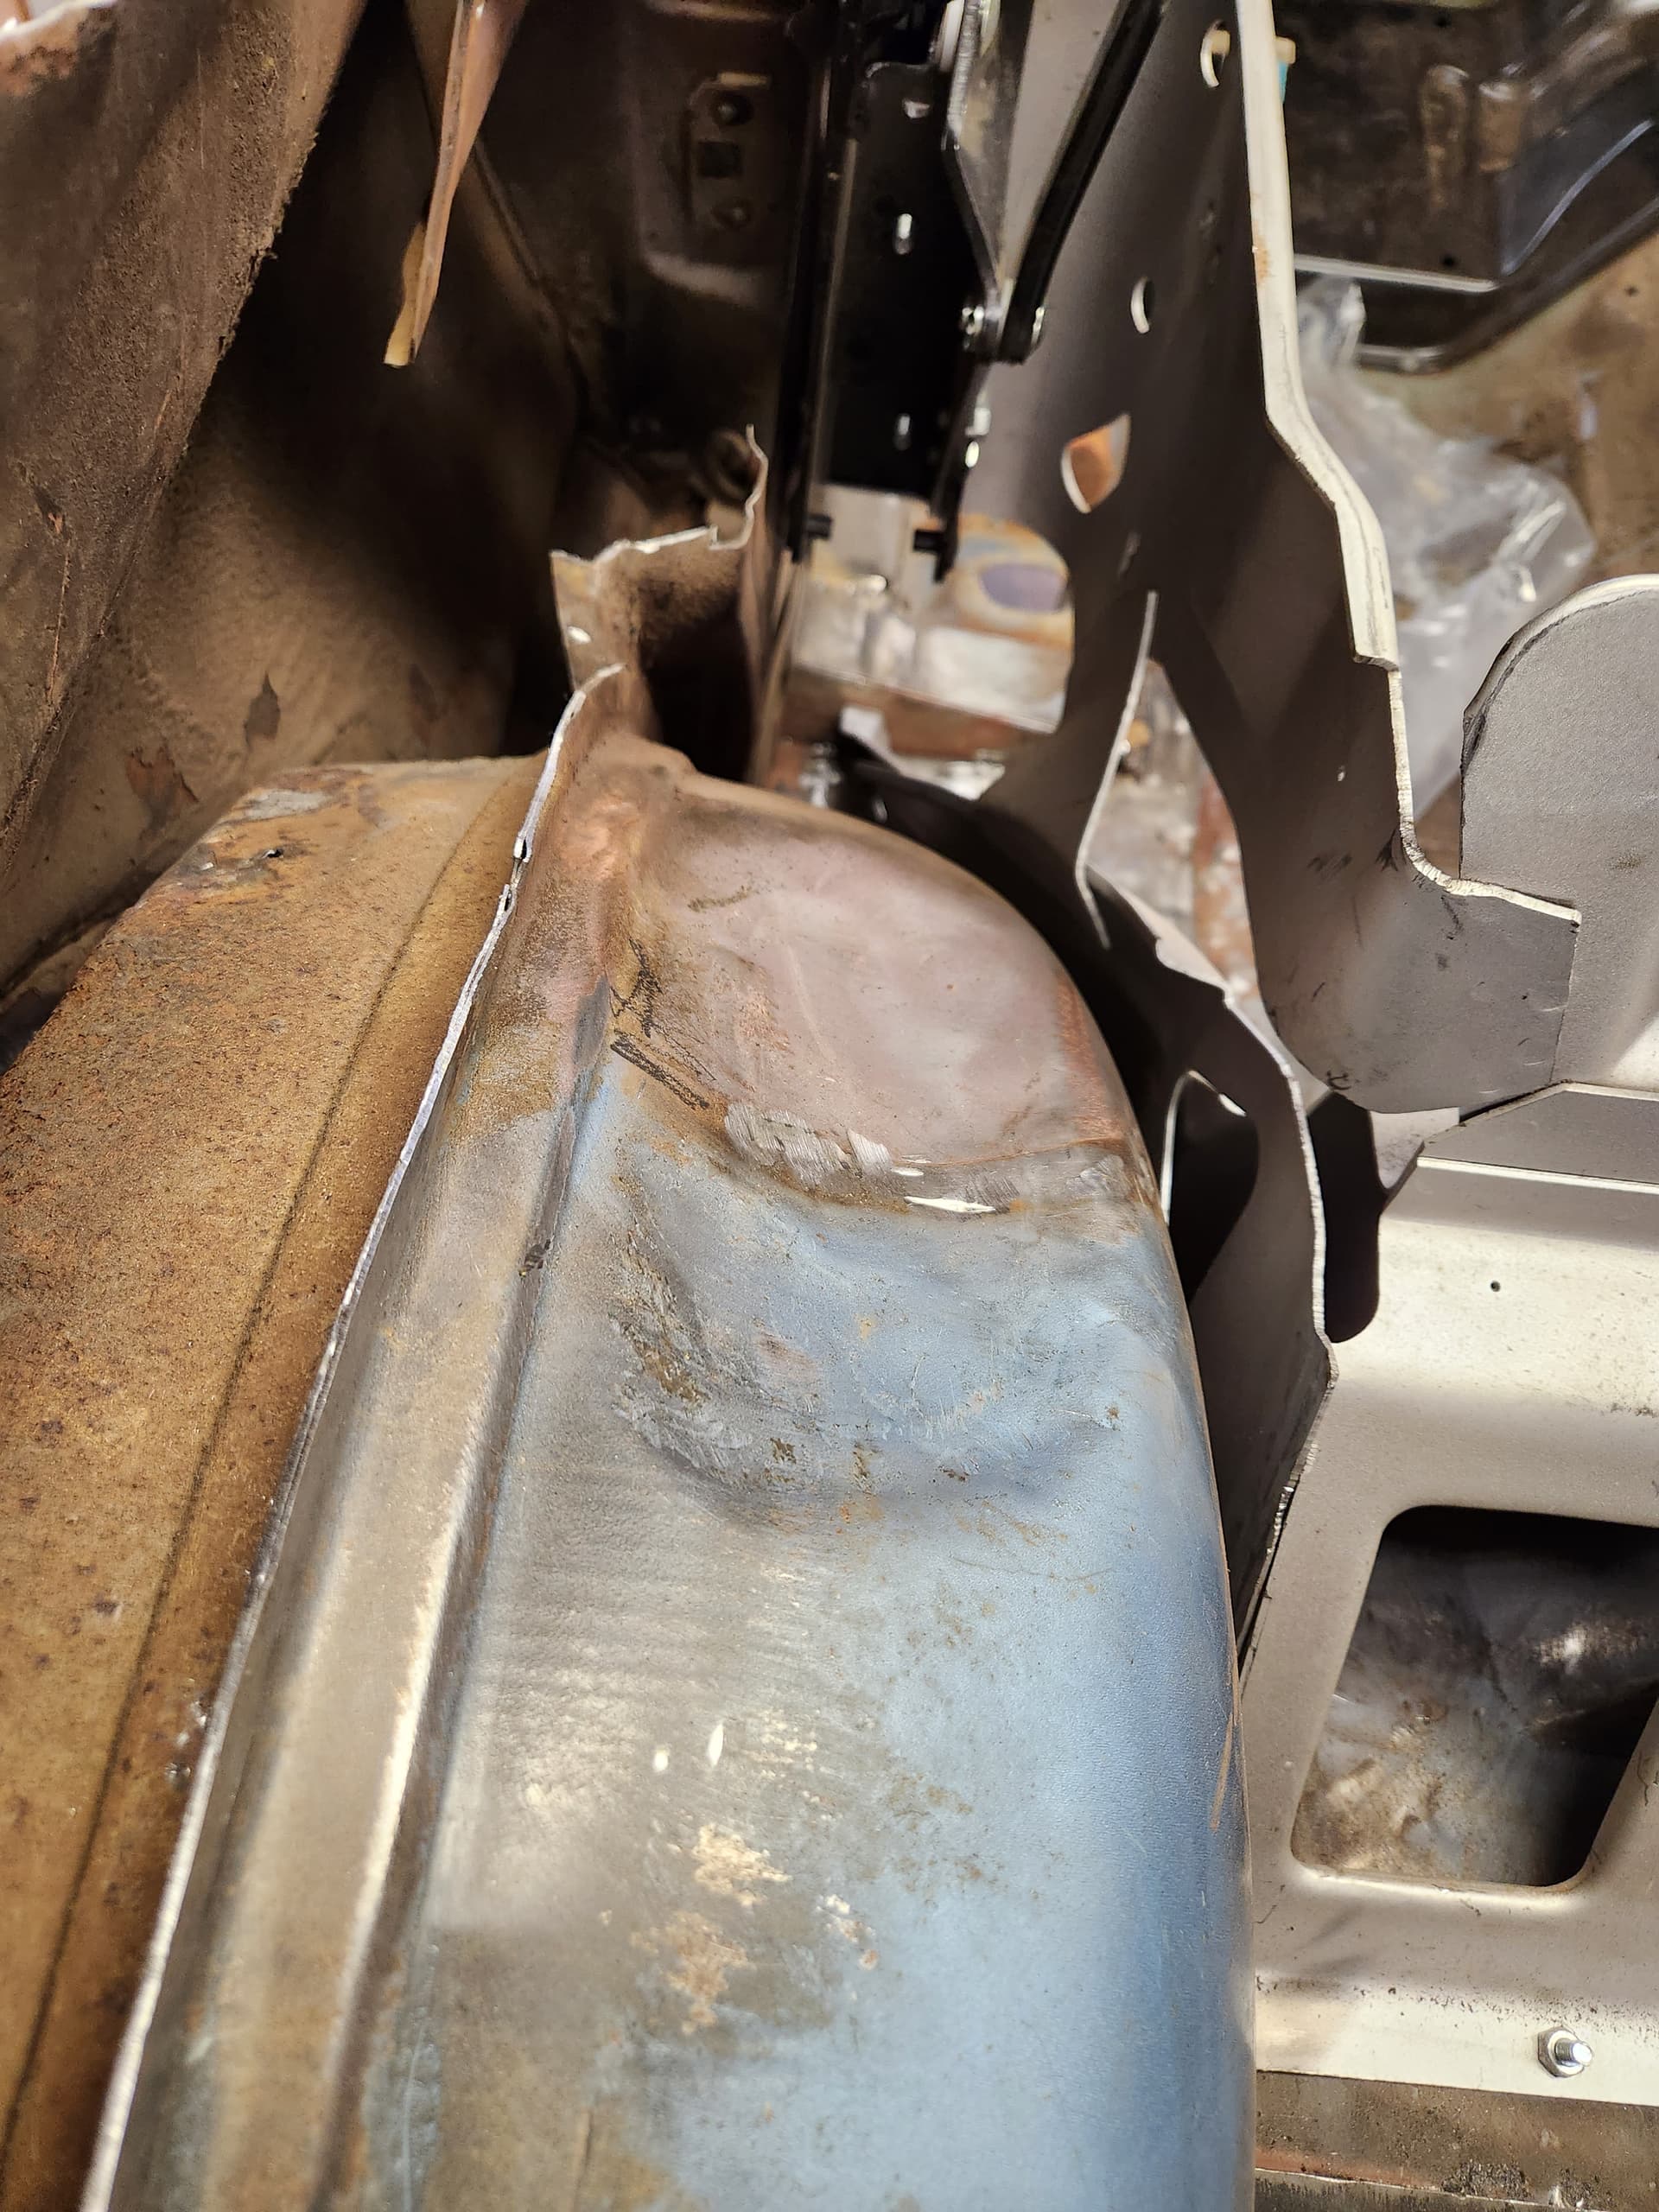
Altering the wheelhouses for the top clearance has been tedious at best. A couple of hours of actual cutting and shaping but many more estimating and trial fitting before cutting.
I collected a lot of measurements from photos of Mustangs such as the following to size the changes required.

Then worked them a little with a smaller BFH in stages and checked clearances top the top bows and other parts.
Whack, whack
Whack, whach, chop for metal stress relief
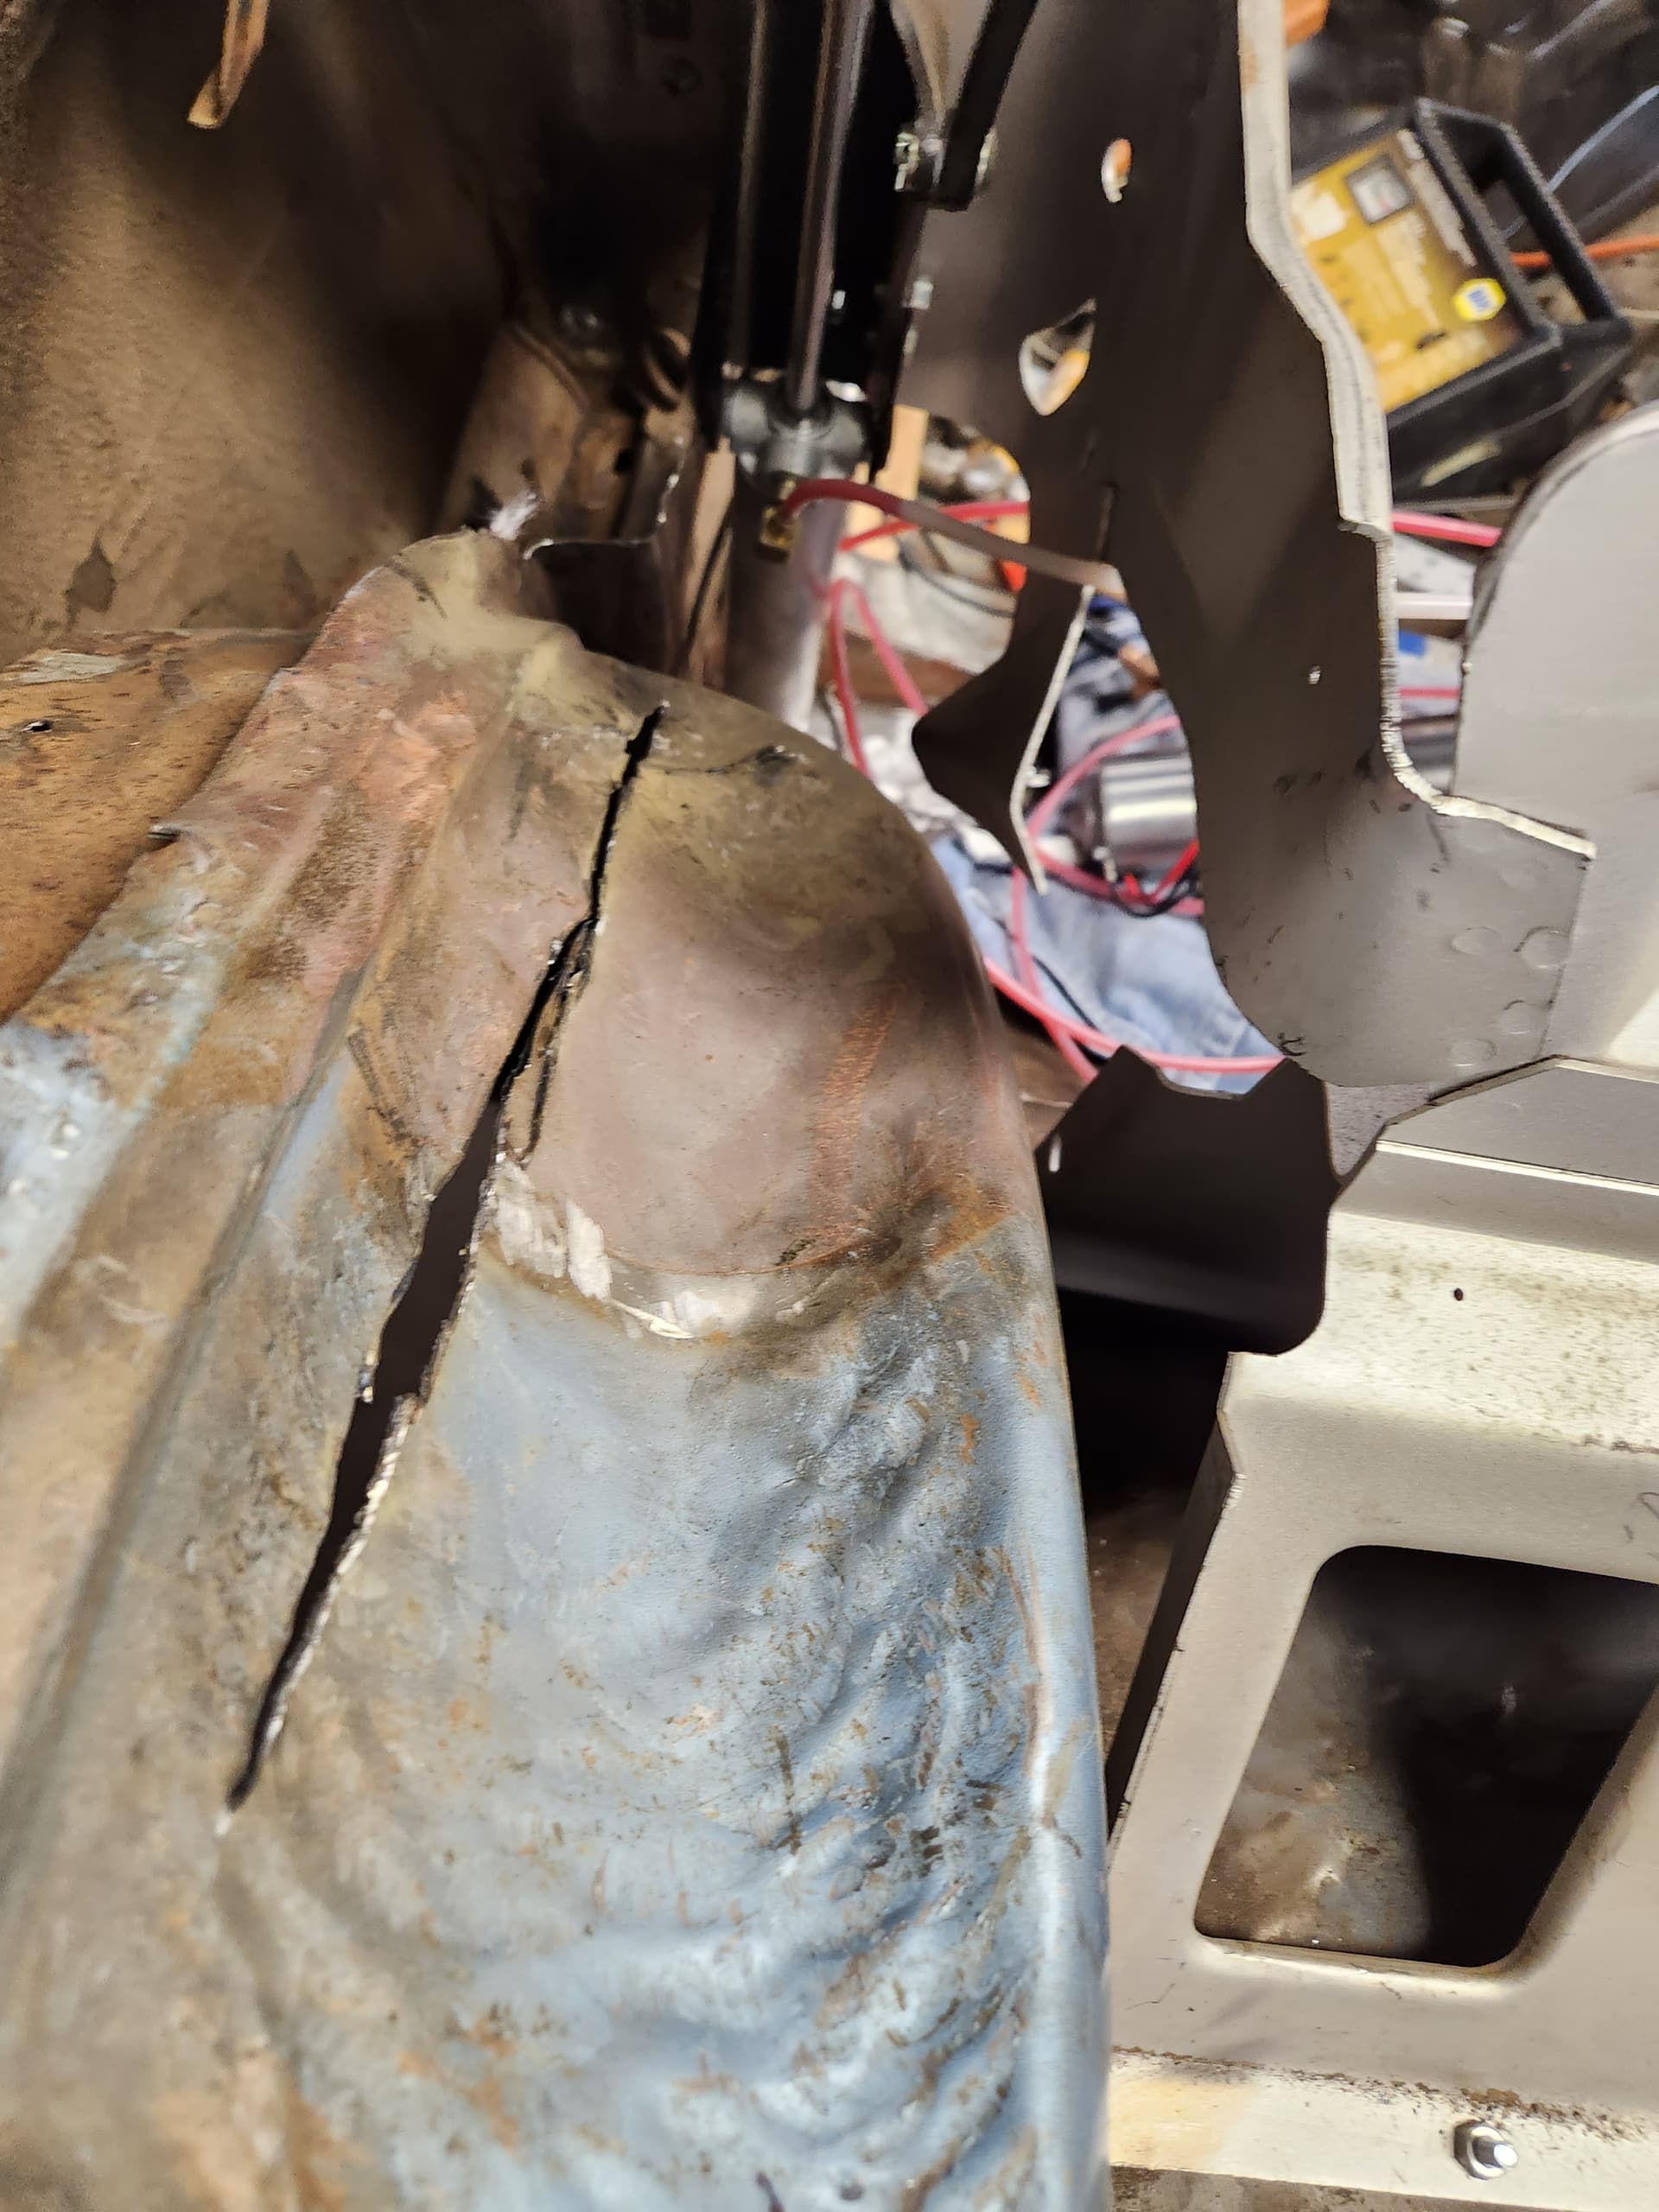
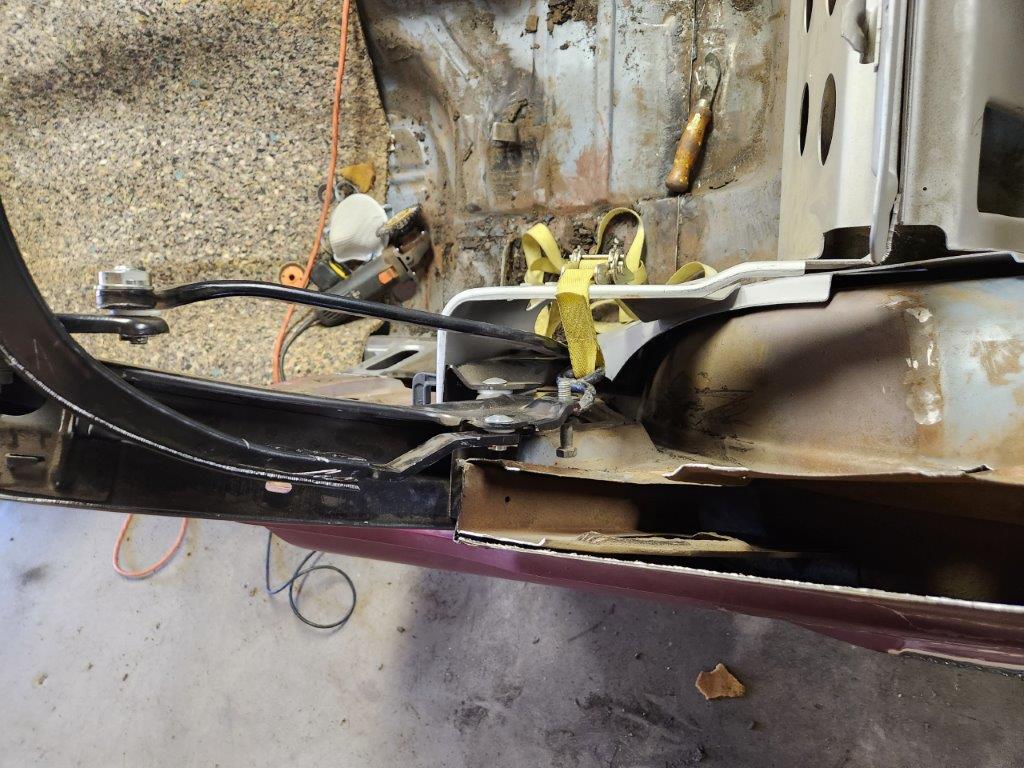
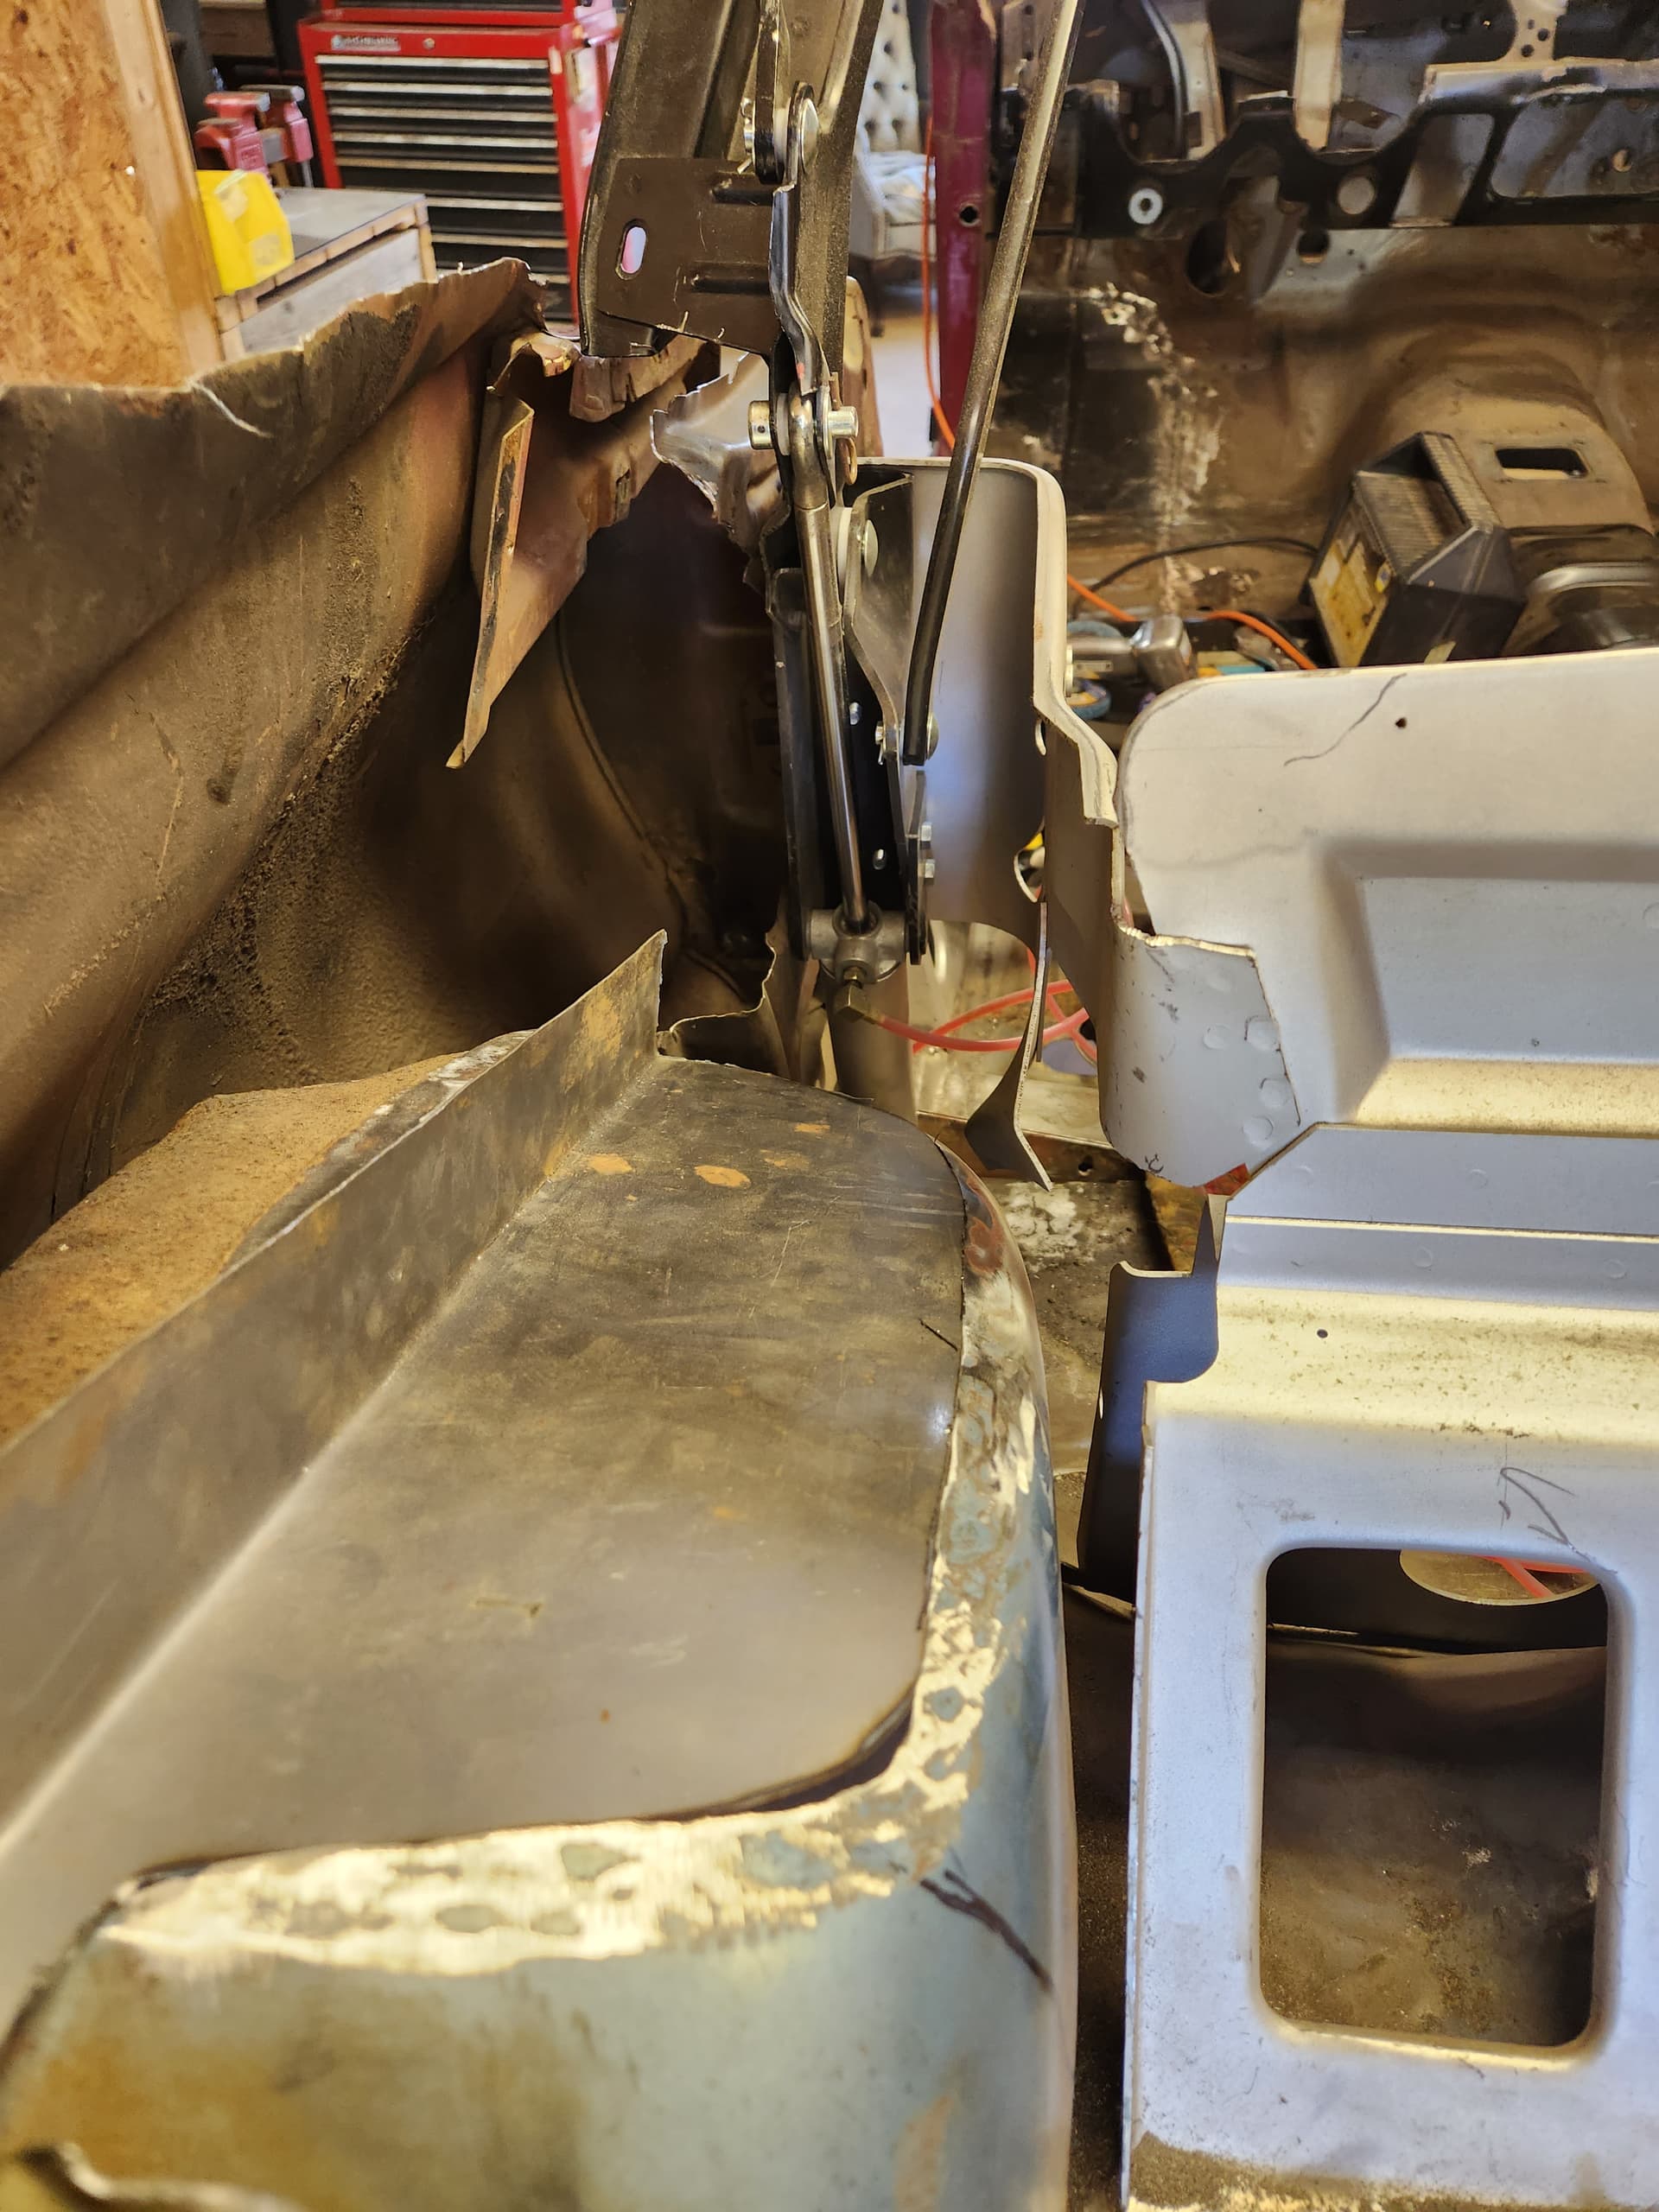
Sideview
Ugly! No going back now.

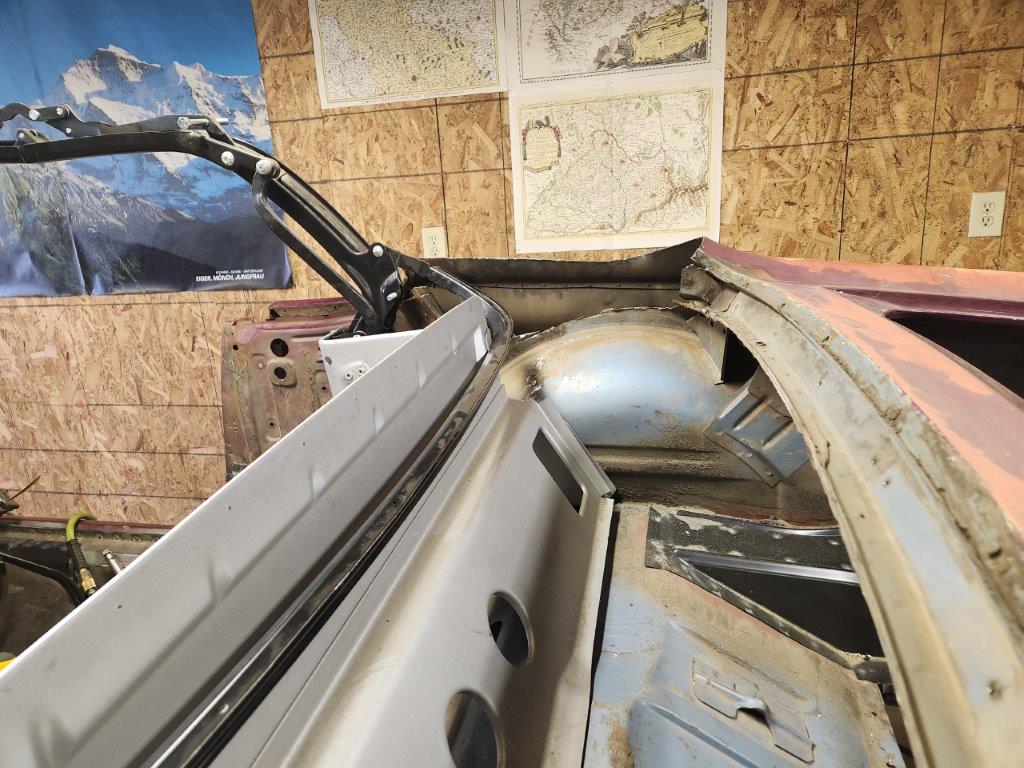
Topview
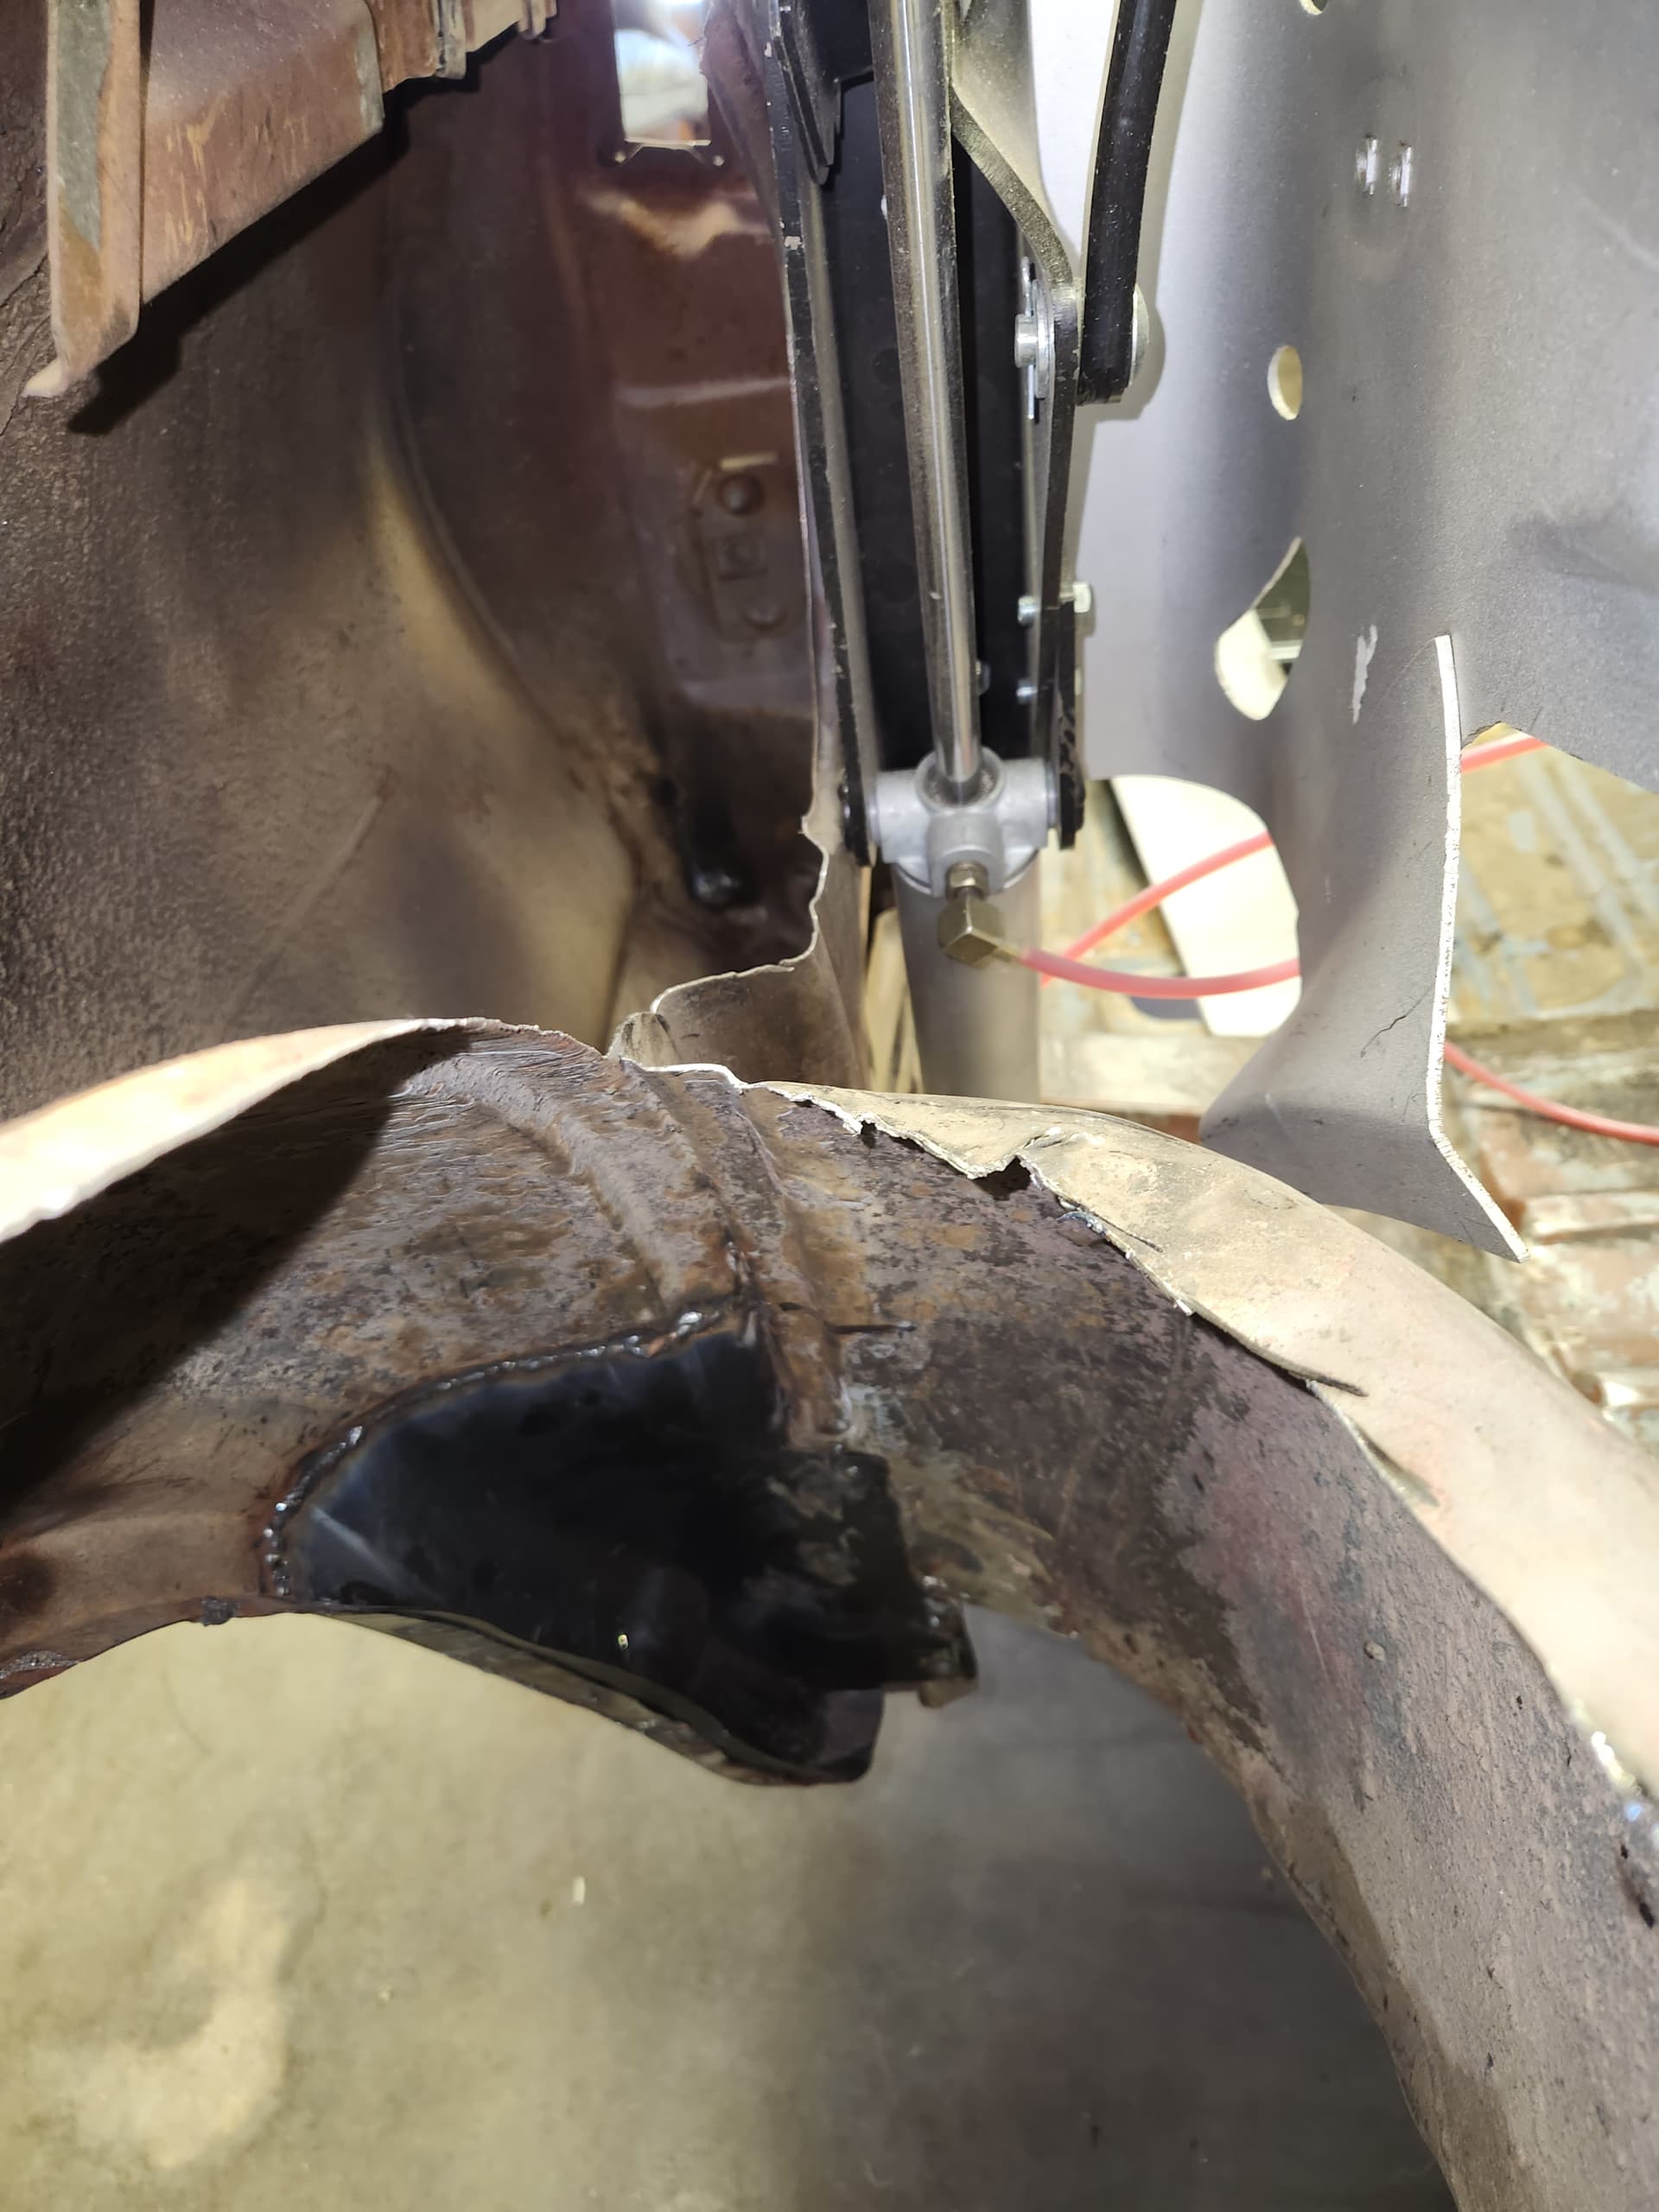
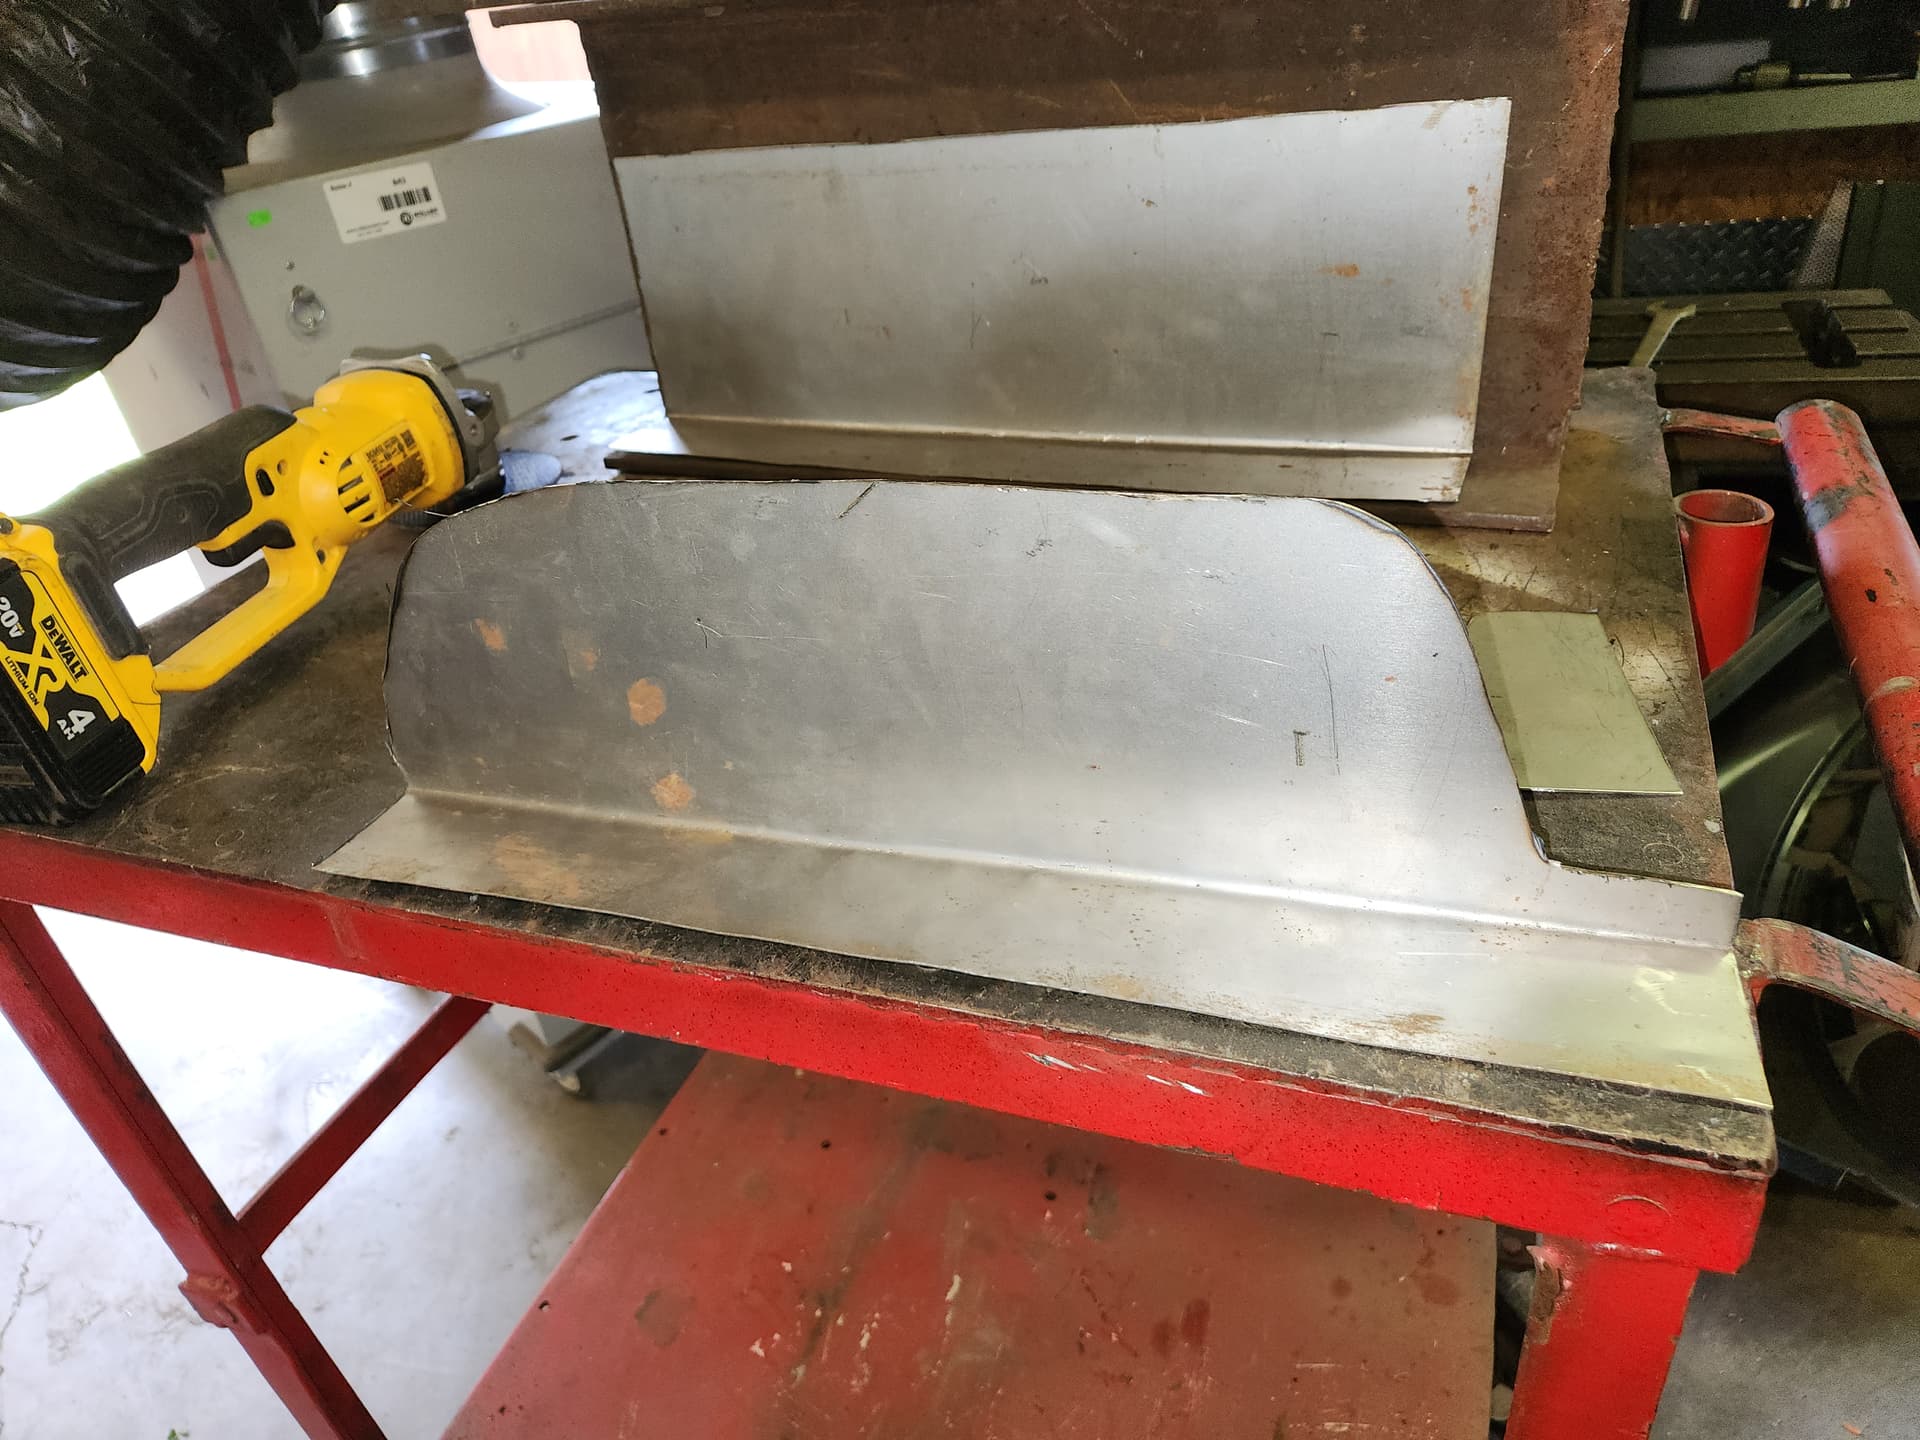
Cleaned-up and some dolly work
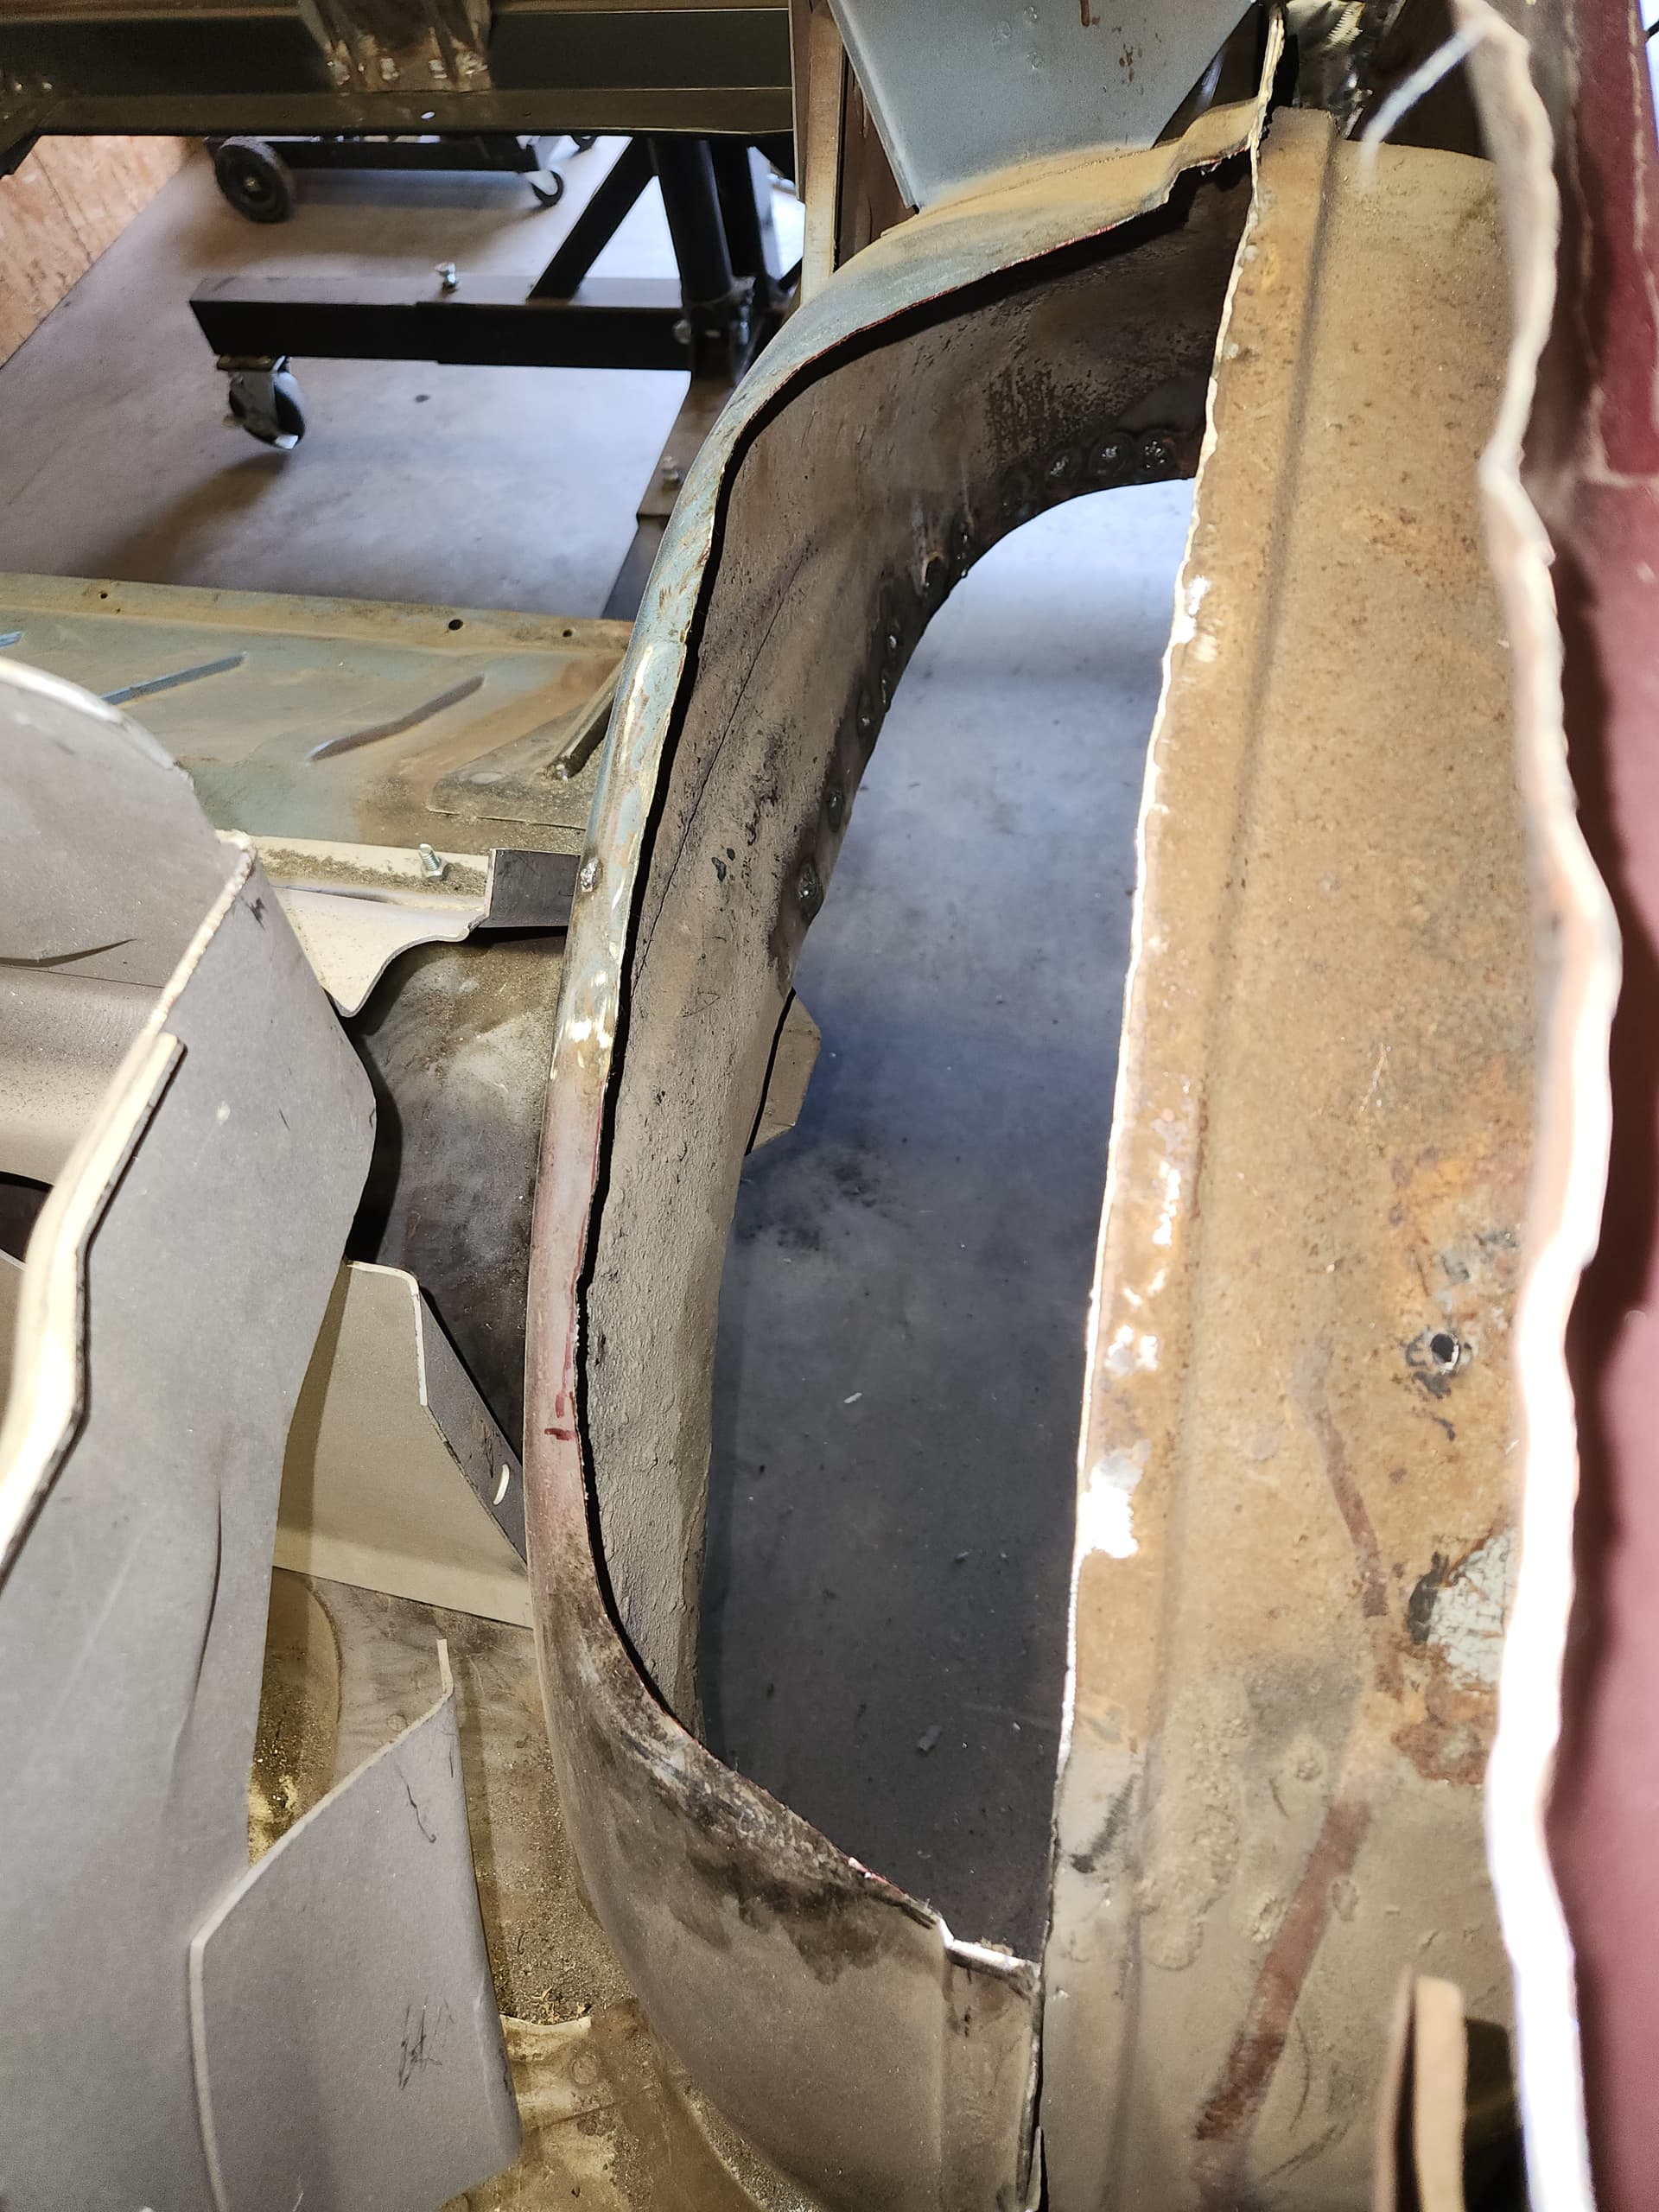
The hole is ~17" long by 5.5" wide and the ends are tapered to blend the curvature of the wheelhouse to meet a flat piece of metal. The cut starts approx 5.5" measured in a straight line from the top lift cylinder rod (check the topview photo above). The inner wheelhouse is fully removed to the interface with the outer wheelhouse. The Mustang leaves the flange between the inner and outer in place and just flattens it over. Much cleaner to remove and butt weld. This also provides another 1" or so of clearance to avoid damaging the top.
No break but the straight side of the steel table and a piece of flatbar works very well.

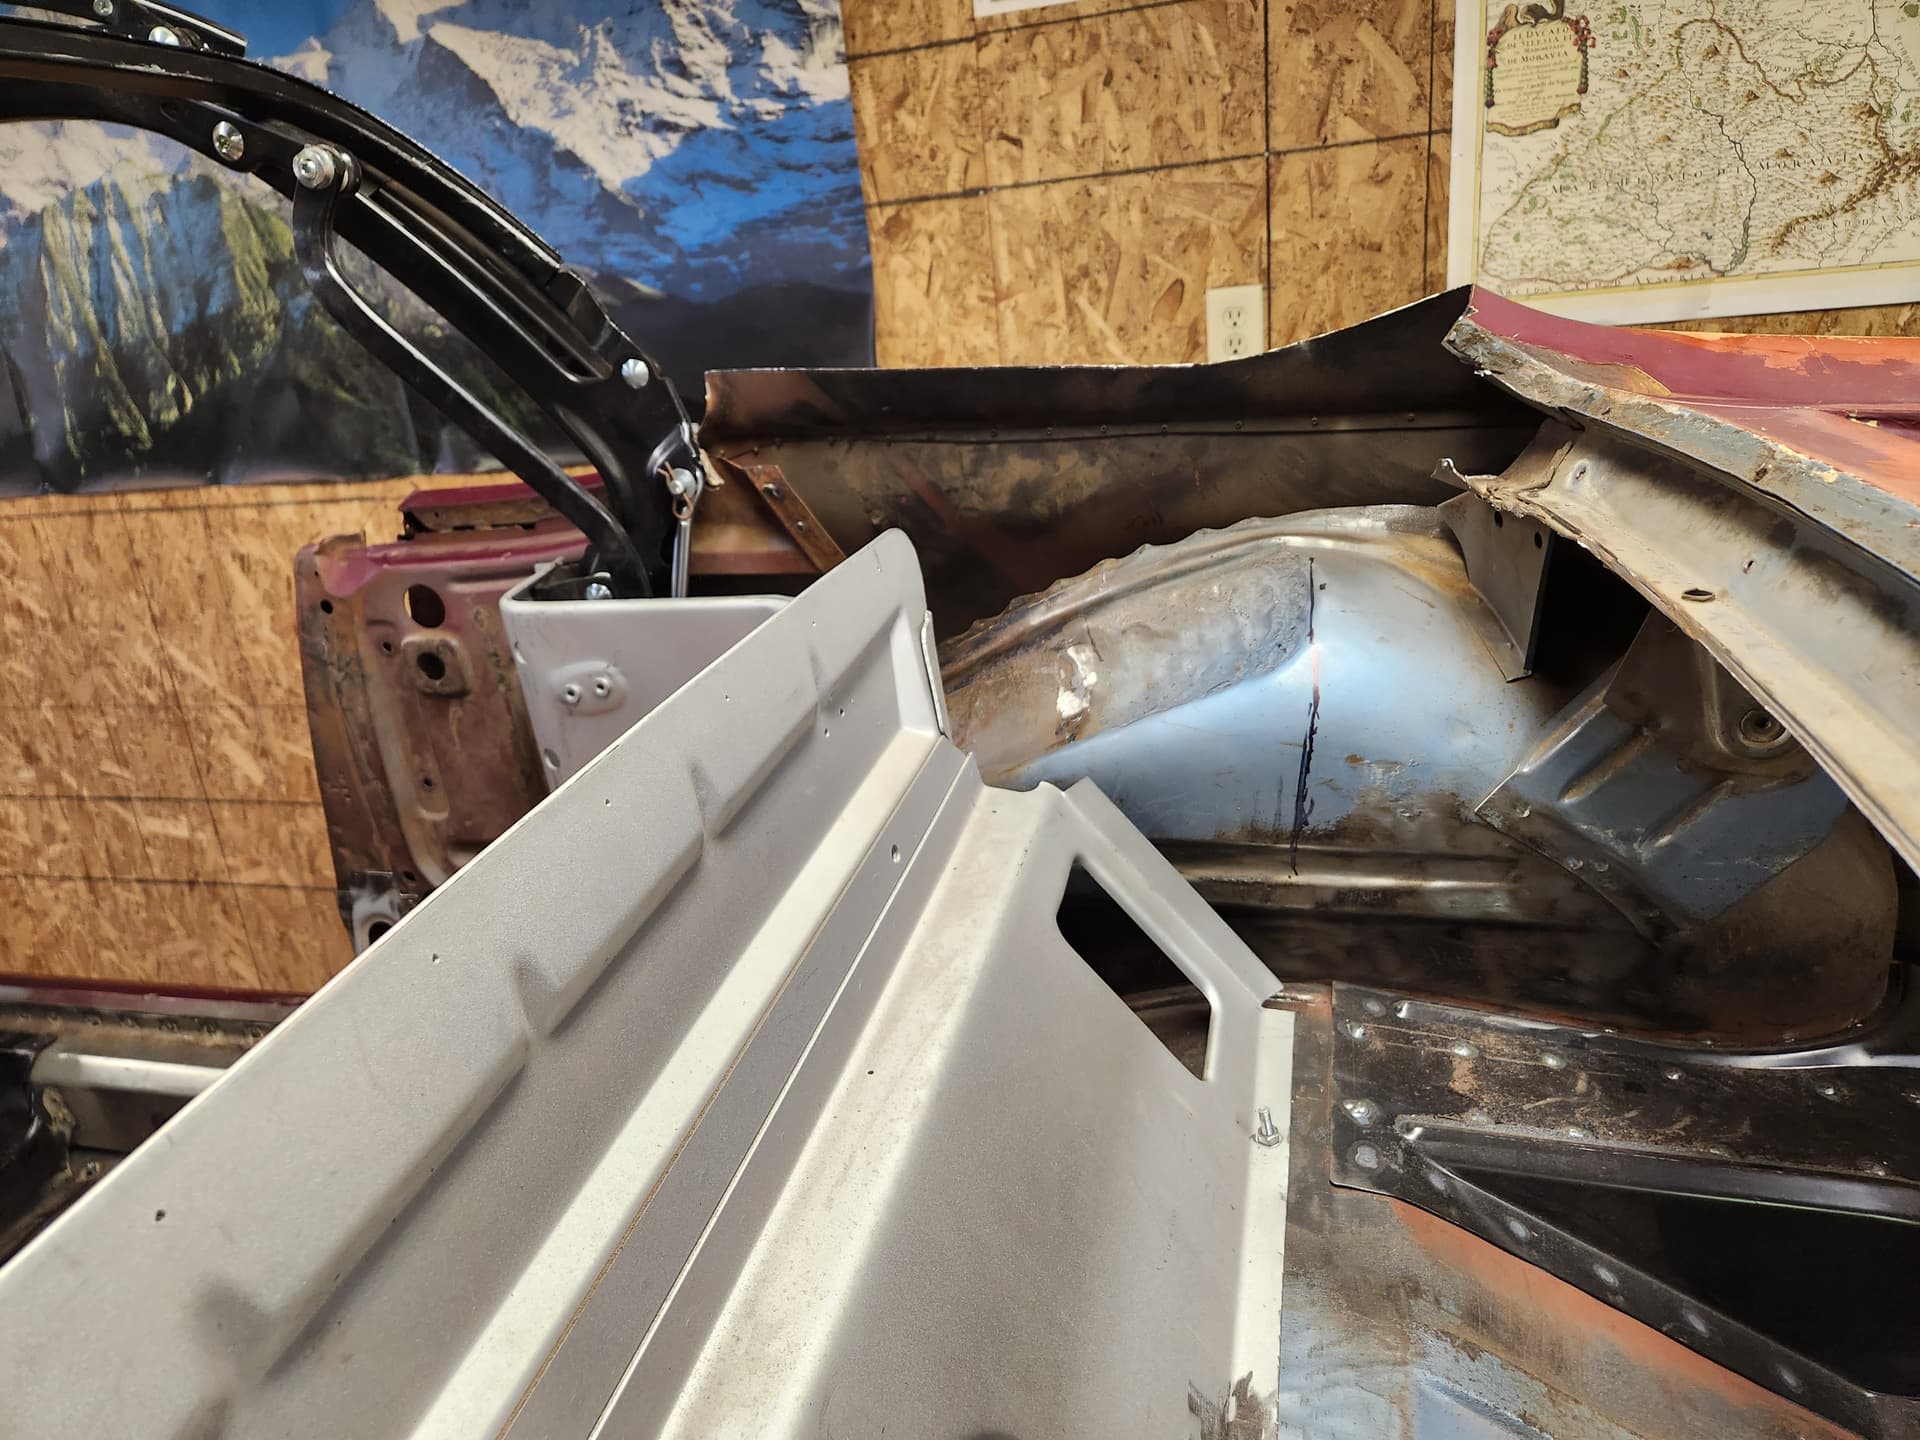
It kind of fits?
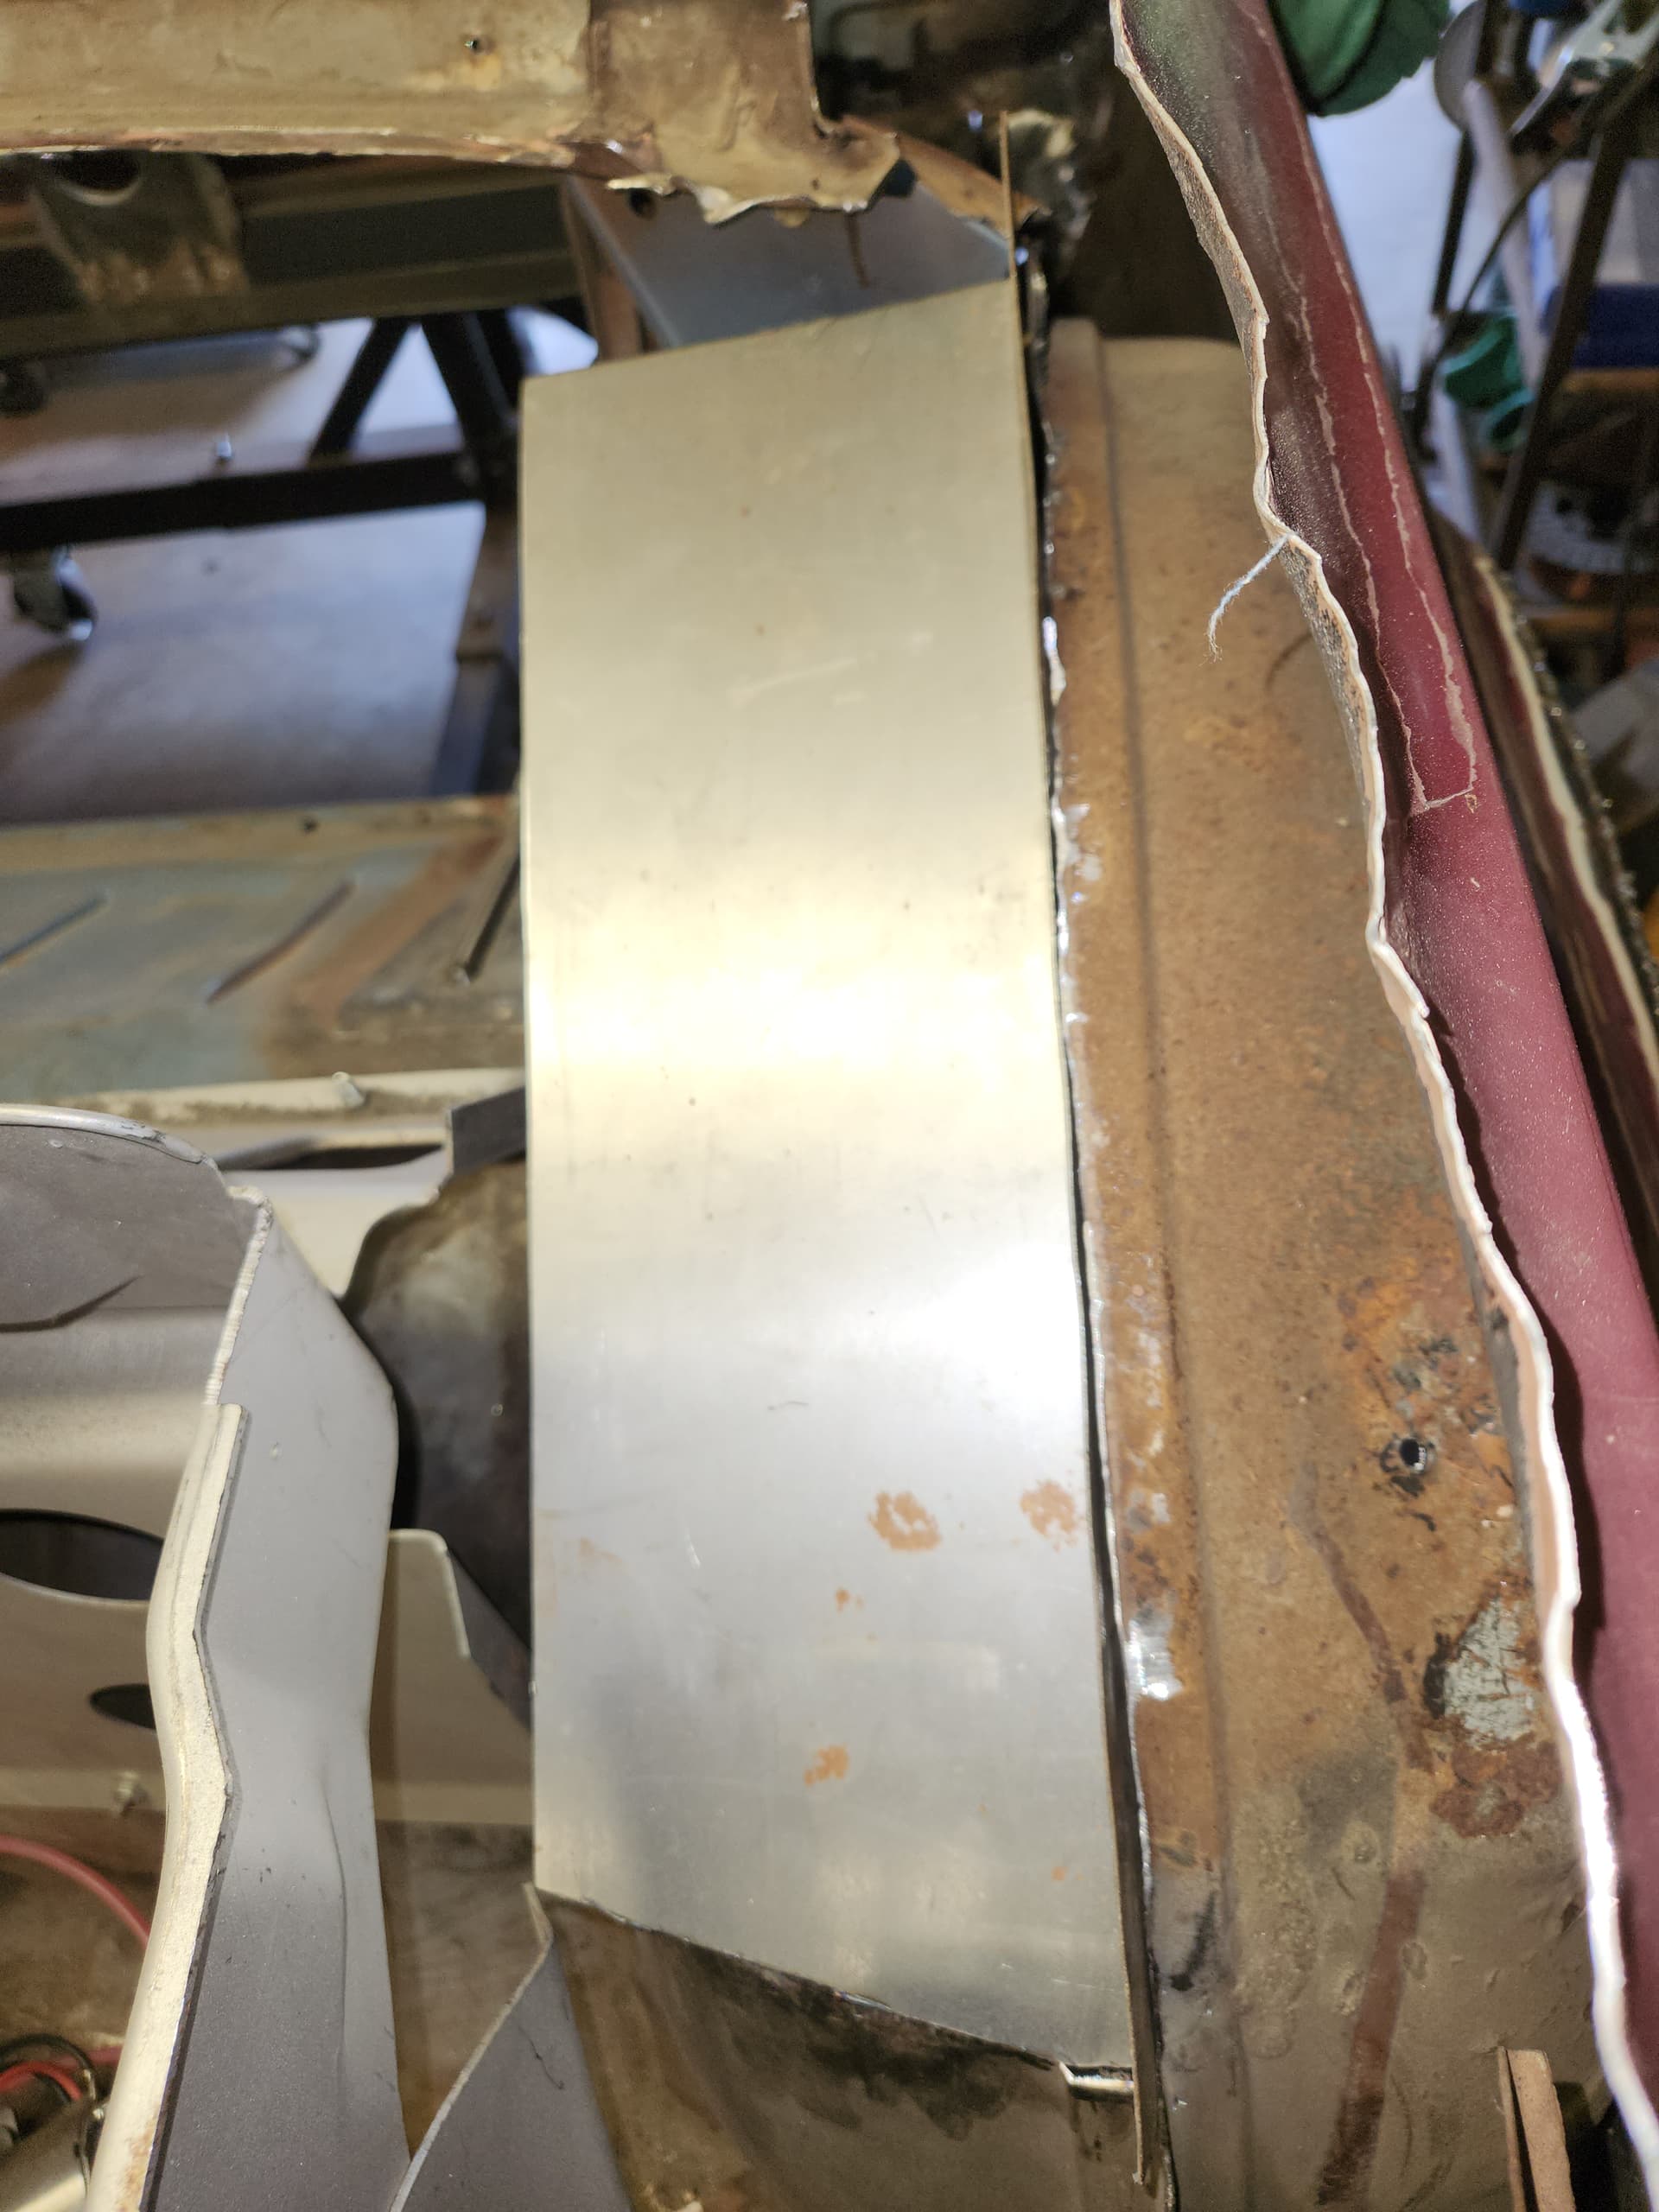
Much better
Tacked into place

2 Likes
According to most references the Cougar id ~3" longer than the Mustang. This checks out well and confirms my positioning of the top frame. The rear top frame mounting locations and the frame support/divider are in the relative factory location.
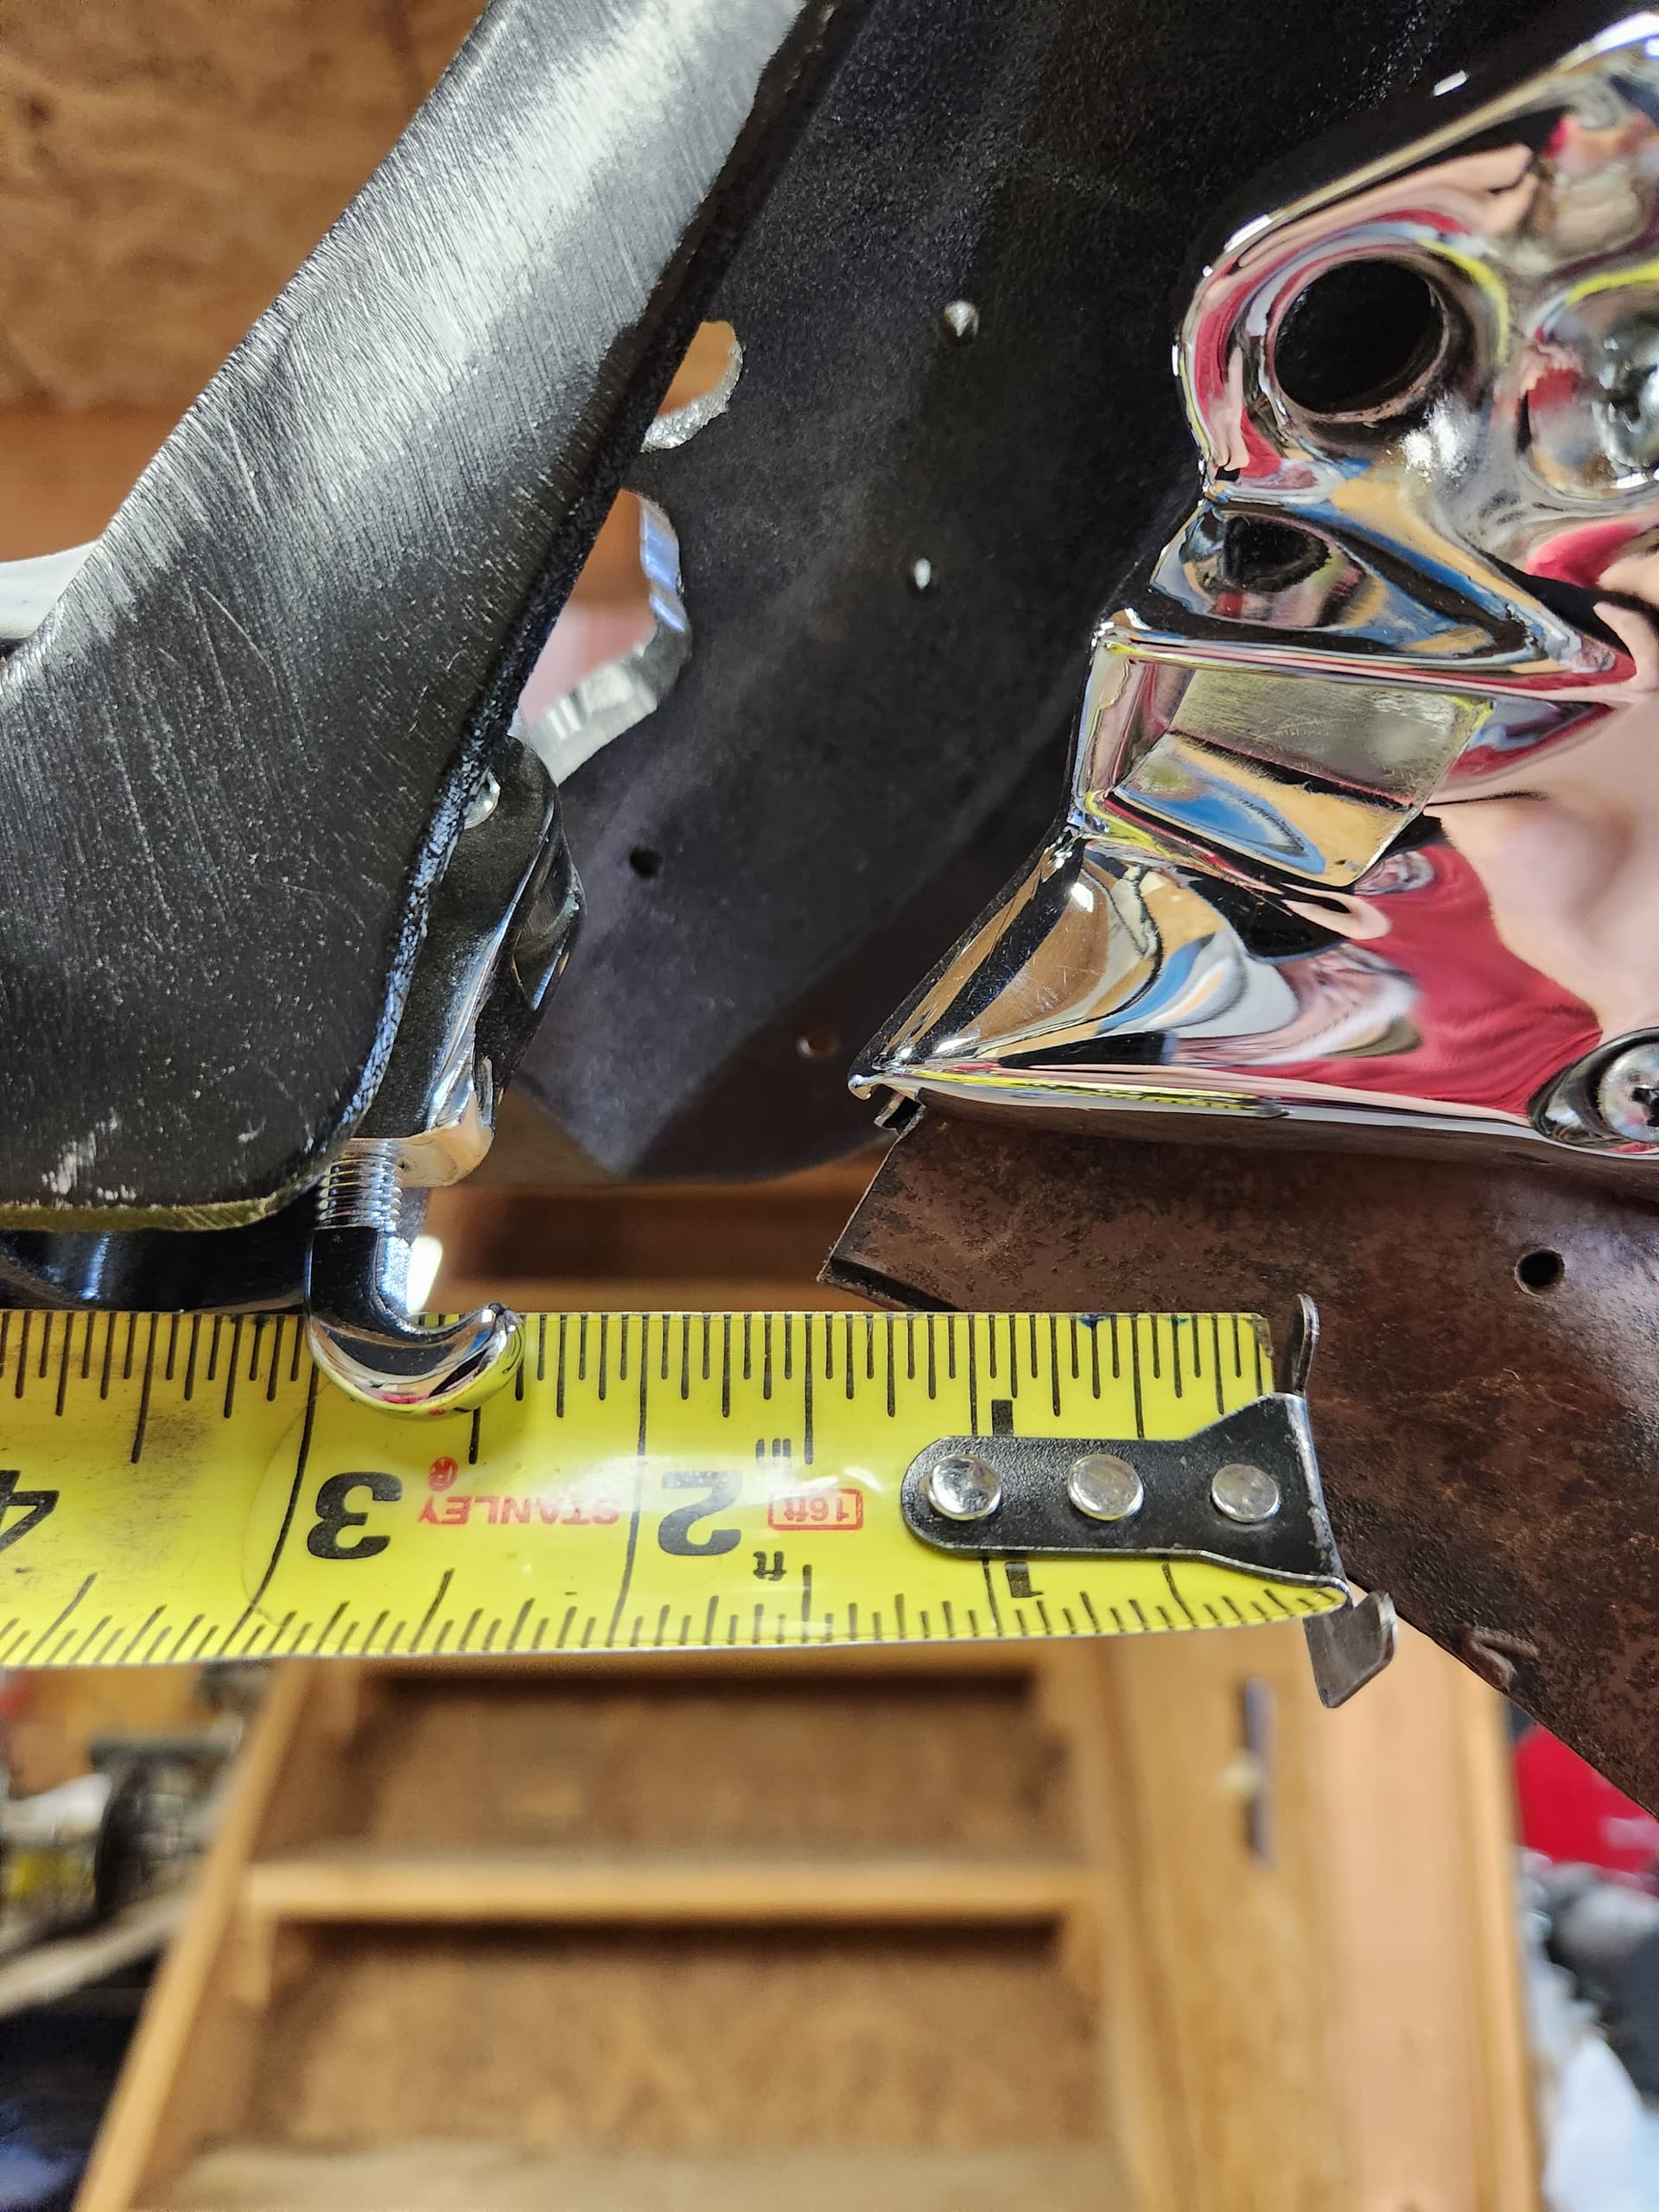
Obviously not going to lock.
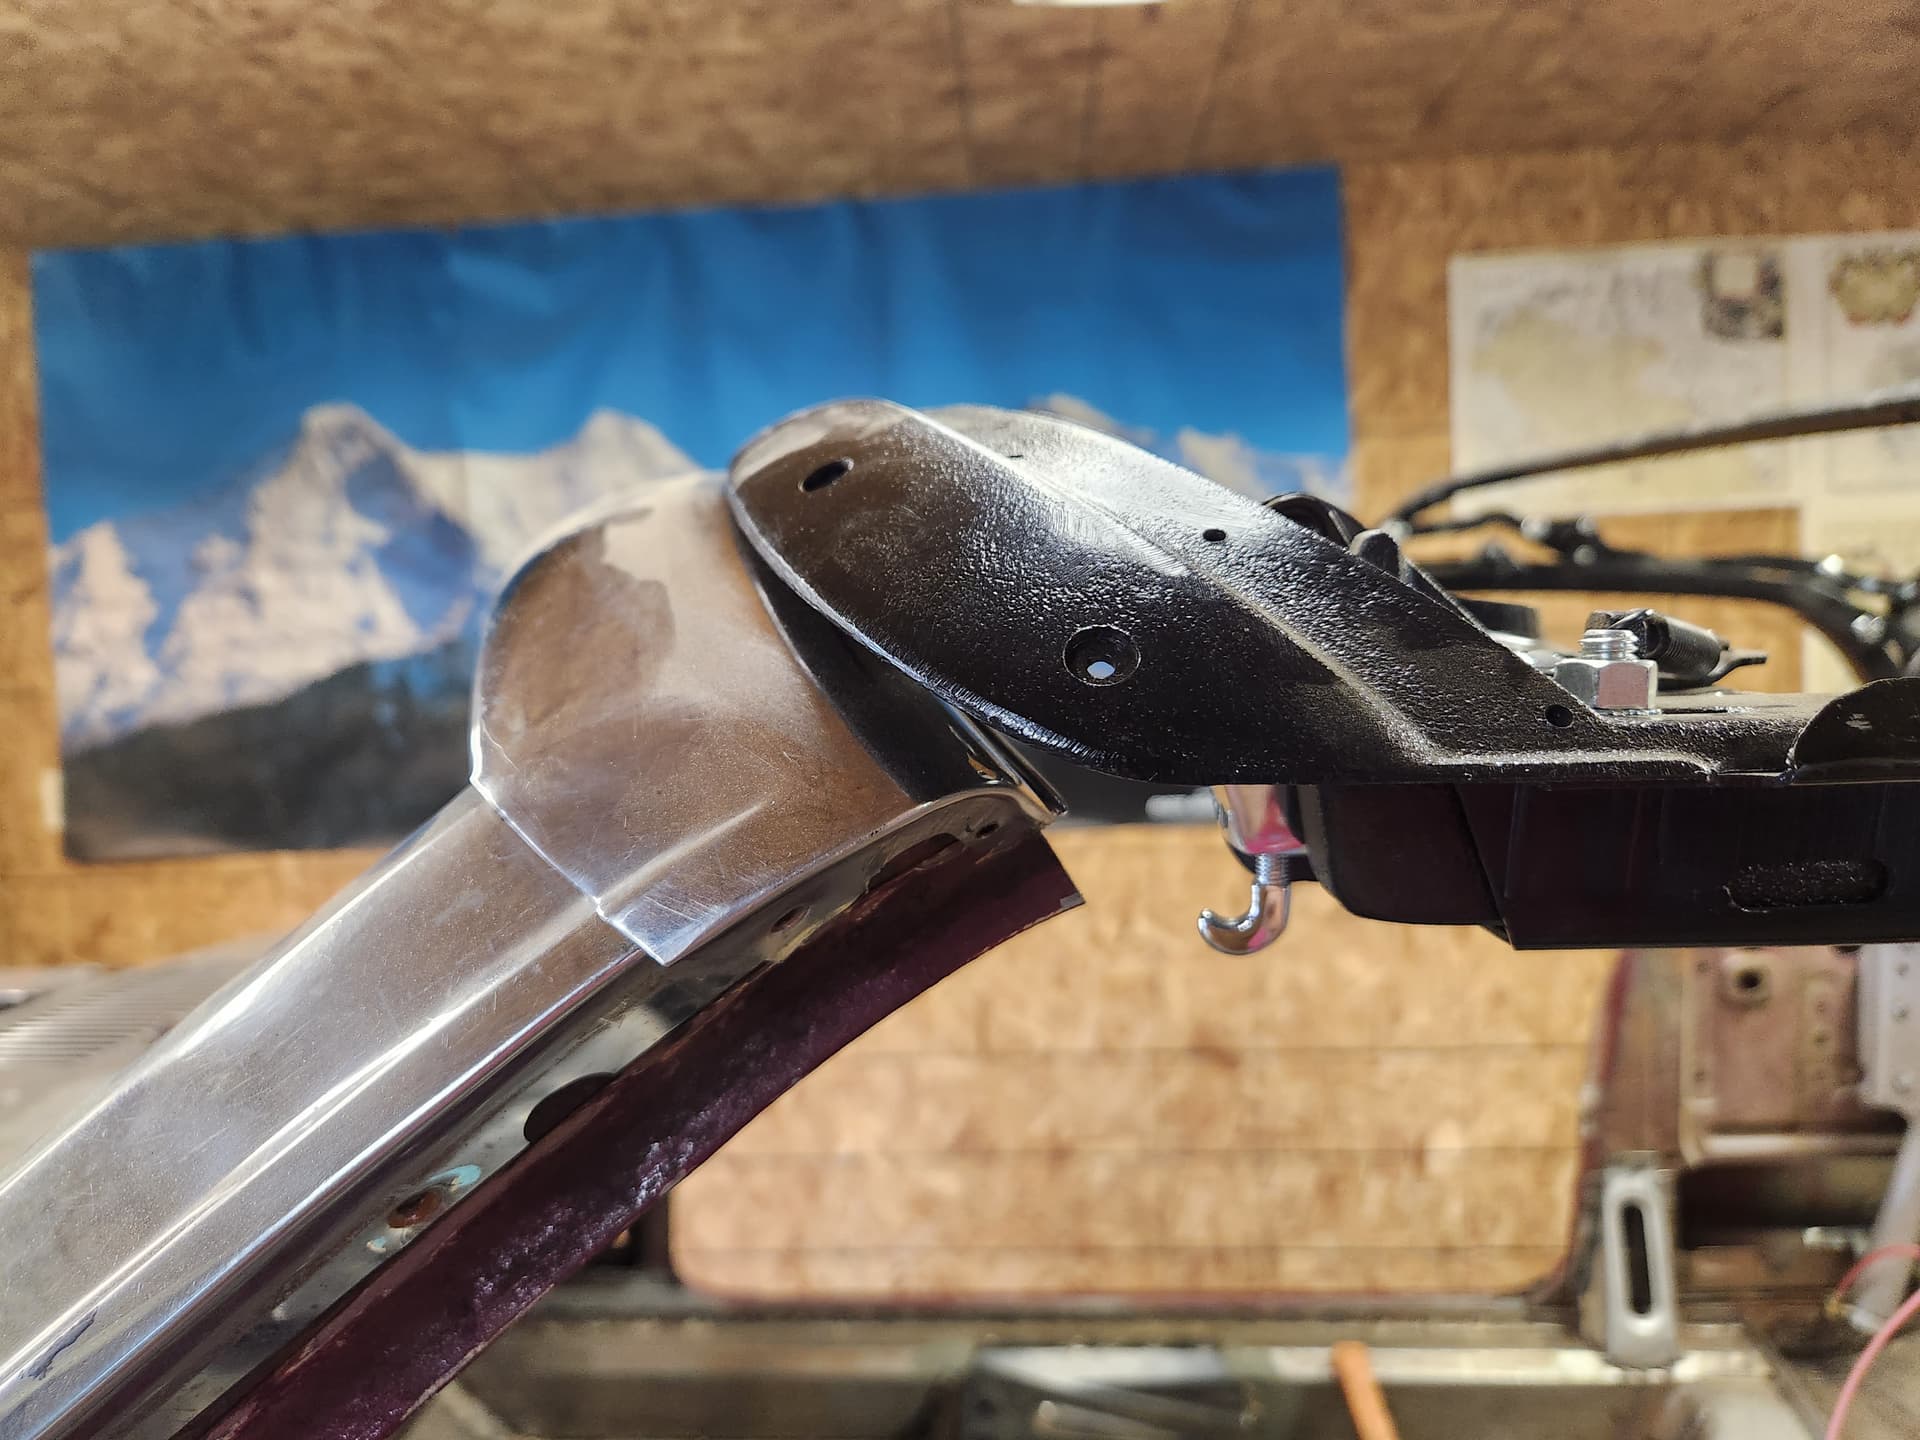
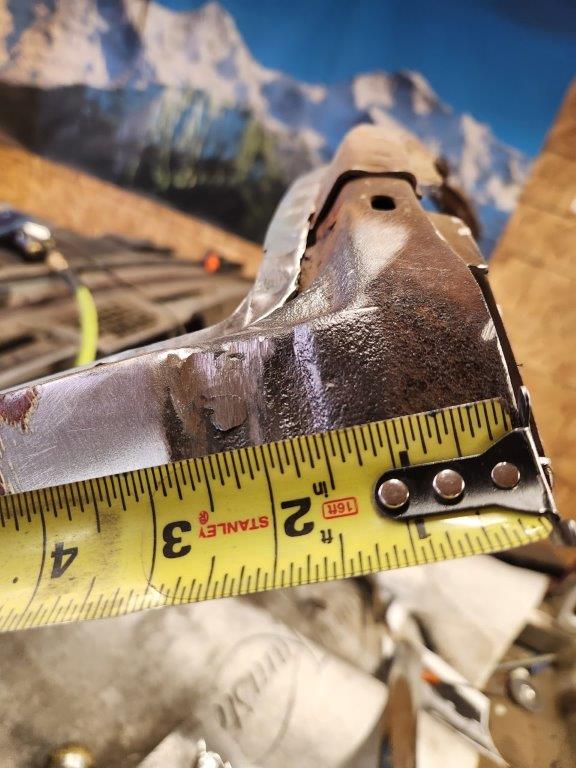
2-3/4" offset from centerline of latch hook to mating pocket. Very similar for the top alignment pin and mating holes.
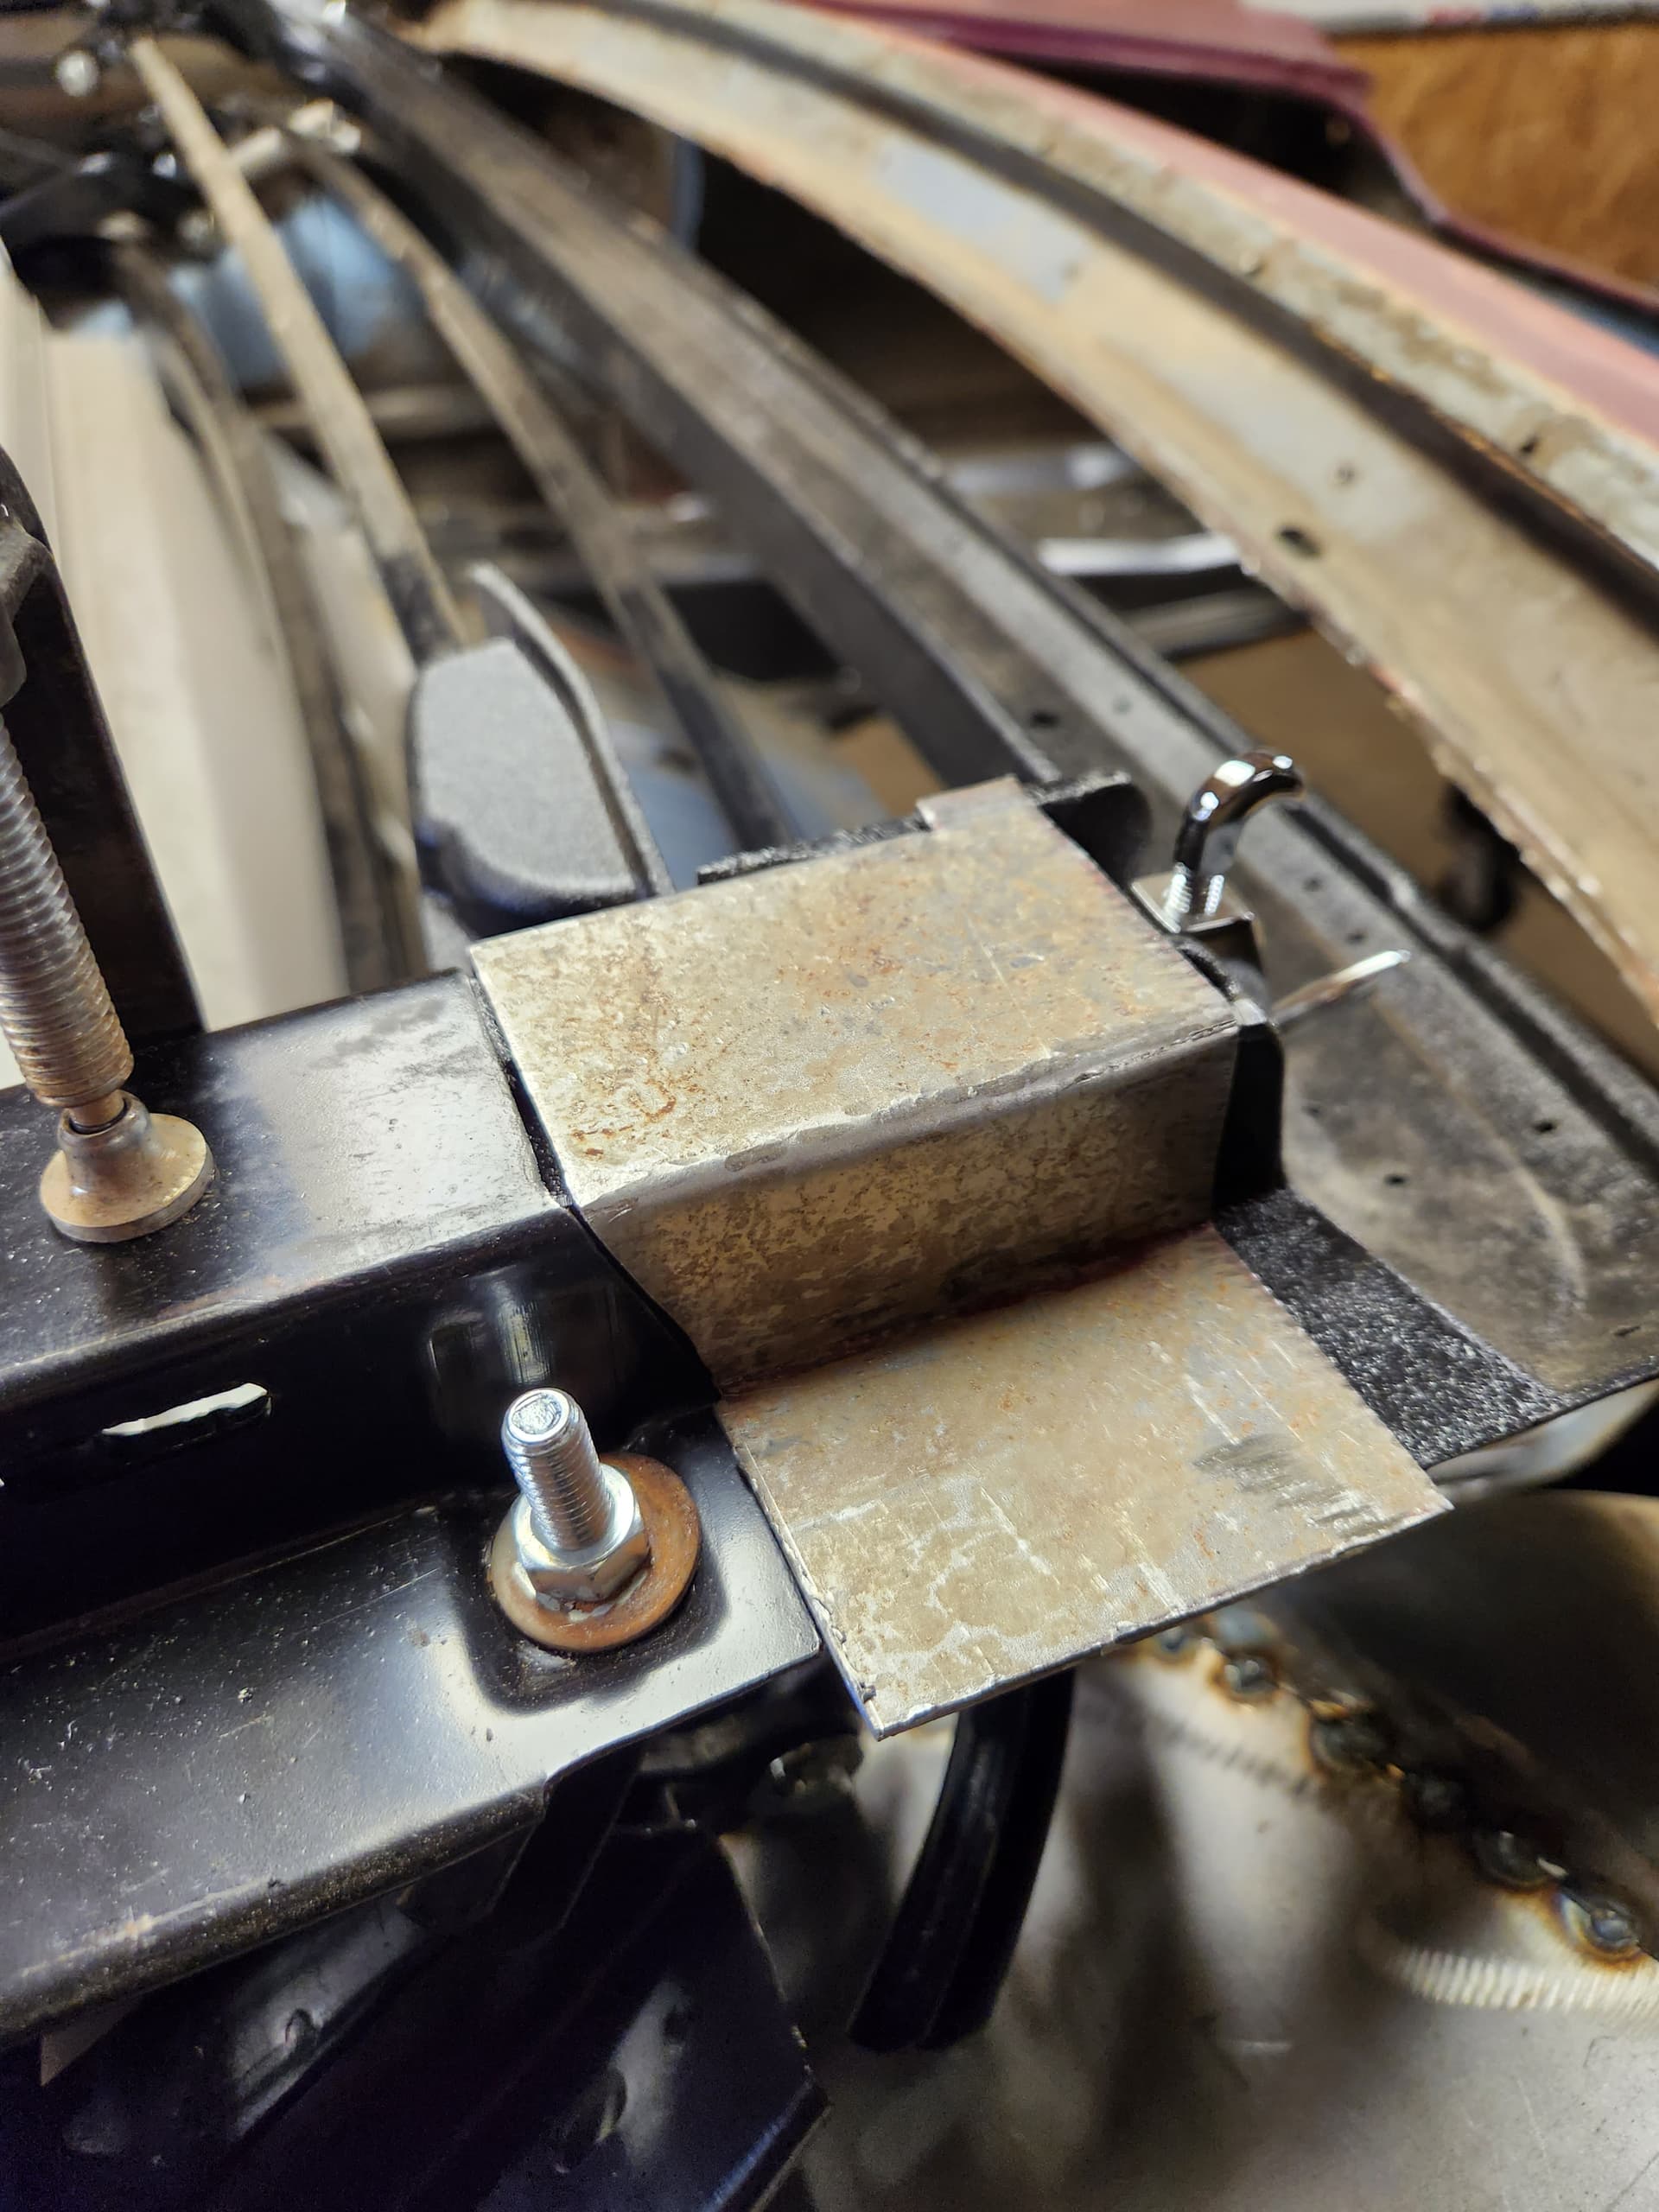
Adjustability of the hearer bow is less than +/-0.5" and is limited in multiple ways including the slot for the bolt.

Header bow adjusted for the 2-34" offset

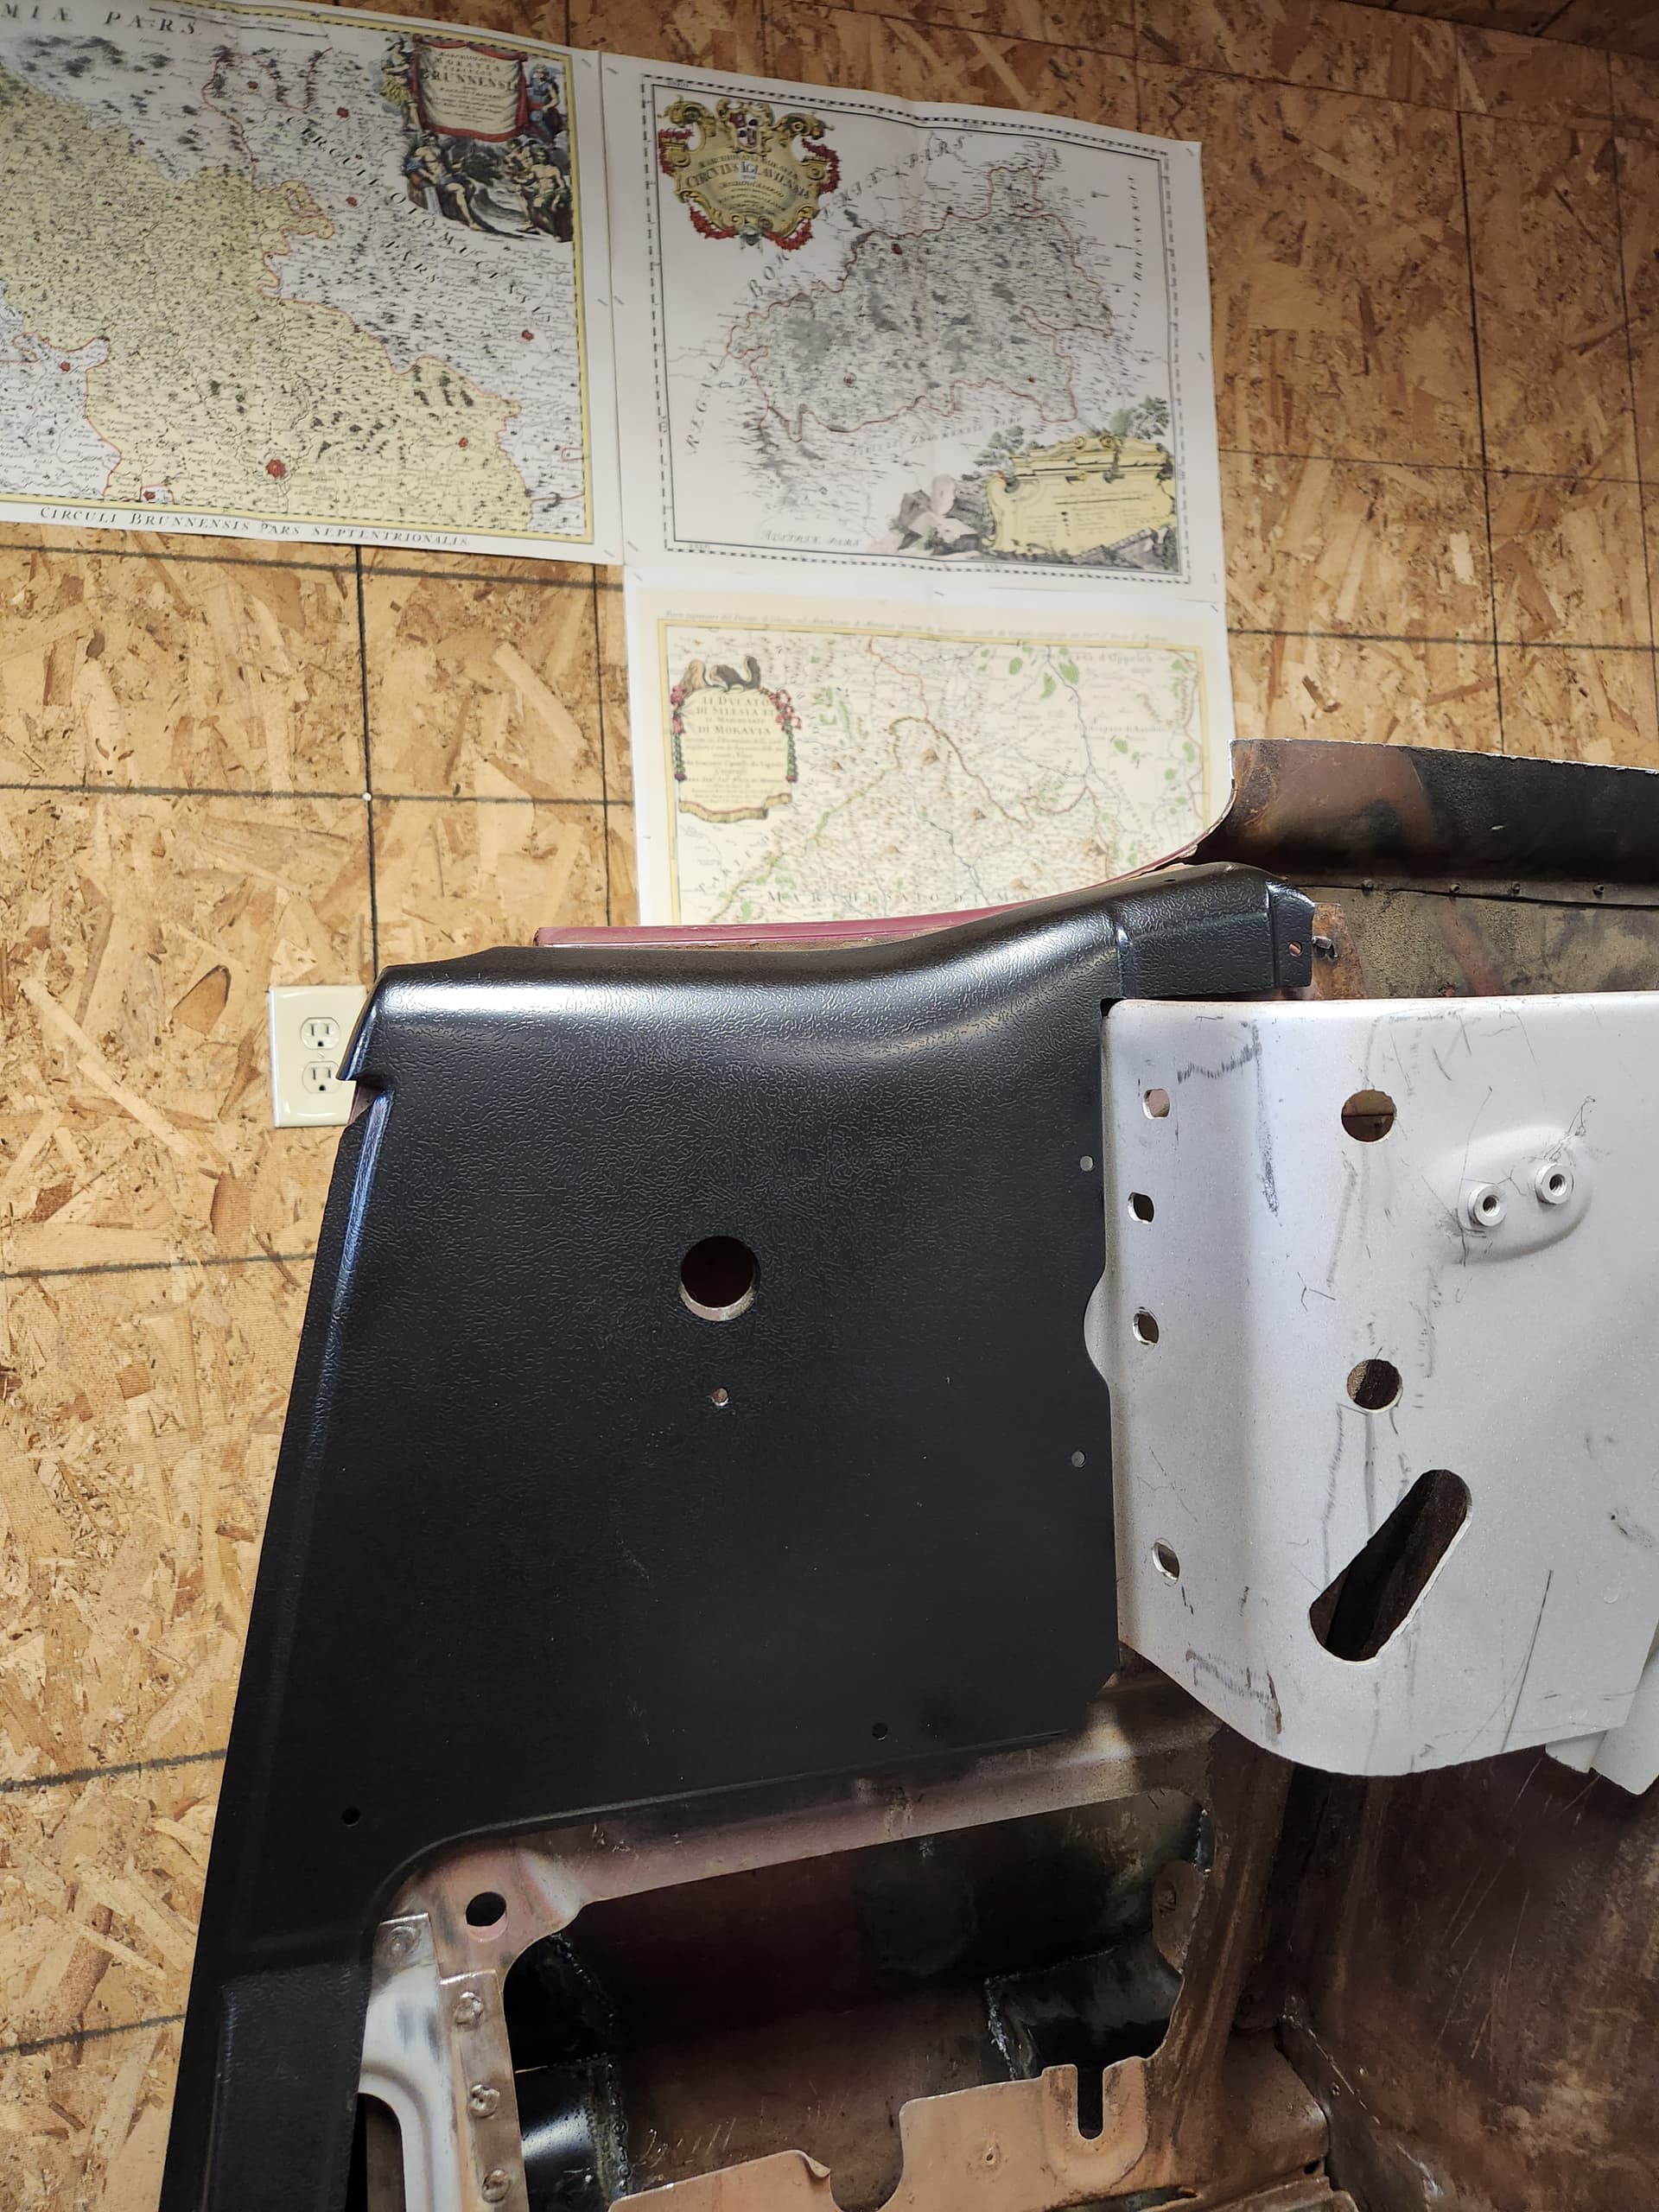
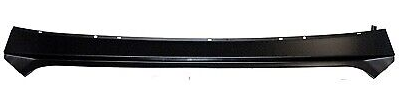
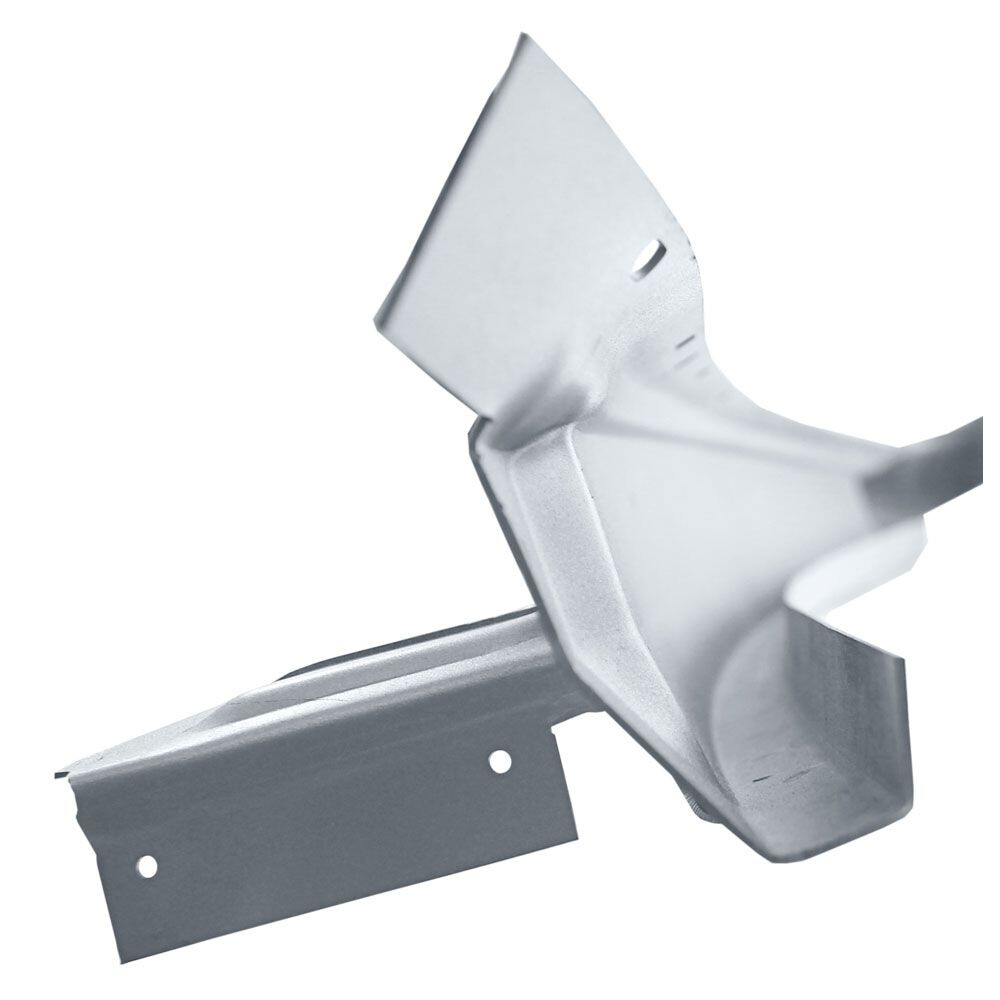
Top frame extension piece (14 Ga.) that must be welded in. Holes/slots to be added later.
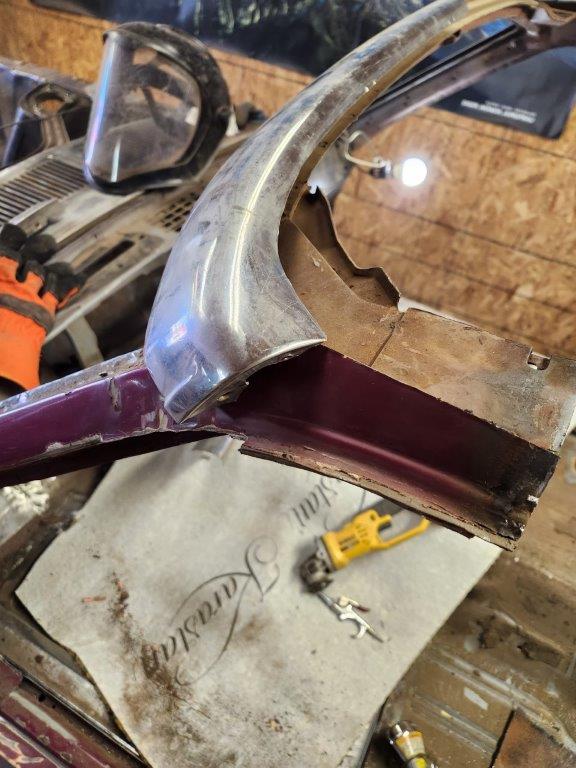
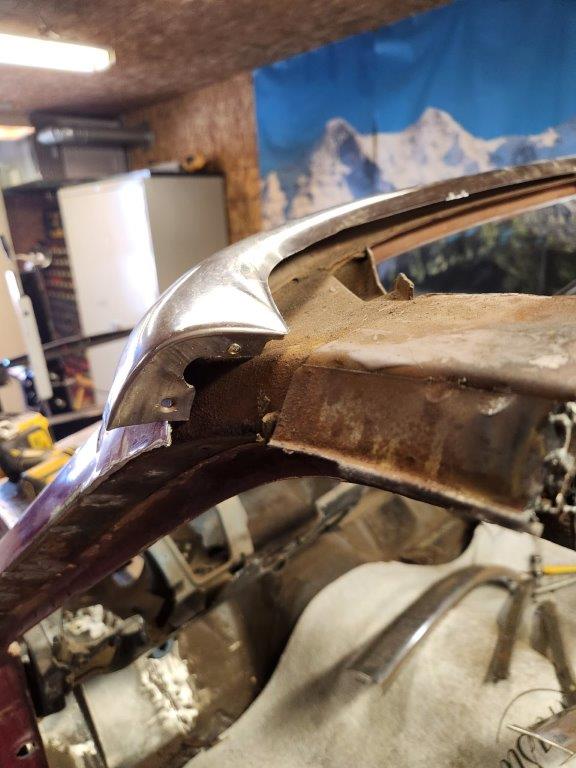
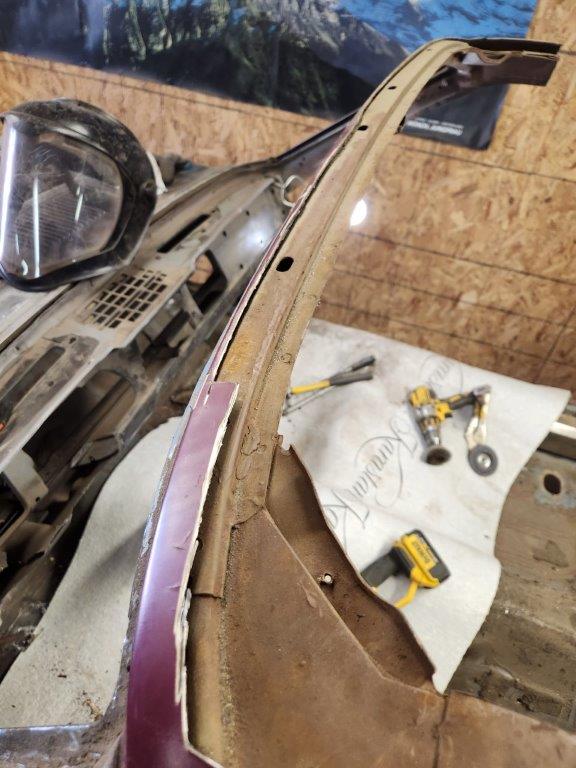
Next up. The gutter.
With the top extensions in place there is not much clearance to the remains of the rear window frame and package shelf. Regardless, these portions need to go to install a gutter.
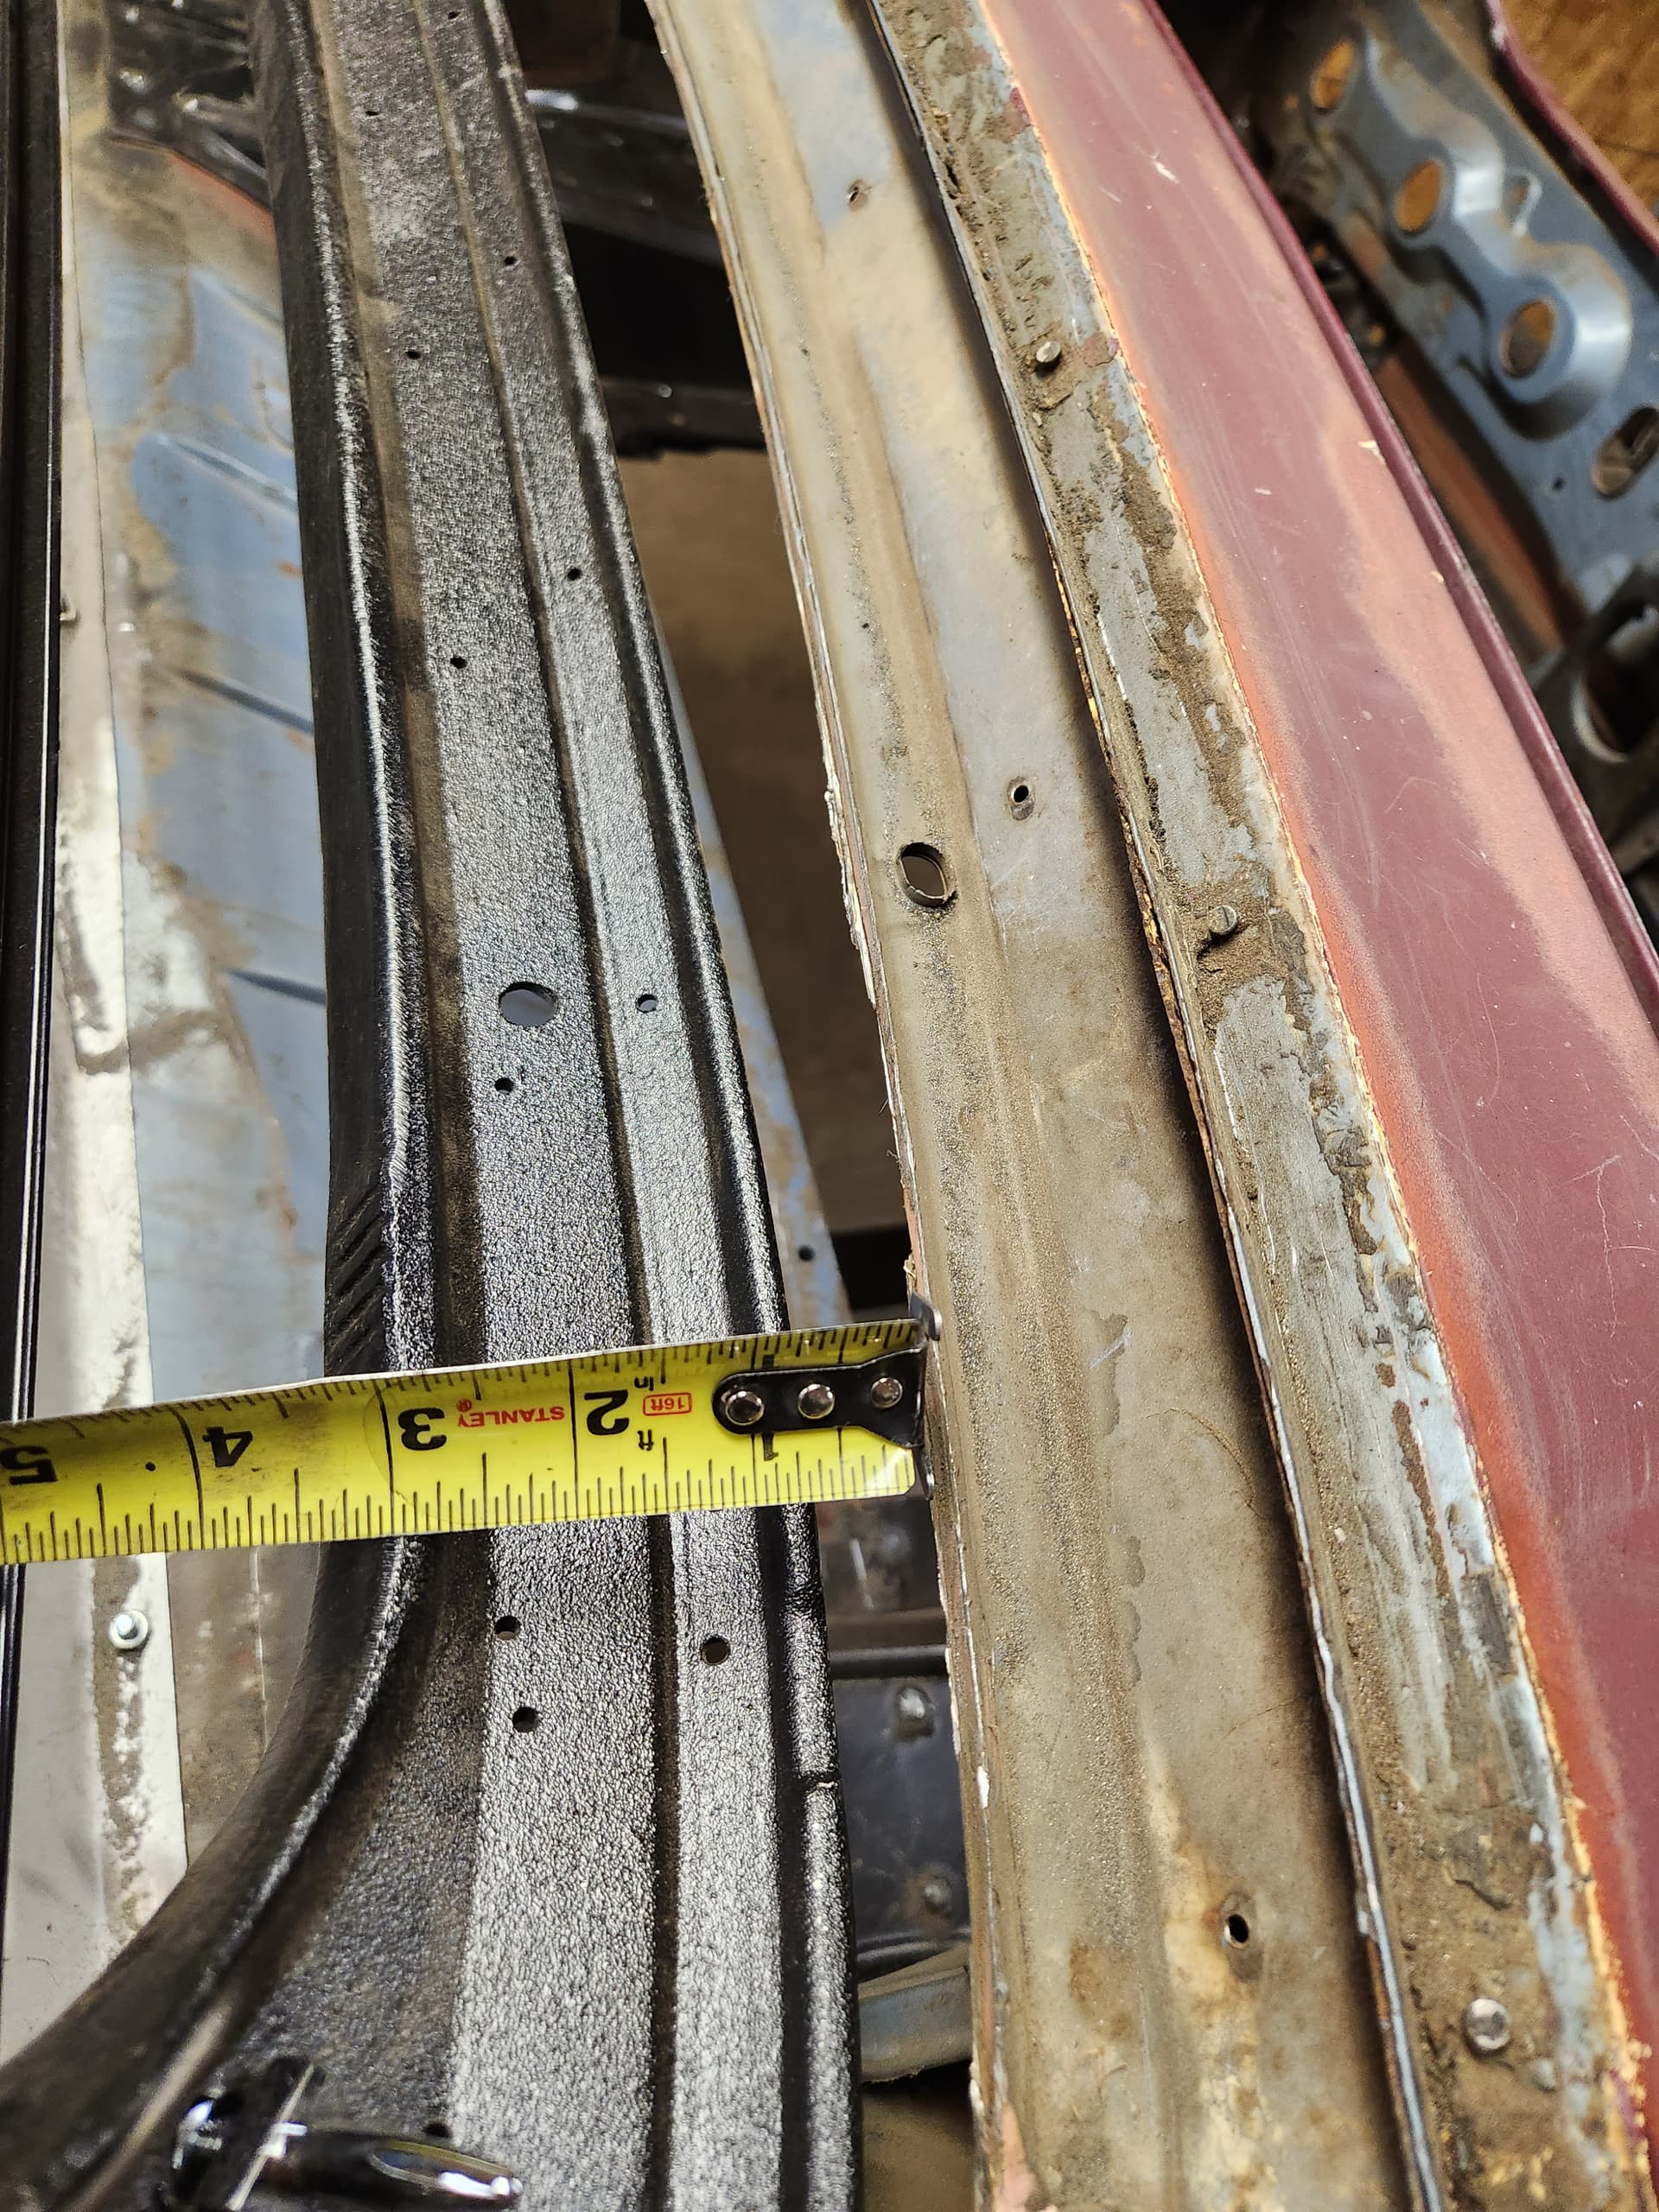
I will be modifying and installing portions of an M228 Scott Drake 67/68 Convertible Deck Filler panel and a Dynacorn 3647FWT. Combined these have the needed gutter section and and the correct flanging for the well trim. Plus for ~$100 with shipping, it is a lot less work then hammering/shrinking/stretching.
Stay tuned.